
DAB Digital Radio LM3886 Amplifier - PIC Software
1 - Intro, 2 - Investigation, 3 - Design, 4 - PSU and Amp, 5 - Control Board, 6 - Software, 7 - Summary
On this page...
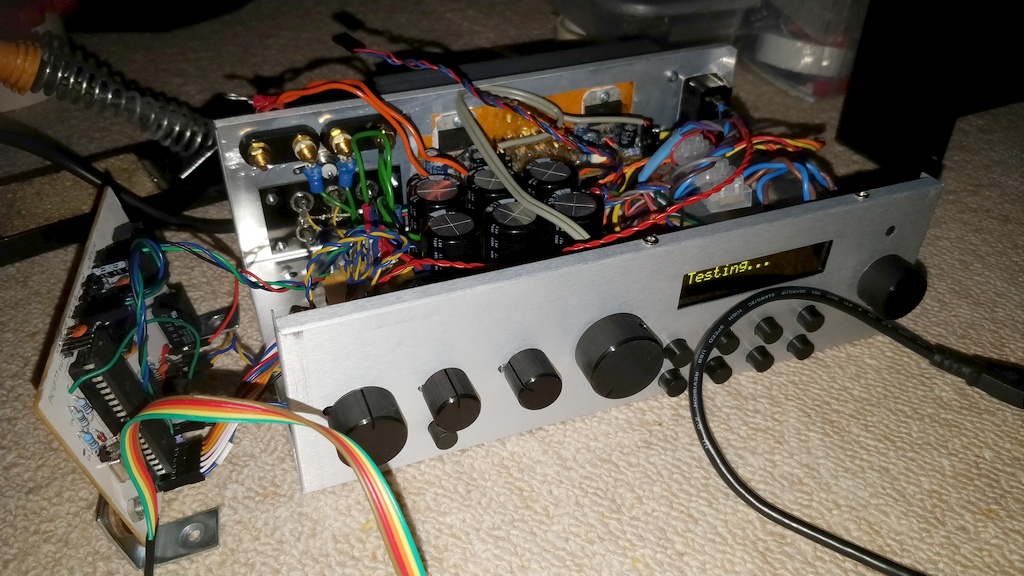
PIC Program
As usual I picked the PIC as I already had one, and I used the Source Boost, Boost C programming language to code it, since I have a license. This code is small enough to use a free license.
My source code is available on github.com.
What the microcontroller does is four things:
- Translate the I²C signal from the DAB module to a parallel signal for the HD44780 compatible OLED display
- If there was no I²C signal, show the active input selected on the display instead
- Provide a power unmute circuit, so that the speakers would unmute about 3 seconds after power on
- Detect any DC present on the amplifier output (indicating a failure) and mute the speakers immediately
Of all these tasks, the first was the most complex and took me quite some time to achieve.
The program overall is small though, and efficiently implemented. It compiles and assembles down to 839 bytes, meaning just 10% of the EEPROM of my PIC16F77 is used (8k bytes total). However because of the fairly long circular buffer, RAM is 145 bytes out of the 368 bytes (40%). It's running at 6MHz, which in PIC world, is one instruction every 667 nanoseconds (the PIC can run up to 20MHz). So despite its age, my PIC is overkill for the task!
Reliability is spot on, it's never crashed in the time I've been using it so far.
Communicating to the LCD/OLED display
Since my display was a HD44780 compatible one, I decided to ease the work required and just use the library that comes with the Boost C IDE itself.
This handles all the timings and signals needed to drive the display correctly, though I did need to inspect the C file itself to understand how to send functions directly.
HD44780 displays are popular, so whatever language or microprocessor you use, it's very likely they'll be a library available.
It was crucial to make sure the LCD display was working and displaying characters correctly before I moved on to translating the I²C commands because the latter would require a working display for me to be able to test and debug it properly.
Therefore I initially programmed in a very basic program using the library to write some test text to both lines of the display to ensure it is working as expected.
I²C receiver and processing
To the DAB module, the PIC would look like the existing LCD - responding on address 3E and receiving the data sent from the DAB module.
As mentioned, I used my logic analyser with Sigrox PulseView to analyse the communication the DAB module was providing to the original LCD display. This was all done on the original board, with two wires connecting to the analyser, and a common ground connection so it has a signal reference.
The examples captured are above, and are extensive enough for me to code for.
The logic analysed gave me the I²C address the LCD was responding too, which was 0x3E. This is what the PIC hardware SSP module would be set to respond to.
Hardware SSP receiver
One of the reasons I picked my PIC16F77 over my PIC16F627 is the hardware SSP. This would reduce the programming effort as the PIC16F627 would need me to do bit-banging to do the communications, and whilst I²C can be done this way, it's not easy as they'll need to be handling of error situations, checking of address and responding with ACK / NACK.
Note on newer PICs, the module is called MSSP.
However, the hardware module is also a bit tricky to use and I needed quite a few experiments and research before I got a satisfactory outcome.
The first challenge is initialising the SSP module correctly, and handling the interrupt requests.
This will vary from PIC to PIC. Mine is really old (2005), and the data sheet on it is not all that clear. Fortunately there are some app notes and sample Assembler and C code for I²C use.
My needs are simplified a bit because the PIC is a receive only slave - it never sends data back to the master (the DAB module), other than the ACK signal.
Initialisation I set the following:
The TRIS register (TRISC).
As the SSP is on port C, bits 4 and 3, both need to be set as inputs. On different PICs, these may be on different I/O registers.
The SSPCON register
Note that this is used for both initialisation, but also the WCOL, SSPOV and CKP bits are used during the program flow to respond to certain conditions.
| Bit | Name | Setting | Reason |
| 7 WCOL | Write Collision Detect | 0 | Set to off, it should be off by default. The PIC sets it if it does occur and the code must clear it |
| 6 SSPOV | Receive Overflow Indicator bit | 0 | Set to off, it should be off by default. The PIC sets it if it does occur and the code must clear it |
| 5 SSPEN | Synchronous Serial Port Enable bit | 1 | Enables the serial port and configures the SDA and SCL pins as serial port pins |
| 4 CKP | SCK release control | 1 | Enable clock. This is so the master can control the clock and send data. |
| 3:0 SSPM3:SSPM0 | Synchronous Serial Port Mode Select bits | 1110 | I²C Slave mode, 7-bit address with START and STOP bit interrupts enabled |
The SSPADD register
This is where the address is set. It's not particularly clear, but the address goes into bits 7 to 1 (since it's a 7 bit address), which means you need to shift all bits to the left in order to set it (so 0x3E would be 0x7C.
The SSPSTAT register
All bits should default to zero.
The INTCON / PIE1 registers
When initialisation is complete, set PEIE (enables all unmasked peripheral interrupts) and GIE (enable global interrupts) in INTCON, and SSPIE (enable I²C interrupt).
/******************************************************
  Function called once only to initialise variables and
  setup the PIC registers
*******************************************************/
void initialise() {
    // IO ports setup
    trisa = 0x07; // RA0, RA1, RA2 are input, rest ouptuts (only RA4 used)
    porta = 0x00; // set to off
    trisb = 0x01; // RB0 (INT) is an input, rest outputs, unsued
    portb = 0x00; // set to off
    trisc = 0xD8; // RC7 (Rx) and RC6 (Tx) are inputs, RC4[SDA] and RC3[SCL] are inputs (for I2C slave), RC0, RC1 and RC2 for LCD ouputs, RC5 unused
    portc = 0x18; // set to off, except RC4, RC3 for I2C
    trisd = 0x00; // All outputs, LCD
    portd = 0x00; // LCD outputs off
    trise = 0x00; // All outputs, unused
    porte = 0x00; // All off

    // ADC setup
    adcon0 = 0x00; // ADC off
    adcon1 = 0x0F; // All digital I/O

    t1con = 0x31;  //  00 11 0000 - 1:8 prescale, oscil off, internal clock, timer disabled
    // Timer 1 setup - interrupt every 0.5 sec
    // Timer1 Registers Prescaler= 1:8 - TMR1 Preset = 18660 - Freq = 4.00 Hz - Period = 0.250005 seconds
    t1con.T1CKPS1 = 1;   // bits 5-4  Prescaler Rate Select bits
    t1con.T1CKPS0 = 1;   // bit 4
    t1con.T1OSCEN = 0;   // bit 3 Timer1 Oscillator Enable Control bit 0 = off (pins used for LCD)
    t1con.NOT_T1SYNC = 1;// bit 2 Timer1 External Clock Input Synchronization Control bit...1 = Do not synchronize external clock input
    t1con.TMR1CS = 0;    // bit 1 Timer1 Clock Source Select bit...0 = Internal clock (FOSC/4)
    t1con.TMR1ON = 0;    // bit 0 enables timer
    tmr1h = TMR1HV;      // preset for timer1 MSB register
    tmr1l = TMR1LV;      // preset for timer1 LSB register
    pie1.TMR1IE = 1;     // Timer 1 interrupt

    // I2C communications setup
    //sspcon = 0x2E; // Receive Overflow Indicator cleared, SSPEN SDA/SCL set as enabled, CKP clock disabled, 1110 = I2C Slave mode - 7-bit address, with start/stop interrupts
    sspcon.WCOL = 0; // No colision
    sspcon.SSPOV = 0; // No overflow
    sspcon.SSPEN = 1; // Enabled SDA/SCL pins
    sspcon.CKP = 1; // SCK release control - enable clock
    // 1110 = I2C Slave mode, 7-bit address with START and STOP bit interrupts enabled
    sspcon.SSPM3 = 1;
    sspcon.SSPM2 = 1;
    sspcon.SSPM1 = 1;
    sspcon.SSPM0 = 0;

    sspadd = I2C_slave_address << 1; // Address requested from the DAB module, should be shifted one bit to the left [ SSPSR<7:1> ]
    sspstat = 0; // Clear by default

    // rs232 communications setup
    // SYNC = 0, BRGH = 1, BRG16 = 0
    // 4MHz Baud rate 9600 = 25 = ((4000000 / 9600) / 16) - 1
    spbrg = 25; // 25 = ((4000000 / 9600) / 16) - 1
    txsta = 0x36; // 00100110 - 8 bit, transmit enable, async mode, high speed, TSR empty, 9bit (0)
    rcsta = 0x90; // 10010000 - serial port enabled, 8 bit reception, async mode continuous recieve, no frame error, no overrun error
    // No receive commands, only sends
    //pie1.RCIE = 1; // Usart interrupt receive (no send interrupt)
    iRS232Index = 0;

    // Slight delay before initialising LCD and interrupts
    delay_ms(100);

    // Setup for RB0 Interrupt [DC fail]
    intcon.INTE = 1; // RB2 Interrupt (for DC Fail)
    option_reg.INTEDG = 0; // RB2 interrupt should occur on falling edge
    intcon.INTF = 0; // Clear RB2 interrupt flag bit
    option_reg.NOT_RBPU = 1; // Port B pull-ups disabled (otherwise DC fail is not detected)

    // Interrupt setup
    intcon.PEIE = 1; // Enables all unmasked peripheral interrupts (required for RS232 and I2C)
    intcon.GIE = 1; // Enable global interrupts
    pie1.SSPIE = 1; // Enable I2C interrupt

    // No task at initialisation
    cTask = 0;
    iSecQ = 0;

    lcd_setup();

    sspcon.CKP = 1; // Pull clock high - we're ready to receive data
}
With the above initialisation, the PIC will generate an interrupt when a START bit occurs, on each byte received, and when a STOP bit occurs.
The interrupt on the STOP bit is important because it signifies the end of the word that was transmitted (and hence may be processed).
For handling the interrupts, bit SSPIF in PIR1 is set and the PIC enters it's special interrupt routine, pausing any main execution.
To handle errors, the first check that is made is against SSPOV bit in SSPCON. If this is true, we have an overflow condition and clear it. The code does a mandatory read of SSPBUF and clears the SSPOV flag. The byte read from the register is ignored.
Otherwise if SSPOV is not set, we can read bytes in from the register. The state of the I²C communication can be read from the SSPSTAT register. There are 4 bits to care about:
- Bit 0 BF: Buffer Full Status bit
- Bit 2 R/W: Read/Write bit Information (I2C mode only)
- Bit 3 S: START bit
- Bit 5 D/A: Data/Address bit (I2C mode only)
There are 5 different states:
| State | BF | R/W | S | D/A | |
| 1) Master Write, Last Byte was an Address | 1 | 0 | 1 | 0 | Received an address |
| 2) Master Write, Last Byte was Data | 1 | 0 | 1 | 1 | Received data |
| 3) Master Read, Last Byte was an Address | 0 | 1 | 1 | 0 | Master requested an address |
| 4) Master Read, Last Byte was Data | 0 | 1 | 1 | 1 | Master requested data |
| 5) Master NACK | 0 | 0 | 1 | 1 | Master didn't acknowledge |
The two states to handle in my case, since the DAB module never 'requests' data to be sent to it would be:
- Master Write, Last Byte was an Address
- Master Write, Last Byte was Data
Under state 1, we don't want to read the address to the buffer, but must still read from SSPBUF in order clear the BF (Buffer Full) bit and be able to receive more data.
Under state 2, a data byte was received. A read from SSPBUF is required, and then that byte must be added to a buffer to allow more bytes to possibly be received.
Finally, using SSPSTAT, we can also check for a STOP condition, by checking the P bit, but also checking that BF is false (so no byte was received), S is false (not a START condition) and D/A is true (state prior would have been data).
| State | P | BF | R/W | S | D/A |
| STOP state | 1 | 0 | 0 | 0 | 1 |
Under the STOP condition, I write the character FF to my buffer to indicate the end of the transmission, and enable a flag for the task manager in the main program to process the buffer.
/******************************************************
  Interrupt handler
*******************************************************/
void interrupt(void) {
    // I2C
    // SSP interrupt byte received
    if (pir1.SSPIF) {

        char i2cData;
        char i2cStatus;
        char i2cState;

        if ( sspcon.SSPOV == 1 ) {
            // Test if we have an overflow condition and clear it
            i2cData = sspbuf; // Do a dummy read of the SSPBUF
            sspcon.SSPOV = 0; // Clear the overflow flag
        } else {
            // Mask the status bits out from the other unimportant register bits
            // SSPSTAT_BIT_MASK  0b00101101
            // bit 0 BF: Buffer Full Status bit
            // bit 2 R/W: Read/Write bit Information (I2C mode only)
            // bit 3 S: START bit
            // bit 5 D/A: Data/Address bit (I2C mode only)
            i2cStatus = ( sspstat & SSPSTAT_BIT_MASK );

            if ( (i2cStatus ^ I2CSTATE_1 ) == 0 ) {
                // State 1 - SSPSTAT bits: S = 1, D_A = 0, R_W = 0, BF = 1
                // State 1: Master Write, Last Byte was an Address
                // Do a dummy read of the SSPBUF
                i2cData = sspbuf;
            } else if ( (i2cStatus ^ I2CSTATE_2 ) == 0 ) {
                // State 2 - SSPSTAT bits: S = 1, D_A = 1, R_W = 0, BF = 1
                // State 2: Master Write, Last Byte was Data
                // Read from SSBUF
                i2cData = sspbuf;
                i2cBufferWrite(i2cData);
            }
        }

        // If stop condition:
        // State Stop - SSPSTAT bits: D_A = 1, P = 1, S = 0, R_W = 0, BF = 0
        if ((( sspstat & SSPSTAT_STOP_BIT_MASK ) ^ I2CSTATE_STOP) == 0 ) {
            // End of command - write FF to indicate it
            i2cBufferWrite(0xFF);
            // Flag the task scheduler that there is data to process
            cTask.TASK_I2C_RECV = 1;
        }

        pir1.SSPIF = 0; // Clear interrupt flag
    }
}
The main method then deals with processing the buffer and sending the data out to my own LCD display.
During my initial tests, the other challenge I had was receiving further commands from the DAB module whilst I was still writing the prior commands to the LCD. This would cause the buffer to fill and corruption would occur.
Originally, I was filling a buffer until the end of the communication, and the testing the length and first character to see what it was. If it was a display command (i.e. 32 characters for one line as each is prefixed with 0xC0), I would then send each to the display.
The problem is, sending to the display was too slow. I would receive the next line or even the next refresh of the display before processing the previous command, meaning I'd lose what was in the buffer.
For reference, the gap between the DAB module sending the 'select line' function and then sending the line data is 60us minimum, sometimes 80us.
After the first line of data is sent, 130us was the gap between sending the 'select line' function to send the second set of data.
Gaps between refreshing the display are much longer. I measured 486ms for normal scrolling text - too slow really, I imagine most of you are used to DAB's feature of slowly scrolling the text so you spend 20 seconds staring at the screen to see what song is playing!
Signal quality monitoring or other info modes refreshed quicker - 180ms.
Anyway, on my problem, the situation improved by bumping the clock speed from 4MHz to 6MHz (I had one spare), but it still wasn't reliable enough.
It's clear that I'm trying to do too much in the code after I receive each data line, so I should instead process earlier, and during the receiving of data.
The solution was to use a circular buffer instead. This brilliant piece of software engineering allows you to have a buffer, and two numbers to indicate the start and end position of the data. The trick here is the end position can be less than the start position.
What the best trick is though is that the start position can be incremented after you process each character, and when it reaches the end position, you've processed everything.
By operating like that, the single buffer can be filled by the interrupt routine which is receiving the I²C characters, and emptied by the main program once it has sent the character onward to the LCD display.
The hackaday link below shows the circular buffer in action and has a good piece of code I ported to Boost C for my project.
/******************************************************
  These variables and functions are for a circular buffer
*******************************************************/
enum BufferStatus {BUFFER_OK, BUFFER_EMPTY, BUFFER_FULL};
struct Buffer {
    unsigned char data[I2C_BUFFER_SIZE];
    unsigned char iHead;
    unsigned char iTail;
};
volatile struct Buffer i2cBuffer = {{0}, 0, 0};

enum BufferStatus i2cBufferWrite(unsigned char byteIn) {
    unsigned char iNextHead = (i2cBuffer.iHead == (I2C_BUFFER_SIZE - 1)) ? 0 : i2cBuffer.iHead + 1;

    if (iNextHead == i2cBuffer.iTail){
        return BUFFER_FULL;
    }
    i2cBuffer.data[i2cBuffer.iHead] = byteIn;
    i2cBuffer.iHead = iNextHead;
    return BUFFER_OK;
}

enum BufferStatus i2cBufferRead(unsigned char *byteOut) {
    if (i2cBuffer.iHead == i2cBuffer.iTail){
        return BUFFER_EMPTY;
    }
    *byteOut = i2cBuffer.data[i2cBuffer.iTail];
    i2cBuffer.iTail = (i2cBuffer.iTail == (I2C_BUFFER_SIZE - 1)) ? 0 : i2cBuffer.iTail + 1;
    return BUFFER_OK;
}
The other alteration I could now make because of this is to start processing data as soon as I receive a STOP condition on the communication, and continue to process it even when the next communication is arriving. As a result, it is now 100% reliable.
To process the data received, I would read out of the circular buffer, and hold states of processing:
0 - means the loop is looking for the start of a command
1 - means it found a function type of command (first byte was 0x00), and must subsequent data as commands
2 - means it found text data (first byte was 0xC0)
3 - means it found data on setting up a custom character (first byte was 0x40)
Once I know I'm processing functions or data, I can set my target LCD to the correct mode and send the subsequent data.
For functions I ignore the command 0x38 (enter mode), since it's not needed. For data I ignore the separator character 0xC0.
/******************************************************
  Called after I2C communcation received to process the
  bytes in the buffer
*******************************************************/
void i2cProcess() {

    unsigned char iReadData;
    unsigned char iProcessing = 0; // 0 for looking, 1 for functions, 2 for text data, 3 for custom data

    /*
    if first command is 00
    - if next is 38
        - function follows (48,50)
    - else function (80, C0)
    if first command is 40 or C0
        - data follows
    */

    // Keep reading until BUFFER_EMPTY
    // i2cBufferRead moving the start position in the buffer for us
    while (i2cBufferRead(&iReadData) == BUFFER_OK) {
        if (iReadData == 0xFF) {
            // Finished command
            iProcessing = 0;
        } else if (iProcessing == 0) {
            // Looking for a command or function
            if (iReadData == 0x00) // found function
                iProcessing = 1;
            else if (iReadData == 0xC0) // found LCD data
                iProcessing = 2;
            else if (iReadData == 0x40) // found custom chars
                iProcessing = 3;
        } else if (iProcessing == 1) {
            // Doing functions
            if (iReadData != 0x38) // Skip 0x38 function, but write anything else
                lcd_function(iReadData);
        } else if (iProcessing > 1) {
            // Doing data
            if (iReadData != 0xC0) { // Skip 0xC0 data, but write anything else
                lcd_datamode();
                lcd_write(iReadData);
            }
        }
    }
}
Although it's an involved piece of logic, the code for processing it comes in at under 200 lines, and works very well now.
Speaker fault detection
I coupled this DAB amp with a pair of 'cheap' speakers in hifi land, but still expensive enough that I would certainly mind losing them to a fault!
Using the same method as my main amplifier inspired by ESP project 111, I built a DC detector into the PIC/DAB module board so I could use the PIC to detect a DC fault, release the speaker relay switches and display a message on the LCD.
The output of the DC detector leads a a comparator, based on the surface mount rail to rail op amp LMV358 (since I had it), and the output of this leads to the external interrupt pin of the PIC, RB0.
The PICs interrupt routine treats the RB0 interrupt as the highest priority and the pin controlling the relay is switched off immediately in the interrupt routine itself.
/******************************************************
  Interrupt handler
*******************************************************/
void interrupt(void) {
    // external interrupt on RB0 - highest priority [DC fail]
    if (intcon.INTF) {
        if (!NODC_FAIL) {
            MUTEOUT = 0; // Mute amps
            // Show fault on display
            // Flag this task to the task array
            cTask.TASK_INT_EXT0 = 1;
        }
        intcon.INTF = 0;

        return; // do not process any other interrupt
    }

    ...

}
The task schedule then lets the main routine write FAULT to the LCD display after, so I know what happened.
            if (cTask.TASK_INT_EXT0) {
                // A DC fault occurred - show on display
                t1con.TMR1ON = 1; // Switch on the timer - will reset fault if it clears within 2 seconds
                lcd_clear();
                lprintf("FAULT");
                cTask.TASK_INT_EXT0 = 0;
I tested it with a 9V battery across the amplifier speaker output (with the amplifier disconnected) and the relay is successfully disabled and fault message shown. Hopefully I never see this message again though in day to day running, but at least my speakers should be saved.
More details on the DC fail detection circuit are available here.
Power on mute
The power on mute is simple enough - it uses the speaker relays installed for DC protection and only activates them just after 2 seconds.
Since the DAB module is sending commands, I didn't want to add a simple delay in the main program, preventing anything else from running (apart from the interrupt routine).
Instead I used the timer 1 circuit.
With a prescaler of 1:8 (lowest resolution available), and preset of 1866 (72 for TMR1HV and 228 for TMR1LV), I get an interrupt every 0.336 seconds. After 8 interrupts, I then unmute. This works out at 2.7 seconds.
It's a weird number because I originally had the timer running off a 4MHz crystal, however just under 3 seconds works out quite nice as it's about the same time it takes for the DAB module to show its welcome message.
The calculator here helps understand and calculate the registers used by PIC timers: http://eng-serve.com/pic/pic_timer.html.
When unmuting, I ensure that there is no DC failure before activating the relay enable pin. After activating the pins, the timer is disabled and not used again unless a DC failure occurs.
/******************************************************
  Interrupt handler
*******************************************************/
void interrupt(void) {

    ...

    // Handle timer1 interrupt
    if (pir1.TMR1IF) {
        tmr1h = TMR1HV;      // preset for timer1 MSB register
        tmr1l = TMR1LV;      // preset for timer1 LSB register

        // Tick the quarter seconds
        iSecQ++;
        // Once it reaches 8 (2 seconds), flag the task
        if (iSecQ >= 8) {
            cTask.TASK_TIMER1 = 1;
            iSecQ = 0;
        }

        pir1.TMR1IF = 0;     // Clear interrupt flag
    }
}
/******************************************************
  Called after timer 1 has counted enough times, used
  to unmute the speakers
*******************************************************/
void onTimer1() {
    if (NODC_FAIL) {
        // If DC fail is OK, unmute
        // Enable the relay output
        MUTEOUT = 1;

        // Turn off the timer
        t1con.TMR1ON = 0;
        showSource();
    }
}
Input selection detection
Since my rotary switch has 4 poles, the spare one was used to switch a 3.3V line to different input pins on the PIC.
This detection is done in the main loop, which constantly puts a mask over port a and compares what it read to what it read previously.
If there is a difference, a debounce delay of 50ms occurs, and the input is read again.
If it is still different, then I really did move the switch and the active input is then displayed.
When I select any other source than the DAB module, the power to the DAB module is cut (by the same rotary switch), so it no longer sends I²C data. The LCD will then just display what I want, and I set my three spare phono inputs to Chromecast (for streaming radio or mp3s from my server), PC Audio, or Auxiliary. When switched back to DAB, the DAB message is displayed, until the module powers on and starts sending I²C data.
        // Check the selected input (unless DC fault is present, or muted)
        if (NODC_FAIL && MUTEOUT) {
            // Get porta status for active input
            iActiveInput = porta & 0b00000111;

            if (iActiveInput != iActiveInputPrev) {
                // debounce
                delay_ms(50);
                iActiveInput = porta & 0b00000111;
            }

            // if still different, show the new input on the LCD
            if (iActiveInput != iActiveInputPrev) {
                iActiveInputPrev = iActiveInput;
                showSource();
            }
        }
/******************************************************
  Called after rotary switch change is detected, used
  to display the approriate selected input
*******************************************************/
void showSource() {
    lcd_clear();
    if (test_bit(porta, 0)) {
        lcd_gotoxy(0, 0);
        lprintf("DAB");
    } else if (test_bit(porta, 1)) {
        lcd_gotoxy(0, 0);
        lprintf("PC Audio");
    } else if (test_bit(porta, 2)) {
        lcd_gotoxy(0, 0);
        lprintf("Chromecast");
    } else {
        lcd_gotoxy(0, 0);
        lprintf("Auxiliary");
    }
}
References and more reading:
Source code on github.com
PIC 16F7X Datasheet
SourceBoost I2C Slave Example
Microchip Forums - Interrupt on I2C stop condition
Microchip Forums - I2C Slave mode - detect STOP bit
electroSome - I²C Communication with PIC Microcontroller – MPLAB XC8
Dring Engineering Services - IC Timer Calculator and Source Code Generator
ESP - Project 111 - PIC Based Speaker Protection
Hackaday - Embed With Elliot: Going ‘Round With Circular Buffers
All About Circuits - How to Interface a 16×2 LCD Module with an MCU
Source Boost