
150W Subwoofer
Contents
Page 1 - Design
Page 2 - P3A Amplifier
Page 3 - Input filter and EQ
Page 4 - Power Supply details
Page 5 - Box Design
Page 6 - Box Construction
Page 7 - PIC Micro Control
Box Construction
The design was pretty large, with a required volume of nearly 39 litres for the speaker box, plus room at the bottom and room at the back for the electronics.
Still, I needed a nice looking box, which would fit in my small space, but also be ready to look good in any location should I move out.
I put pencil to paper with various designs, and the best I came up with has been redrawn below, in paint:
My box design
What makes this design good (IMO) is how I managed to keep the box from looking to square like by having 45° angle top. The sides and bottom are still keep square, and the result ended up in a box which looks a little better for not much more effort.
Mitre (45°) cuts should be pretty easy to do using a jigsaw as long as you follow a perfectly straight surface which is clamped to the wood being cut. I used some spare wooden floor boards which are prefectly straight (otherwise they wouldn't fit together well), clamped to the wood I was cutting. The result was perfect mitre cuts.
To do the normal striaght cuts, I also used the same technique. The only difference was the length between the jigsaw blade and the edge of its plate was now greater (3.3cm as opposed to 2.3cm IIRC).
Using mitred edges is highly recommended, as you will get a perfect square edge if done correctly. My edges were so good I actually managed to slightly cut my hand on one of them! A light bit of sanding ensured that wouldn't happen again!
The case was held together internally using blocks with self tapping wood screws.
It is not recommended to use wood screws on MDF, especially thin MDF like my 12mm stuff, however I did give the screws a test and every time they would rip the wood slightly except for when I used a deep 1.5mm pilot hole. A braddle just does not go deep enough.
This technique worked as the box is able to support my weight when I stood on top of it, the only slight problem is a couple of screws must have been engineered slightly longer then the others as I did get the odd small bot popping out the side when I tightend every screw the same ammount. Shame really, but it isn't too bad. If you have more space then me though everything except cost points towards thicker MDF.
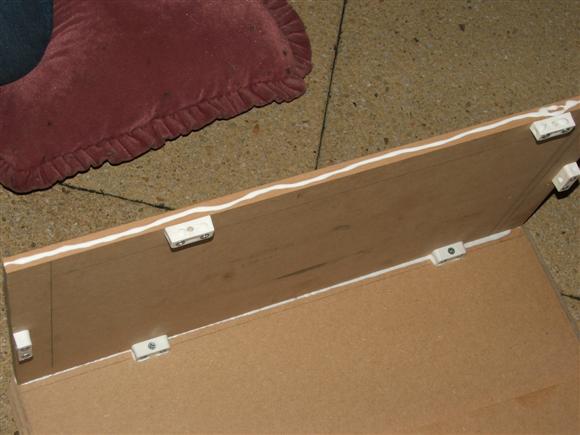
Using blocks and wood glue to construct the box
Once the blocks were seated correctly on one piece, the side can then be glued and screwed together carefully.
Before doing any of that though, make sure you have a good strategy of building the box. I started with the top/bottom, and then added the sides followed by the front and rear. This is the most natural way to complete the task and will avoid sinking wood into spaces which would cause the glue to scrap away from the wood.

Taking futher shape, this is getting ready to place the front on the box
Once complete, leave it to dry overnight!
Ok ok, I didn't quite do that as I decided it wouldn't be too terrible to see how the box would look with the amplifier attached to the rear:
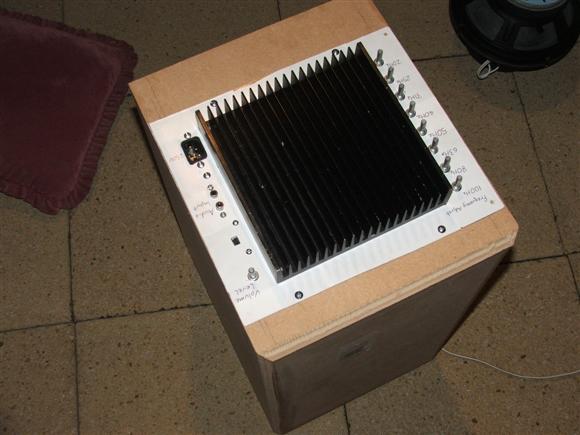
Amplifier attached to the rear
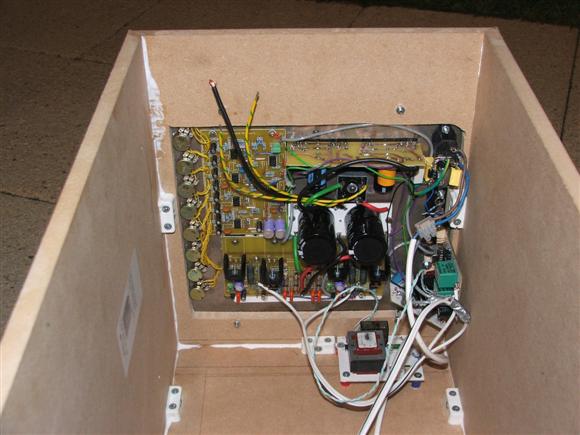
Amplifier attached viewed from inside, notice the Mains power board attached to
the box top using spacers and the same wood screws. This seems to work well.
The next (construction) day was spent working on the inside of the box. I cut an inside piece so that the speaker chamber could be separated from the space the amplifier would sit. The idea basically being that I could determine speaker box volume easier this way.
I also cut a piece of wood to sit inside so that I could screw the bottom to from the outside (as I wouldn't be able to get to internal wood blocks with all the sides on!).
The bottom also needed to be cut and prepared to accept two heavy 10" speakers to it.
These were again glued in place, except for the bottom part with the speakers on it, which would be screwed to the box and sealed using draft excluder. Draft excluder also proved useful to seal the gaps that would occur between the speaker ring and the baffle (bottom).
After a quick fit together, here is how the box looks with the bottom in place, complete with speakers.
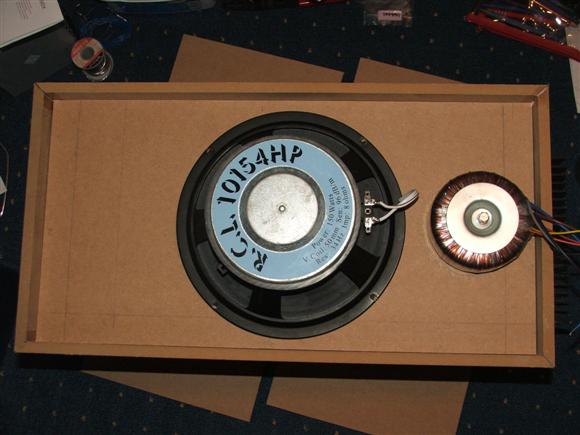
Speakers placed on the bottom, the transfomer is also placed on the bottom, as this would
turn out to be the only room available for it.