150W Subwoofer
Contents
Page 1 - Design
Page 2 - P3A Amplifier
Page 3 - Input filter and EQ
Page 4 - Power Supply details
Page 5 - Box Design
Page 6 - Box Construction
Page 7 - PIC Micro Control
P3A Amplifier, up to 200W!
As said before, the choice of this amplifier is because I happened to buy the PCB from Rod so I could use it to design my own boards for my 5 channel power amplifier.
Having this extra board with two stereo P3A amplifiers on it meant I could use it for my subwoofer project and with the added convenience of having spare sample on-semi transistors for the project, I could simply use a few cheap components and have an amplifier that, when bridged into 8 ohms, is capable of up to 200W.
In reality, this power is unobtainable. This is because of the fact that I was tight on my budget and only purchased a 225VA toriodal transformer. Whilst the regulatation will not be as good, it is suitable because...
- It is a subwoofer amp, regulation is not quite as important in terms of sound quality
- My speaker is rated only to 150W anyway
- 225VA has a smaller core, therefore the inrush current is not so much of a problem and a limiter circuit will not be needed
It is also suitable because it will provide plenty of power for the volume levels I need it at ;)
The P3A amplifier itself is a very well designed Class AB amplifier that has superb frequency response, and particularly great at bass frequencies as my main system seems to show.
With a bit of luck and good design, I have high hopes that my subwoofer system will be both small, powerful and capable of responding to low frequencies very happily :)
Cooling
I know from experience however that the P3A does get quite hot when pushed hard. Since each half of the P3A amp will be driving 4 ohms rather then 8 in my main system, it is easy to see I will need a good bit of cooling.
Good cooling comes mainly from a good heatsink, and if you get one that is big enough... that is all that's required.
I found a suitable heatsink on eBay, and whilst I bid quite high for it, I feel I still got a pretty good bargain.

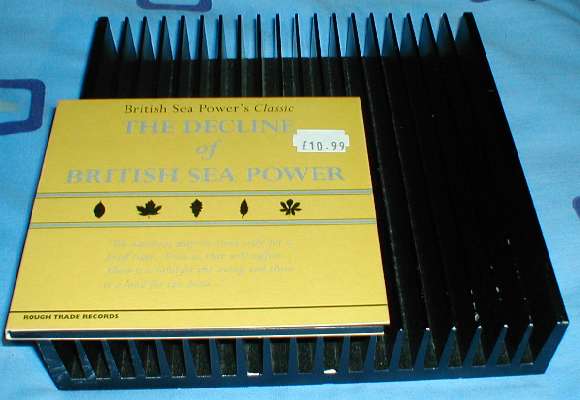
The use of the British Sea Power CD case shows how large this heatsink is. Large enough to provide enough cooling for the P3A transistors and for the voltage regulators (used for power to the input filter and equaliser).
The driver transistors are also cooled using a small TO220 heatsink for each one. Rod recommends that these heatsinks are needed for 4 ohm loads and since the rest of the amp is in an unvented enclosure it seems a very good idea.
Construction
Construction is easy, especially if you use Rod's PCB which is very neat and easy to solder up.
The critical part is how the transistors will be mounted to both the board and the heatsink. Rod gives information of ways to do this in his construction guide (available only if you buy the board).
Of course it is critical that you get every correct value component in the correct place and for devices like electrolytic capacitors and transistors, making sure that they have the correct orientation.
On often confusing point is the different types of output driver transitors (Q5 and Q6) and Q4. With the BD139/BD140 transistors, the metal side should be facing the inputs - the opposite way to how I have my transistors. The MJE15034/MJE15035 transistors (which I use) must have the metal side facing towards the output transistors.
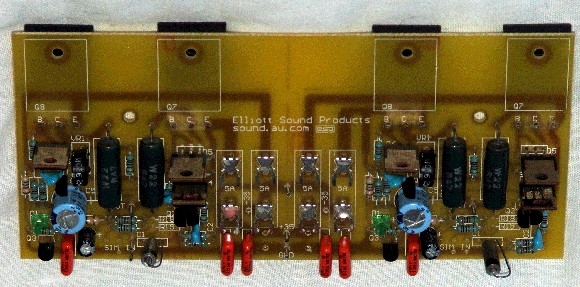
After soldering, my P3A looks like as below:

For an amp of its class, there is not very much to it. The picture shows the amp just with components soldered onto it for stereo operation only. This is because to test whether it works I will need to test each amp on the board separately. Once I am happy that both amps are working fine and the bias is set, then they can be bridged.
As always, I made sure I tested the amp in the way Rod describes in the P3A article. It was necessary too because a solder bridge on my board I missed when checking my joints earlier caused R15 to burn out. Further damage might have been done if I didn't use the 22ohm safety resistors.
My problems were not over either, because on the other amp, once I tested with an audio source and loudspeaker there was a lot of distortion. I could not figure out what the problem was so I set out to replace every transistor I could, except for Q3 and Q9 as I did not have enough spare BC546's.
The problem was solved after that and both amps on the board worked individually.
Bridging
This subwoofer was only ever intended to use one loudspeaker. With two amps, it seems silly to use only one. The P3A however can easily be configured to work in BTL (Bridge Tied Load) mode.
BTL effectively doubles the power. Each amp drives the speaker (which is connected to each amplifier output terminal and not ever touching ground). One amp drives the speaker with the normal signal, and the other drives the speaker with the signal 180 degrees out of phase, doubling the output. Without the signal out of phase, the two signals would cancel each other out, and you would get nothing.
Bridging an amp means each amplifier sees half the load. This means:
- An 8 ohm speaker represents 4 ohms to each amp
- A 16 ohm speaker represents 8 ohms to each amp
- An 4 ohm speaker represents 2 ohms to each amp!
A 4 OHM SPEAKER SHOULD NEVER BE USED ON A BRIDGED P3A AMPLIFIER
and also... when driving an 8 ohm speaker, the power supply cannot give more voltage then
+/-35V

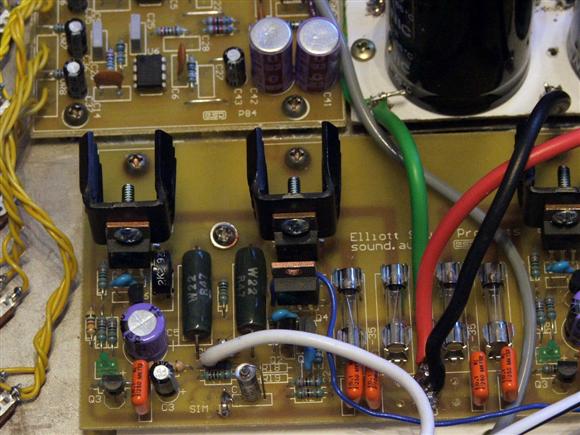
P3A amp connecting in BTL mode, and also showing the heatsinks on driver transistors Q5, Q6
Connectiing the amps in BTL mode was not difficult. As an added construction tip I would recommend you have a wire coming from R17 soldered in before hand, which can easily be soldered to the speaker output pin on the right amplifier.
Even if you intend to use BTL, pins must be inserted in every position as you will find it much easier then working on the back of the board.
