
Blow hole fan mod... and the repaint
Part 4 - 7V fan modding and a quick side mod
I was a little bit unhappy about the noise levels, especially after adding the blow hole fan. Most people have heard about 7 volt fan modding and it is simple to do indeed.
So I thought I would give it a try... and try to do it in a way that was neat and easy(ish) to change. The main method I employed was removing and replacing pins in the molex power connectors that most case fans come with. Modding 3-pin fans to run on 7 volt becomes a little more complex unless you have a 4-pin molex to 3-pin adaptor.
The two fans at the back and the fan on the top of the case were to become my first thing to tackle. I found after failing to use small tweezers, that the effective way of removing the pins from the molex connector involves flattening the lugs using a small slot head screwdriver or the point of a compass.
If you look closely at the pins - you will see that they are only held in by two lugs at opossite sides of the pin. Squeezing both in should allow the pin to slide out. I however found the best method to be forcing each pin at a time in so it laid flat and then carefully removing the pins.
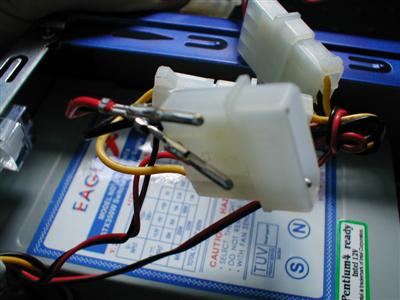
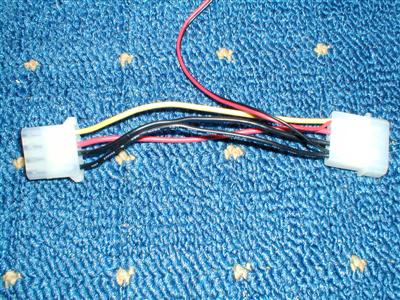
The 5V and ground removed from the molex connector.. which has already been
modded to move the negative to 5V for the fans
To re-insert the pins - make sure the lugs are sticking outwards a bit. I found using the tip of a compass an effective way of achieving this. When re-inserting them into the connector there should be a small clip and tugging them will not make them fall out.
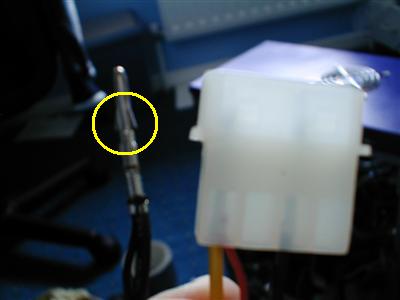
Make sure those lugs stick outward a bit before re-insertion
As can be seen from the photo, the cables have been moved around somewhat to get the 7V required to make those fans spin quiet. The diagram below shows what is required:
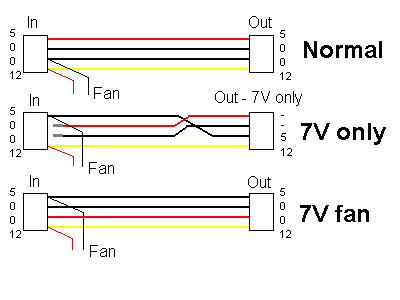
- a normal fan pass through connector at the top
- Then there is a pass through for extra fans to go on the end which will also run at 7V
NOTE: The end of this connector and further fan connectors to it must not go to any other component in the PC! - Finally the bottom diagram is a pass through that makes one fan 7V, but allows you to connect normal components to the end (recommended for one fan, or all of them if you have the patience).
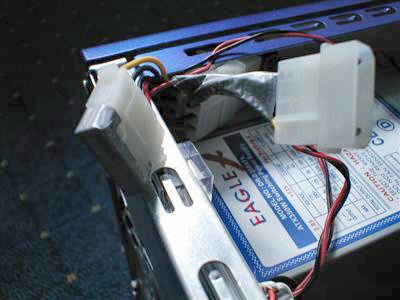
Sealed off end and insulated spare connectors - good pratice
The first mod I done doesn't require the connector ends to be changed, but as I moved onto the second mod - I realised that the other ends are much harder to remove. They are still the same basic lugs that hold the sockets in, but they are much closer to the edge so I found that small slot head screwdriver and forcing the lugs inward until they are flat done the trick.

Getting those wider pins out...
Completed mod on a connector that passes through normal voltage but sends 7V to the
fan.
Furthermore my next task was to solder this connector (which was chopped from a dead fan) to my spare 80mm fans that are to go in the front of my PC. Soldering these is simple, just make sure red goes to red and black goes to black (or sometimes blue).
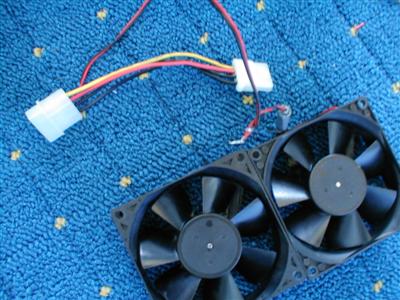
Completed solder job
I moved the colour fans that were in the front out because they were never seen so I thought using the spare standard black ones in a hidden place would be better.

Fans mounted in place - at the front of the case blowing inwards
And thats all there is to it. 7V modding is pretty simple - but make sure you know what you are doing - and note that I am not responsible for any blown up PC's - use a multimeter if in doubt.
While I was there, I cleaned all the dust off my fans too - there was quite a bit to swift but it is worth it - if only for airflow. Use a polish and a duster so the dust does not go everwhere
Modding my window holders
This was quite a simple task, however very effective. I wasn't too happy about how standard screws look in the side of my case - especially against that new shiny paintwork.
So what I did is use the spare metal holders in my spare 5 1/4 inch drive bay covers to put in the side of the case. Having the 5mm holes there already from the previous window meant that all it would need is a simple bit of filing.
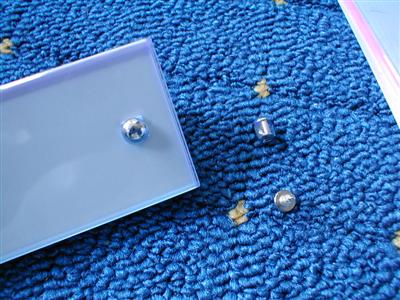
The clever little things that come out of the drive bay covers from the Verre v770 cases.
How they work is simple - the bit on the front is just a shiny head with a square butt (that sounds rude I know - but you get me). Then you screw them in from behind (stop laughing) which holds the plastic front, aluminium back to the drive bay cover.
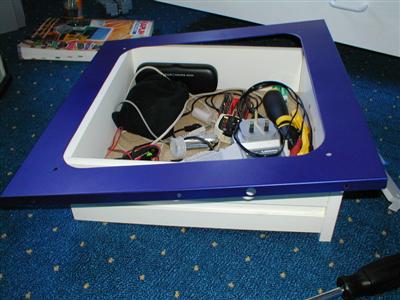
I found a small drawer from my bedside cabinet a damn good rest for the side to sit on

Filing was quite easy - just get the general square shape and keep testing the bit to see if
it fits.
Once done - the look is so much more stunning - especially against that blue. I had to be VERY careful all the time whilst filing though as any slip would ruin that paint job on the side as those needle files are sharp enough to draw blood easily if you slip up.
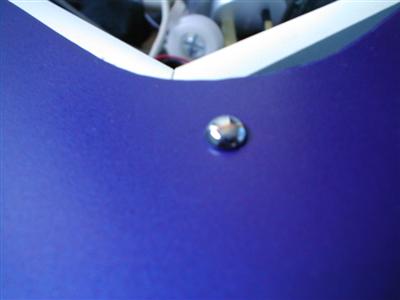
Looking good for something simple and free.
After this simple mod - there was a fair amount of metal dust around from the filing. So with fan dust too - you can tell I hoovered the carpet that day!