
Home-made PC Router and NAS Server [Page 4] - NAS
NAS build
The second objective of the build is a host for my files. As mentioned, this is not an enterprise grade NAS, but it has some useful features and is great for the home user.
UPDATE September 2019: I originally ran two 2TB hard drives in soft RAID 1 configuration, using BTRFS. I recently suffered a failure of one drive, and ended up losing a portion of data permanently. Lucky some of the data I had a further backup of, but some I did not, despite no faults on the second disk! Because of this, I no longer recommend btfs as a file-system (at least not RAID1 and/or the version in Ubuntu 18.04) because it was not properly replicating the data on both hard drives. I also do not recommend these Seagate BarraCuda 2.5" drives in NAS duties, despite the fact they would have been sleeping most of the time. Fortunately the btrfs restore command could get about 80% of the data, so it wasn't a complete tragedy, but I expected better.
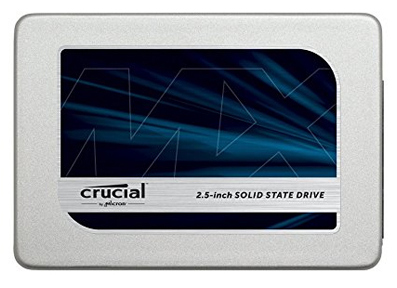
My setup now uses three drives - fed up of spinning disks, I brought two 1TB Crucial MX500 SSDs for my data store, and the remaining Seagate 2TB disk (in 2.5 inch size) is a backup only drive. The Crucial MX500 SSDs have a 5 year warranty, and I intend to use them last that long making their cost more palatable!
My intention is to ensure that the storage is resilient and recoverable in two potential events:
- If one of these drives fails, I can get everything from a spare one
- If I do something silly like overwrite or delete files, to be able to restore them from the previous day or further back
When I initially did this setup, I did just create one XFS partition on each drive and used regular RSYNC commands to copy the changes over to the backup drive. This is ideal and simple. I'm now back to this setup and recommend it for home use.
The reason why I went back to this vs the RAID1 setup, is because I do not need 24x7 operation. If a disk fails, I'd rather know about it straight away and act accordingly. With RAID1, the volume still works in a degraded from when one disk was lost, and for some time my samba file share was completely oblivious to the disk failure for reading purposes.
Nowadays BTRFS and ZFS file systems work well and stable on Linux. Both of these are advanced and support snapshots and RAID. ZFS is more
enterprise grade (having come from Sun, now Oracle), but there is now an open version of that which is encouraging. BTRFS seems to have community information
and served me well, until something went wrong.
Assuming you have two new disks for the NAS, you will be either:
- Creating a fresh file system on two new disks, and copying any file onto it via the network, after creating the file systems
- Re-using the disks but changing from one file system to BTRFS and retaining the data
- Upgrading the disks but because you have only one spare SATA port, adding the second disk later
- Upgrading the disks and you have enough SATA ports to add both disks in
Option 1 is easiest, but the copy will be time consuming and could be unreliable with huge volumes.
Option 2 was my first scenario when I upgraded from XFS to BTRFS on my 1TB disks. Option 3 is my latest upgrade path since I'm moving to 2TB disks.
Creating the partition (fdisk)
In all cases, we will need to create a partition on at least one disk first.
The utility fdisk will list your drives:
sudo fdisk -l
You may see some /dev/loop disks - these can be ignored. Your hard drives and SSDs will be named /dev/sd_
Partitions will appear as numbers after /dev/sd_. E.g. my first disk (120G SSD) is connected to port 0 and is named /dev/sda. It has 5 partitions on it e.g. /dev/sda1 for the first partition.
Disk /dev/sda: 111.8 GiB, 120034123776 bytes, 234441648 sectors
Units: sectors of 1 * 512 = 512 bytes
Sector size (logical/physical): 512 bytes / 512 bytes
I/O size (minimum/optimal): 512 bytes / 512 bytes
Disklabel type: gpt
Disk identifier: A9F1CA66-D5A4-4E62-95B8-284D623B1C6D

Device        Start       End   Sectors Size Type
/dev/sda1      2048      4095      2048   1M BIOS boot
/dev/sda2      4096   4198399   4194304   2G Linux filesystem
/dev/sda3   4198400  20975615  16777216   8G Linux swap
/dev/sda4  20975616  41947135  20971520  10G Linux filesystem
/dev/sda5  41947136 209719295 167772160  80G Linux filesystem


Disk /dev/sdb: 1.8 TiB, 2000398934016 bytes, 3907029168 sectors
Units: sectors of 1 * 512 = 512 bytes
Sector size (logical/physical): 512 bytes / 4096 bytes
I/O size (minimum/optimal): 4096 bytes / 4096 bytes


Disk /dev/sdc: 931.5 GiB, 1000204886016 bytes, 1953525168 sectors
Units: sectors of 1 * 512 = 512 bytes
Sector size (logical/physical): 512 bytes / 4096 bytes
I/O size (minimum/optimal): 4096 bytes / 4096 bytes
Disklabel type: dos
Disk identifier: 0x000a16eb

Device     Boot Start        End    Sectors   Size Id Type
/dev/sdc1        2048 1953523711 1953521664 931.5G 83 Linux


Disk /dev/sdd: 931.5 GiB, 1000204886016 bytes, 1953525168 sectors
Units: sectors of 1 * 512 = 512 bytes
Sector size (logical/physical): 512 bytes / 4096 bytes
I/O size (minimum/optimal): 4096 bytes / 4096 bytes
Disklabel type: dos
Disk identifier: 0x0005eb02

Device     Boot Start        End    Sectors   Size Id Type
/dev/sdd1        2048 1953523711 1953521664 931.5G 83 Linux
My new 2TB drive is named /dev/sdb since it is on the second SATA port on the motherboard. My old 1TB drives are /dev/sdc and /dev/sdd.
Before we can create a file system on the disk, we should partition it first. To do this, run:
sudo fdisk -c /dev/sdb
If you are in scenario 2 (reusing two existing disks), you will want to delete one disk and re-partition it for use with BTRFS. Press 'p' to print the current partitions, and if any are listed, press 'd' to delete them. When complete, press 'w' to write the changes.
It's more modern to use the GPT partition scheme now for disks, rather than the legacy MSDOS scheme. To do this, press 'g'.
To create a new partition, press 'n'. Accept the following three defaults for partition number (1), first sector (2048), last sector - either accept the default which is whatever the last sector on your disk is, or enter +800G if you wanted the partition size to be 800GB.
Press 'p' to verify the partition information is correct, then 'w' to write changes. To quit, q.
Press 'p' again and note the new partition 'Device' name, e.g. /dev/sdb1. You'll need it next and later. To quit, q.
Now refresh the system partition information, this command does this well:
sudo partprobe -s
For my upgrade to SSD, the partition created would hold LVM, but to keep the SSD performance good, I also built in an amount of over provisioning of 10 to 15%. This leaves free space at the end of the partition, which I cannot use for data, but ensures the SSD performance remains healthy.
Creating the file system
We can now move on to creating our file system.
For my third build, I've gone to EXT4. EXT4 is the most popular file system on Linux.
For additional flexibility though, and because I wanted to keep the ability to make snapshots of my data, I have additionally used Logical Volume Manager (LVM) to manage the data.
We will start by creating the partition on only one disk, as my scenarios 2 and 3 above. For scenario 4, I also recommend this method of bulk copying data to one disk first, and then removing the first and copying to the second disk later.
In my 'recovery' situation, I was forced to use "btfs restore" to copy from my single remaining working 2TB disk, since the filesystem damage was beyond the point where it could mount. One nice thing about the restore is it has a regex to select which folder to restore and since my data is easily carved up between personal data (pictures, music, video) all in one folder, and work (programs, documents, VMs) in another, I could restore one folder to one of my new 1TB SSDs, and the other to the second.
My first 1TB ssd storage will be created on disk /dev/sdb and that will be mounted for the btfs restore to run. Normally though, you'll just copy files from the old disk on /dev/sdc to the new one (scenario 3).
Logical Volume Manager
Before we can create the partitions, LVM needs to be setup first.
My new setup will consist of three disks, each using LVM:
- Disk 1 (/dev/sdc on my system) is a 1TB ssd - for holding personal data
- Disk 2 (/dev/sdd on my system) is a 1TB ssd - for holding work data and Virtual Machines
- Disk 3 (/dev/sdb on my system) is a 2TB hdd - for a copy of the data on both disks above
Each disk will need a physical volume. This is done by this command, which creates a physical volume on a given partition:
sudo pvcreate /dev/sdb1
Repeat for any other disks that you are intending to use too.
Now, you can create a Volume Group. The volume group is a group of Logical Volumes. If you have a setup like mine, you could create the same volume group covering disks 1 and 2 together, so it would all appear as one 2TB volume.
I don't like this though, as you lose control over what disk the data would be written to and a single SSD failure, could result in all the data gone. I much prefer the control of saying this data is going on this disk, this data on the other.
The logical volume group will however contain snapshots of the data. So I'll be creating three volume groups - one for the first 1TB ssd, another for the second 1TB ssd, and a third for the 2TB backup disk.
sudo vgcreate vg_ssd_1 /dev/sdc1
sudo vgcreate vg_ssd_2 /dev/sdd1
sudo vgcreate vg_hdd_2tb /dev/sdb1
Finally - the logical volumes. To have room for the snapshots, I made the Logical volumes 760GB on each SSD. The HDD will not have snapshots, so I just made it 100%. That extra room may be used for backups of an additional drive running on the server, such as the OS drive.
sudo lvcreate -L 760G -n lvol0 vg_ssd_1
sudo lvcreate -L 760G -n lvol0 vg_ssd_2
sudo lvcreate -l 100%VG -n lvol0 vg_hdd_2tb
Verify the volumes by typing 'lvs'
  LV    VG         Attr       LSize   Pool Origin Data%  Meta%  Move Log Cpy%Sync Convert
  lvol0 vg_hdd_2tb -wi-a-----  <1.62t
  lvol0 vg_ssd_1   -wi-ao---- 760.00g
  lvol0 vg_ssd_2   -wi-ao---- 760.00g
EXT4 File System
Really nothing special here - just create an EXT4 filesystem on the logical volume, like below. -L is a label for it.
sudo mkfs.ext4 -L SSD_1TB_1 /dev/mapper/vg_ssd_1-lvol0
sudo mkfs.ext4 -L SSD_1TB_2 /dev/mapper/vg_ssd_2-lvol0
sudo mkfs.ext4 -L HDD_2TB_1 /dev/mapper/vg_hdd_2tb-lvol0
And it's done. Let's mount it, so it's accessible as a folder. I'll mount it in new folder /mnt/master but you can adjust as you need:
EXT4 doesn't have built in compression (a shame), but since the savings are not that great with pictures, videos and music, it's not a great feature loss.
I've specified noatime as an option - this specifies not to write access times for files and directories (created/modified dates are still written). Ideal for SSDs too to save on erase/write operations.
sudo mkdir /mnt/master
sudo mount -o noatime /dev/mapper/vg_ssd_1-lvol0 /mnt/master
A quick command 'df -h' and we can see /dev/mapper/vg_ssd_1-lvol0 is mounted in /mnt/master.
And it's ready. Now to copy all my files.
In my earlier scenario 2, I mounted the remaining XFS partition so I could copy from it:
sudo mkdir /mnt/prior
sudo mount /dev/sdc1 /mnt/prior
In scenario 3 that I'm in now, my old 1TB BTRFS disks were already mounted in /mnt/main
In my 'scenario 4', I had to use btrfs restore to copy what it could to the new disk - but we'll ignore those details, as it's a special case!
Before copying, I want my own user to own the directory (not root) so adjusted the ownership permission:
sudo chown -R dan /mnt/master
Then this is the copy command:
nohup cp -ax /mnt/main/home/* /mnt/master/home &
Run that and it will take a while to copy almost a terabyte. I've prefixed the cp command with 'nohup ' and added ampersand '&' at the end to ensure the copy runs in the background, not via SSH, in case it times out. Then, let it run for hours, and continue tomorrow! Check nohup.out for any errors or messages (they'll be no output at all if successful).
To check it is working, use tail nohup.out. This should show no errors if it is working.
You can also install iotop to check disk usage. It's not installed by default, so run 'sudo apt install iotop' and once installed, use 'sudo iotop' to see the usage (sudo is needed because it needs to run as root).
Once complete, check space usage old vs new, there may be some change expected due to the different file systems, or compression being taking effect.
Then do some spot checks just to make sure.
df -h
du -sh /mnt/master/home
The df command will show the total usage of the disk (so the compressed size). The du command will sum all the files and give the uncompressed size (this will take a while).
Update: For my 1TB ssds, restoring from the single working 2TB disk, I didn't use the copy above because the original filesystem was damaged, therefore btrfs restore was used instead to copy what it could to the SSDs.
Once I'd recovered all the data I could, I then re-partitioned (erased) the 2TB hard drive that had BTFS with a 2TB EXT4 partition. Then the data was then copied in the same way from each ssd to the 2TB hdd.
As I now have three disks (two 1TB ssds for primary storage, and the remaining 2TB disk for backup) - to make the filesystem the same, I mounted the second SSD in a sub folder of the first. This way, when I backup and share the data, I only need to do consider one parent folder.
Mounting at boot
By default, the disks are not available at boot, but adding the mounts into /etc/fstab allows this
sudo nano /etc/fstab
Here is my example, yours will vary. The line at the bottom is the added mount. I mount my two 1TB ssds, but not the 2TB backup disk. This is mounted by a daily script only if needed (data changes).
# /etc/fstab: static file system information.
#
# Use 'blkid' to print the universally unique identifier for a
# device; this may be used with UUID= as a more robust way to name devices
# that works even if disks are added and removed. See fstab(5).
#
# <file system>                           <mount point>   <type>  <options>                      <dump> <pass>
UUID=7e586b39-aa00-11e8-94e6-e46f13a8c8a0 none            swap    sw                             0      0
UUID=7fb20af2-aa00-11e8-94e6-e46f13a8c8a0 /               ext4    defaults,noatime               0      0
UUID=7e586b38-aa00-11e8-94e6-e46f13a8c8a0 /boot           ext4    defaults,noatime               0      0
UUID=828c03b8-aa00-11e8-94e6-e46f13a8c8a0 /mnt/ssd        ext4    defaults,noatime               0      0

# Main disks:
/dev/mapper/vg_ssd_1-lvol0                /mnt/master     ext4    defaults,noatime               0      0
/dev/mapper/vg_ssd_2-lvol0                /mnt/master/home/daniel ext4 defaults,noatime          0      0
Reboot the system and see if it works (or try "sudo mount -a"):
df -h
Filesystem      Size  Used Avail Use% Mounted on
udev                        3.9G     0  3.9G   0% /dev
tmpfs                       791M  8.3M  783M   2% /run
/dev/sda4                   9.8G  5.0G  4.3G  54% /
tmpfs                       3.9G  8.0K  3.9G   1% /dev/shm
tmpfs                       5.0M     0  5.0M   0% /run/lock
tmpfs                       3.9G     0  3.9G   0% /sys/fs/cgroup
/dev/loop0                  8.5M  8.5M     0 100% /snap/canonical-livepatch/81
/dev/loop1                   89M   89M     0 100% /snap/core/7270
/dev/loop2                   89M   89M     0 100% /snap/core/7396
/dev/loop3                  8.5M  8.5M     0 100% /snap/canonical-livepatch/77
/dev/sda5                    79G   48G   27G  65% /mnt/ssd
/dev/sda2                   2.0G  147M  1.7G   8% /boot
tmpfs                       791M     0  791M   0% /run/user/1000
/dev/mapper/vg_ssd_1-lvol0  748G  586G  124G  83% /mnt/master
/dev/mapper/vg_ssd_2-lvol0  748G  514G  196G  73% /mnt/master/home/daniel
Network Disk Share
Samba is what is used to make the hard drive appear on the network. It's basically compatible with Windows file shares without requiring extra software.
To install it:
sudo apt install samba nfs-kernel-server
sudo nano /etc/samba/smb.conf
Change some things from the default. Firstly, add some settings below [global]
security = user
name resolve order = hosts wins bcast
wins support = yes
force user = dan
server min protocol = SMB3
client min protocol = SMB3
client max protocol = SMB3
These settings setup user security, make Samba a WINS (Windows Internet Naming Service) server too, and prioritises WINS over bcast for name resolution (this improves the speed of the share). As SMB1 and SMB2 are old (SMB1 now removed from Windows 10), Samba has also be configured to use SMB3 as the minimum protocol.
One thing we'll also want to do is make sure samba only listens on the LAN network, and only allows connections from localhost (127.0.0.1) and LAN IP ranges (10.0.0.0/8):
hosts allow = 127.0.0.1 10.0.0.0/8

interfaces = enp2s0

bind interfaces only = yes
The IP 10.0.0.0/8 is specified instead of 10.0.1.0 because our VPN network (created later on 10.8.0.0) will also be allowed to connect.
Add the shares that you need:
[share]
comment = This share requires a password
path = /mnt/master/home
browsable = yes
guest ok = no
writable = yes
read only = no
create mask = 0755
user = dan

[ssd]
comment = This share requires a password
path = /mnt/ssd
browsable = yes
guest ok = no
writable = yes
read only = no
create mask = 0755
user = dan
Finally, run:
sudo smbpasswd -a dan
Enter the password the same as the Linux O/S one. Without doing this, I got access denied errors when trying to connect.
I've given two examples - one share is for my NAS drive subvolume (mounted in /mnt/master/home), the other is for a portion of my SSD. Both shares can only be accessed by the 'dan' user.
To add another user, do:
sudo useradd user2

sudo passwd user2

sudo smbpasswd -a user2
Once done, run:
sudo service smbd restart
Now you should be able to go to a Windows PC and browse to the IP address of your server we configured earlier, e.g. \\10.0.1.2
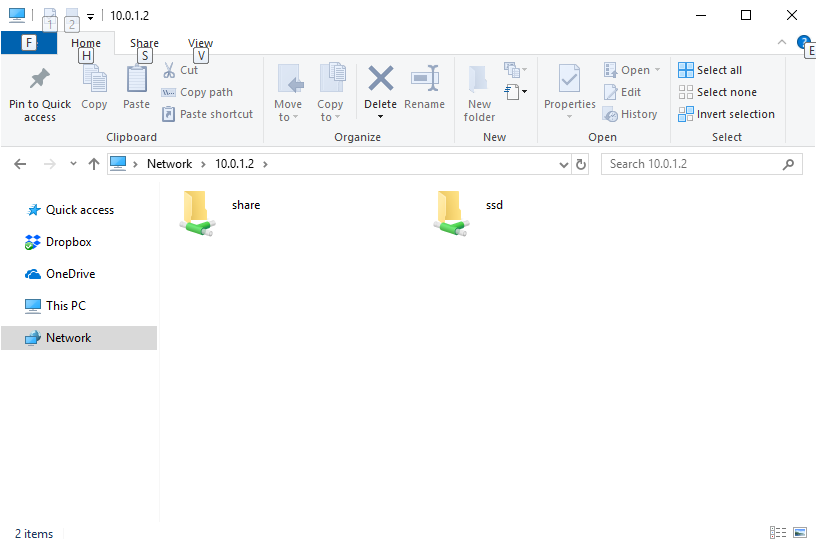
Once you go into a share, you should be prompted for a username and password. You could, if you wish, create a Linux user with the same login name and password as your Windows one and it should automatically pass through.
Performance:
Samba performance is not that great by default. NFS may be a better way to go, but my experiments proved less quick and it was more complex to setup (and can only be accessed by 'Professional' editions of Windows). Adding the following to /etc/samba/smb.conf helped performance quite a lot:
# Performance options:
server signing = disabled
read size = 65536
read prediction = true
write raw = yes
read raw = no
After applying, restart using:
sudo service smbd restart
Backup disk
As mentioned before, the single 2TB hard disk from the original cluster I could still re-use as a backup disk.
Since it has more than enough room for both (over provisioned) SSDs, all data will be replicated to this disk nightly.
That way, if either (or even both) SSDs fail, I still have all my data from the beginning of the day.
Whilst it's not an immediate replication of data as a RAID1 setup would do, chances are if I copied something on the day itself, I'll still have the original source. More likely is the chances I'll go to copy something, and immediately find out I can't because the disk failed - so I wouldn't copy it in the first place!
To replicate all the data to the hard disk, I'll do it once a day using an rsync command.
The backup disk doesn't need to be mounted during the day - it's only there for backup, so my nightly script will mount the disk when needed, run the backup, then unmount.
This allows the hard disk to be powered down into standby mode for the rest of the day because nothing can access it being unmounted. This saves both power, and disk life-span.
To push this saving even further, my script monitors the disk statistics for both my SSD drives, so if nothing has been written on that day, the backup will not run since it is already up-to-date. This saves the disk further, meaning multiple days can pass without it spinning up if I'm not changing data. Yes, I want to save that remaining Seagate disk as much as possible!
Below is the script I use, which has been made into a nightly cron (scheduled) job.
#!/bin/bash

echo `date`

export MYHOME=/home/dan/backupscript

# Writes completed
grep sdc1 /proc/diskstats | awk '{print $8}' > $MYHOME/sdc1_newwrites.txt
grep sdd1 /proc/diskstats | awk '{print $8}' > $MYHOME/sdd1_newwrites.txt

# Compare
cmp "$MYHOME/sdc1_newwrites.txt" "$MYHOME/sdc1_oldwrites.txt"
c1=$?
cmp "$MYHOME/sdd1_newwrites.txt" "$MYHOME/sdd1_oldwrites.txt"
c2=$?

if [ "$c1" -ne 0 ] || [ "$c2" -ne 0 ]; then
    echo 'Detected change, running backup'

    mount /dev/vg_hdd_2tb/lvol0 /mnt/backup
    rsync -airW --delete /mnt/master/* /mnt/backup
    umount /mnt/backup
else
    echo 'No changes detected, skipping backup'
fi

cp $MYHOME/sdc1_newwrites.txt $MYHOME/sdc1_oldwrites.txt
cp $MYHOME/sdd1_newwrites.txt $MYHOME/sdd1_oldwrites.txt
What this is doing is:
- Gets the 'writes' value from /proc/diskstats (8th column) and outputs that to sdc1_newwrites.txt / sdd1_newwrites.txt
- Compares each of these to the previous value (from the previous day)
- If either are different:
- Mounts the hard disk to /mnt/backup
- Runs a backup using rsync
- Un-mounts the hard disk again
- Finally the newwrites / oldwrites files are rotated
Make it executable.
sudo chmod +x ~/backupscript/runbackup.sh
Now it can be added to crontab for scheduling.
sudo crontab -e
Add the following line as an example to call the script daily at 2AM:
0 2 * * * /home/dan/backupscript/runbackup.sh >> /home/dan/backupscript/runbackup.log 2>&1
I created a folder in my home directory named backupscript for the script itself, the newwrites/oldwrites files and an output log. This lives in my server's OS SSD (/dev/sda) so it's not writing to the storage SSDs.
The crontab command above appends output and errors to runbackup.log so I can monitor this and see what it is doing daily.
Logical Volume Management - Snapshots
For my third setup, in order to gain back some features lost by reverting to EXT4 from BTRFS, I setup my new disks using LVM.
LVM allows us to do snapshots - it's the same copy-on-write technology, but this time with the file system of my choice.
LVM needs to be setup before you partition the disks. You can't add it after. The setup is mentioned above.
To create a snapshot - it's actually quite easy. This is the command to create the snapshot, and then I'll leave it there as I only need to mount it and use it if I ever need to go 'back' and get old files.
sudo lvcreate -L 2GB -s -n vg_ssd_1_snap_20190908 /dev/mapper/vg_ssd_1-lvol0
I've created a snapshot size of 2GB. It only starts filling the snapshot when you actually change files on the real logical volume. Most of the time, the changes I make will be small, so 2GB is enough. I have 70GB spare space for snapshots, so it would allow many.
To remove a snapshot:
sudo lvremove /dev/mapper/vg_ssd_1-vg_ssd_1_snap_20190908
I can then schedule these two commands to create rolling 7 day snapshots of my file system.
But what if one day out with the camera and I suddenly dump 10GB to photos to my file system, or start and alter a VM on my work disk? 2GB won't be enough then.
LVM can auto-extend snapshots.
nohup nano /etc/lvm/lvm.conf
Set snapshot_autoextend_threshold so something less than 100, and if you want, also adjust the setting for snapshot_autoextend_percent. 75 and 20 are appropriate for me - so once I make 1.5GB of changes, the snapshot will grow from 2GB to 2.4GB
        # Configuration option activation/snapshot_autoextend_threshold.
        # Auto-extend a snapshot when its usage exceeds this percent.
        # Setting this to 100 disables automatic extension.
        # The minimum value is 50 (a smaller value is treated as 50.)
        # Also see snapshot_autoextend_percent.
        # Automatic extension requires dmeventd to be monitoring the LV.
        #
        # Example
        # Using 70% autoextend threshold and 20% autoextend size, when a 1G
        # snapshot exceeds 700M, it is extended to 1.2G, and when it exceeds
        # 840M, it is extended to 1.44G:
        # snapshot_autoextend_threshold = 70
        #
        snapshot_autoextend_threshold = 75
To mount these snapshots in case you want to go back and get files you changed/deleted from them - mount them like normal:
sudo mkdir -p /mnt/snapshots/20190908
mount /dev/mapper/vg_ssd_1-vg_ssd_1_snap_20190908 /mnt/snapshots/20190908
And to unmount after (required if you want to delete the snapshot):
sudo unmount /mnt/snapshots/20190908
If you delete many files, and just want to restore the entire snapshot, you unmount both logical volumes (the snapshot and master)
sudo lvconvert --merge /dev/mapper/vg_ssd_1-vg_ssd_1_snap_20190908
You may want to then delete the snapshot to save space (lvremove above)
To benefit from snapshots without you having to take them manually, we can schedule them using the same crontab script above.
Here is a modification of the backup script above that monitors the before/after writes to either SSD, and creates snapshots if they are required.
Therefore it will not create a snapshot if there were no writes on that day, and any existing ones will remain. If there are changes, the rsync backup to the hard disk will run like before, and then snapshots will be created for each ssd, only if data on them changed.
A cleanup of old snapshots (so I have a maximum of 7) is also performed. This assumes the snapshot names follow the same pattern, with the YYYYMMDD date format on the end of the name so that when they are ordered (descending), the oldest appear at the bottom of the lvm command output. The awk is then used to output the name of rows 8 onwards, and this is passed to the lvremove command using xargs.
#!/bin/bash

echo `date`

export MYHOME=/home/dan/backupscript

TIME=`date +%Y%m%d`

# Writes completed
grep sdc1 /proc/diskstats | awk '{print $8}' > $MYHOME/sdc1_newwrites.txt
grep sdd1 /proc/diskstats | awk '{print $8}' > $MYHOME/sdd1_newwrites.txt

# Compare
cmp "$MYHOME/sdc1_newwrites.txt" "$MYHOME/sdc1_oldwrites.txt"
c1=$?
cmp "$MYHOME/sdd1_newwrites.txt" "$MYHOME/sdd1_oldwrites.txt"
c2=$?

if [ "$c1" -ne 0 ] || [ "$c2" -ne 0 ]; then
    echo 'Detected change, running backup'

    mount /dev/vg_hdd_2tb/lvol0 /mnt/backup
    rsync -airW --delete /mnt/master/* /mnt/backup
    umount /mnt/backup

    echo "Making snapshots for $TIME"
    if [ "$c1" -ne 0 ]; then
        lvcreate -L 2GB -s -n vg_ssd_1_snap_$TIME /dev/mapper/vg_ssd_1-lvol0
    fi
    if [ "$c2" -ne 0 ]; then
        lvcreate -L 2GB -s -n vg_ssd_2_snap_$TIME /dev/mapper/vg_ssd_2-lvol0
    fi

    echo "Removing old snapshots"
    # order the snapshot names descending, any rows after 7 sent to lvremove
    lvs -o lv_name vg_ssd_1 --noheadings -S "lv_attr=~[^s.*]" --sort -lv_name | awk 'NR>7 {print "/dev/mapper/vg_ssd_1-"$1}' | xargs -r lvremove -y
    lvs -o lv_name vg_ssd_2 --noheadings -S "lv_attr=~[^s.*]" --sort -lv_name | awk 'NR>7 {print "/dev/mapper/vg_ssd_2-"$1}' | xargs -r lvremove -y

    # As the snapshots would have made writes, update the newwrites.txt files
    grep sdc1 /proc/diskstats | awk '{print $8}' > $MYHOME/sdc1_newwrites.txt
    grep sdd1 /proc/diskstats | awk '{print $8}' > $MYHOME/sdd1_newwrites.txt

else
    echo 'No changes detected, skipping backup'
fi

cp $MYHOME/sdc1_newwrites.txt $MYHOME/sdc1_oldwrites.txt
cp $MYHOME/sdd1_newwrites.txt $MYHOME/sdd1_oldwrites.txt
See above for how the command is added to crontab for scheduling.
Using this method, I've got backups for the last 7 days (if files change, longer if not).
References and more reading:
RedHat - Configuring an LVM Volume with an ext4 File System
TecMint - How to Take 'Snapshot of Logical Volume and Restore' in LVM
The Urban Penguin - Managing LVM Snapshots in LVM2
HowToForge - Samba Server installation on Ubuntu 16.04 LTS
HowToForge - Samba Server installation on Ubuntu 16.04 LTS
Old btrfs references:
BTRFS Wiki
HowToForge - A Beginner's Guide To btrfs
Seravi - Using RAID with btrfs and recovering from broken disks
John Ramsden - Using Btrfs for Easy Backup and Rollback