
Home-made PC Router and NAS Server [Page 2] - Install
The build - Installation
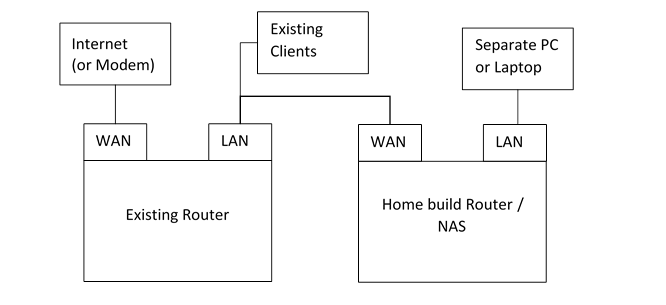
Before you start, plug the PC into a monitor, keyboard and mouse.
We're do most of the build connected to our existing router and network, so we can test things and keep our existing Internet during the build.
Plug the network socket that you intend to use as your WAN connection, into your existing router / LAN. Into the port intended for use as the LAN, we can plug a cable directly into another PC or laptop for testing.
This assumes Ubuntu LTS 18.04 Server version. Ubuntu Server is available to download at https://www.ubuntu.com/download/server.
Download the ISO, and write it to a DVD or USB drive (made bootable by LinuxLive USB Creator, or Rufus).
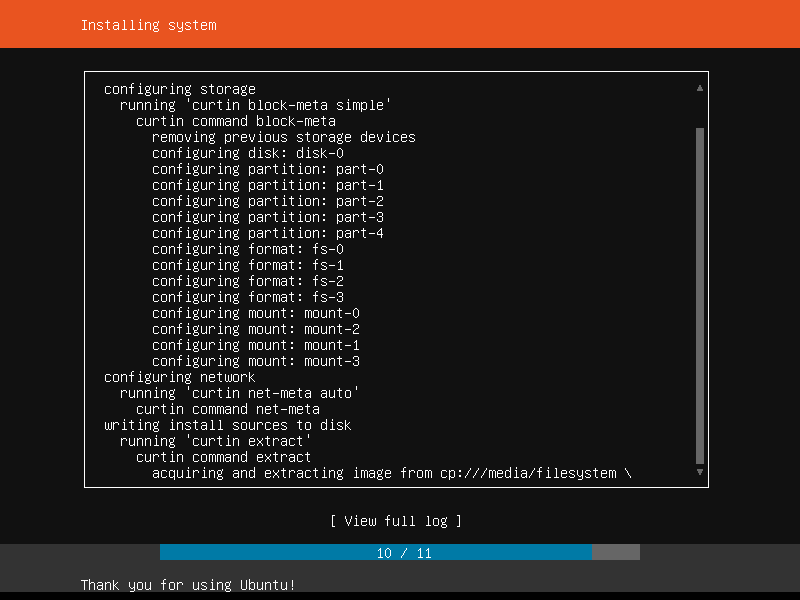
Do the install. I have captured the install by simulating it in a Virtual Machine for your convenience. It's very easy, but gives you a chance to customise network and hard drive partitions, which we will do.
Initial steps
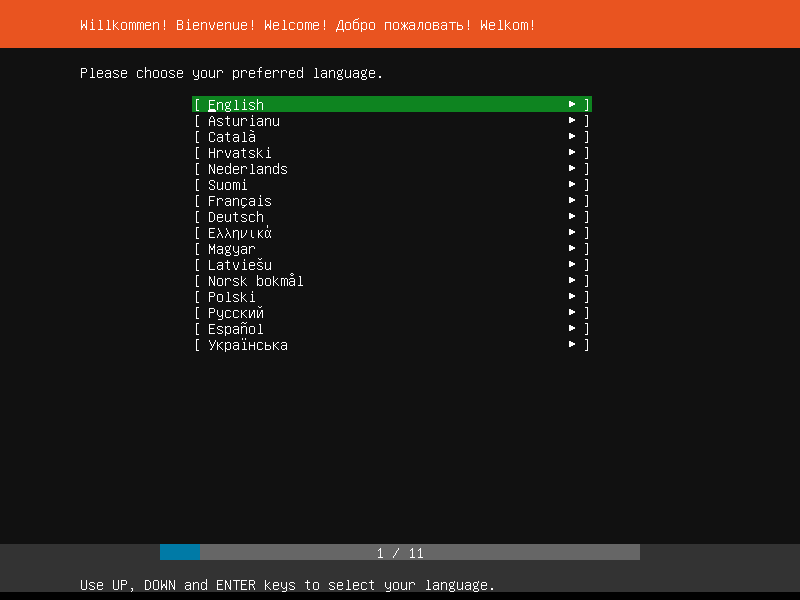
Step 1: Choose a language:
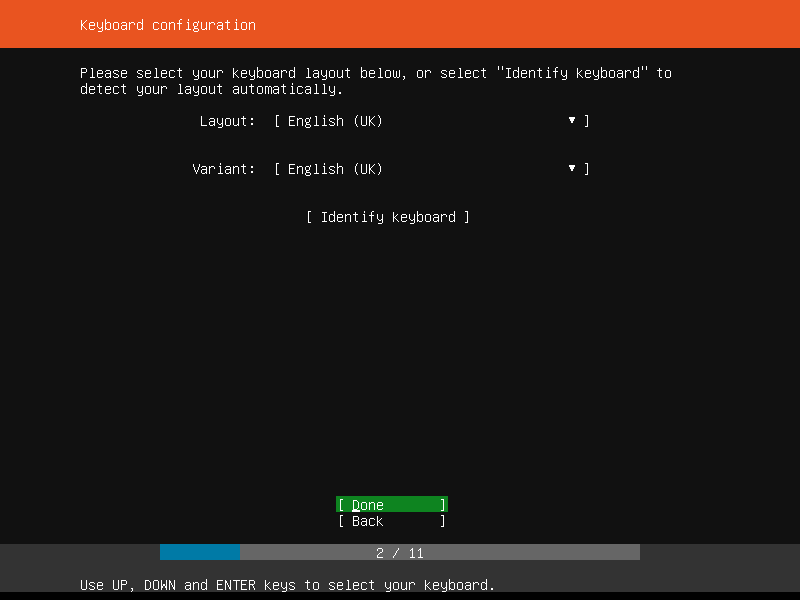
Step 2: Choose a keyboard layout
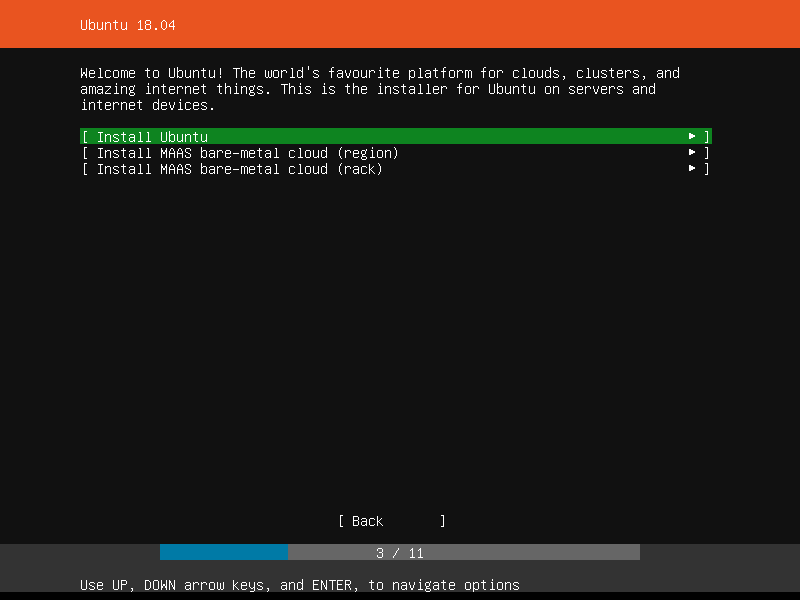
Step 3: Select Install Ubuntu
Network setup
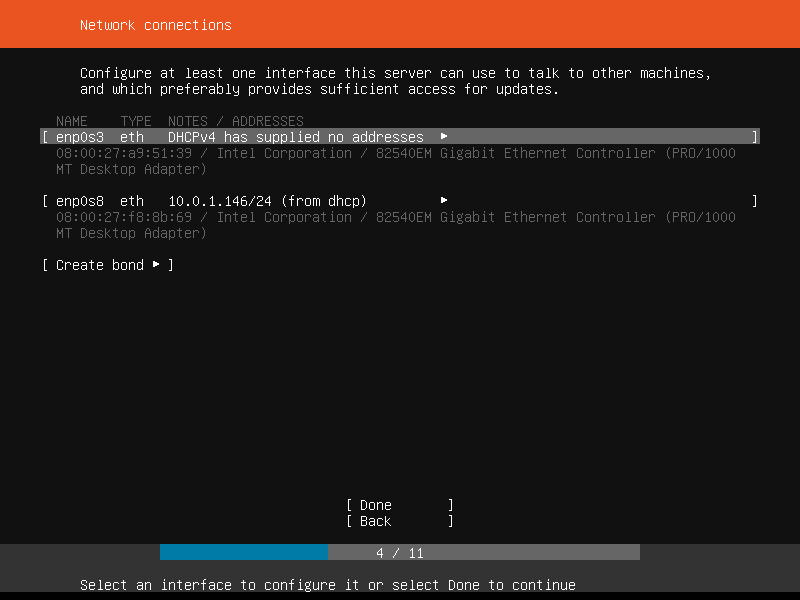
Here I've setup my Virtual machine to replace my server, this being the first network interface is the LAN one, and has no IP assigned by anything else on the network (hence will be static). The second interface is the WAN one, meaning it is assigned an IP address automatically by DHCP by the Internet Service Provider (or our existing router in this initial setup process).
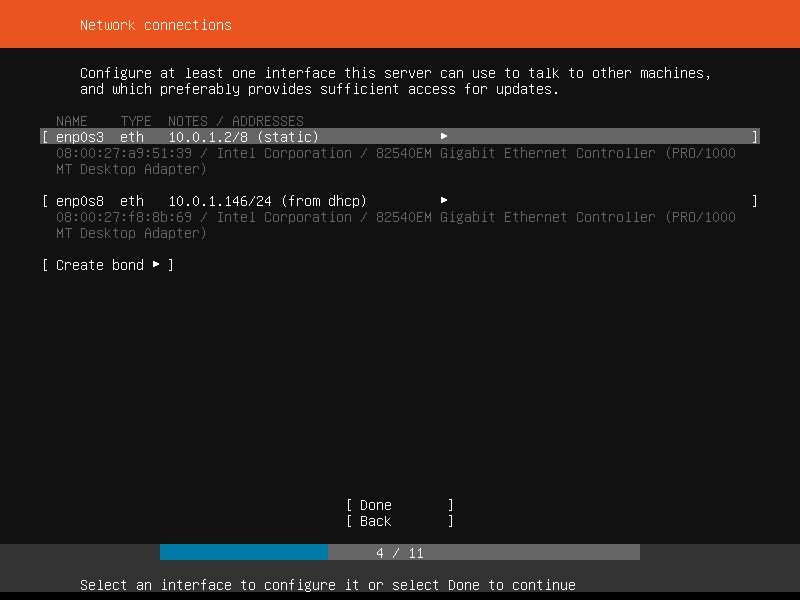
Step 4a: Setup network interfaces - select the first interface (which will be connected to the LAN). We will assign a static IP of 10.0.1.2 to it:
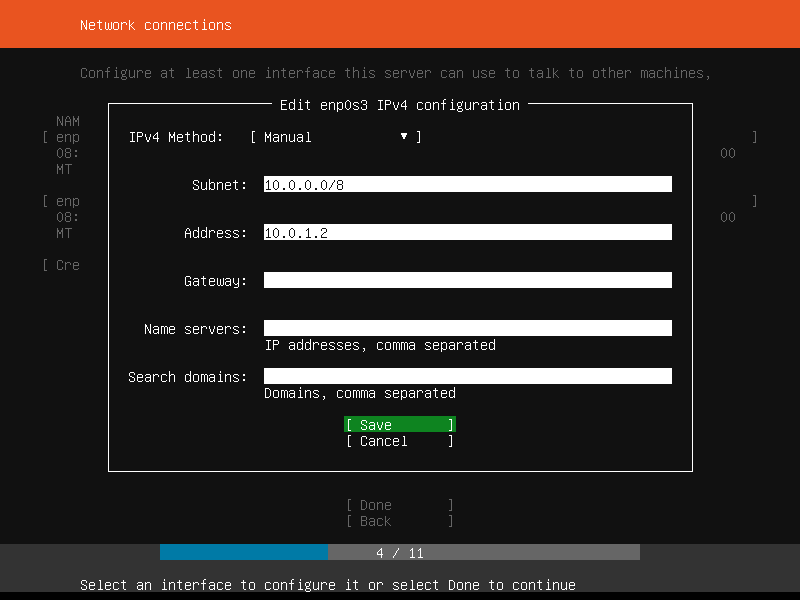
Step 4b: Choose Edit IPv4:

Step 4c: Enter 10.0.0.0/8 for the subnet and 10.0.1.2 for the static IP address (or as you prefer), then press Save:
Step 4d: No further changes needed - we'll leave the second interface as the default automatic DHCP selection, press Done to continue:
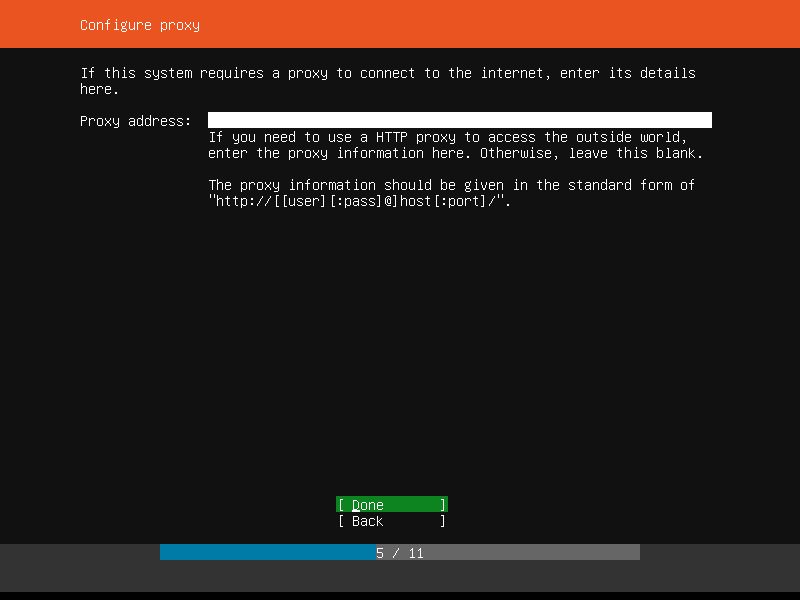
Step 5: Enter proxy information if needed - usually not for a home network:
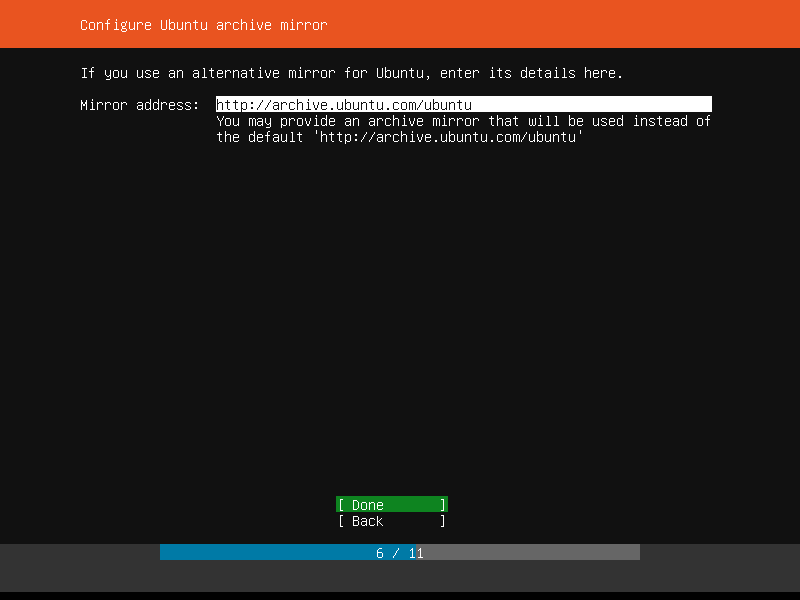
Step 6: Enter an alternative mirror for Ubuntu updates if needed - usually not for a home network. If at a company or University, they may have their own mirror:
Disk filesystem setup
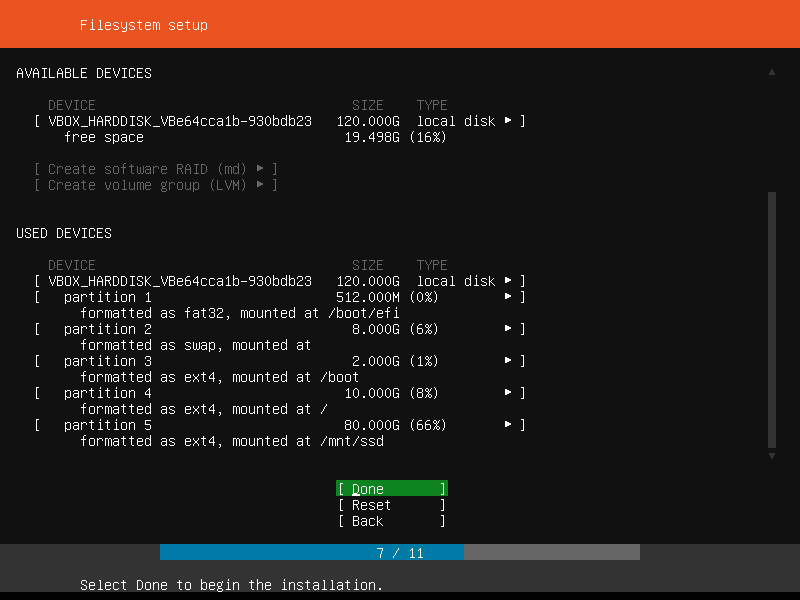
Here I choose to partition manually - creating a 'special' kind of layout for partitioning. Here's the setup and why:
| Mont Point | Size | File System | Why? |
|---|---|---|---|
| 8GB | SWAP | Swap is usually a good idea. I've made it the size of my RAM. | |
| /boot | 2GB | EXT4 | Boot is a small and simple file system. Often 100MB-300MB but I've made it a much bigger 2GB to hold more kernel images during upgrades |
| / | 10GB | EXT4 | This is where the OS goes. 10GB should be more than enough for a server OS. EXT4 works well with SSDs and is reliable. The /home directory is also on here, but you can separate it onto another partition if you prefer. |
| /mnt/ssd | 80GB | EXT4 | An area to store files such as VMs that may run on this server, for performance. Again EXT4. |
| Some free space is kept for over-provisioning to keep SSD performance optimal |
Step 7a: Choose Manual:

Step 7b: Select the correct disk and 'Make Boot Device'. If you've installed all your disks, make sure you select the correct one you want the O/S to install on to:
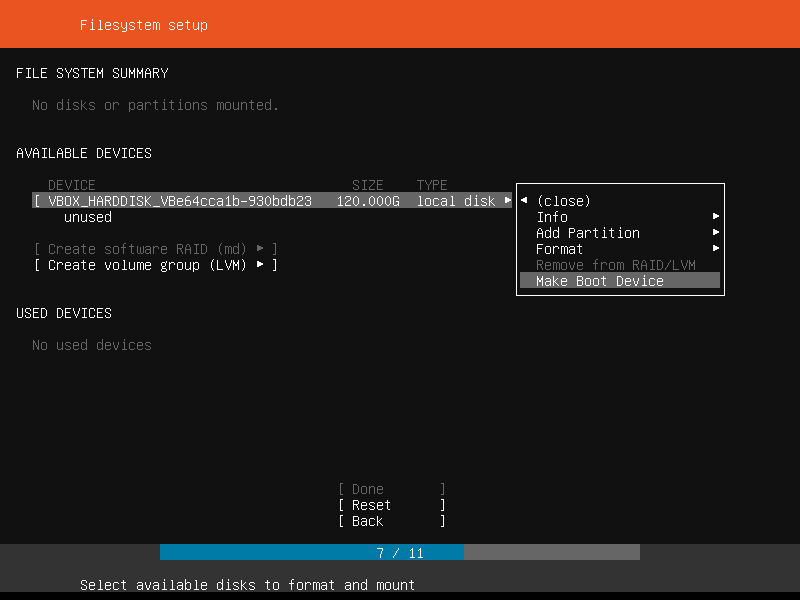
Once complete, a /boot/efi partition should automatically appear for EFI systems, for legacy systems, this step is not required.
Step 7c: Select the correct disk again and this time select 'Add Partition':
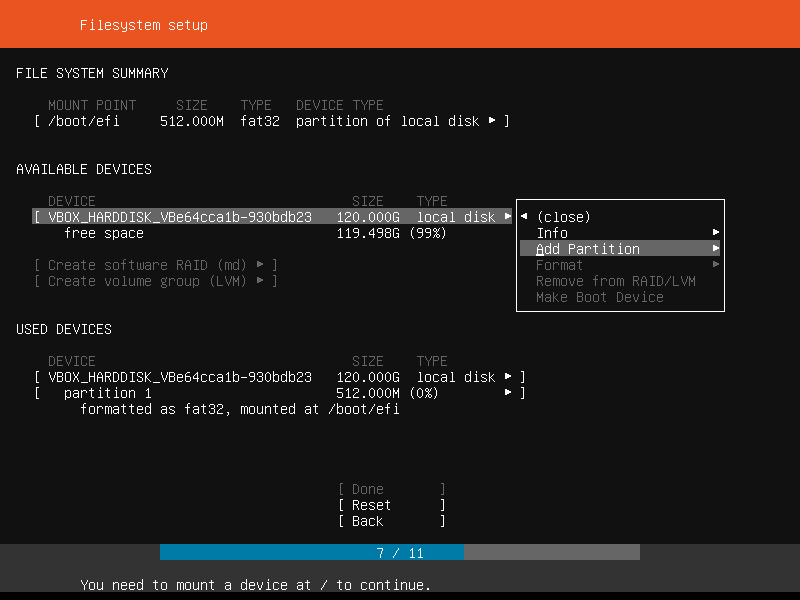
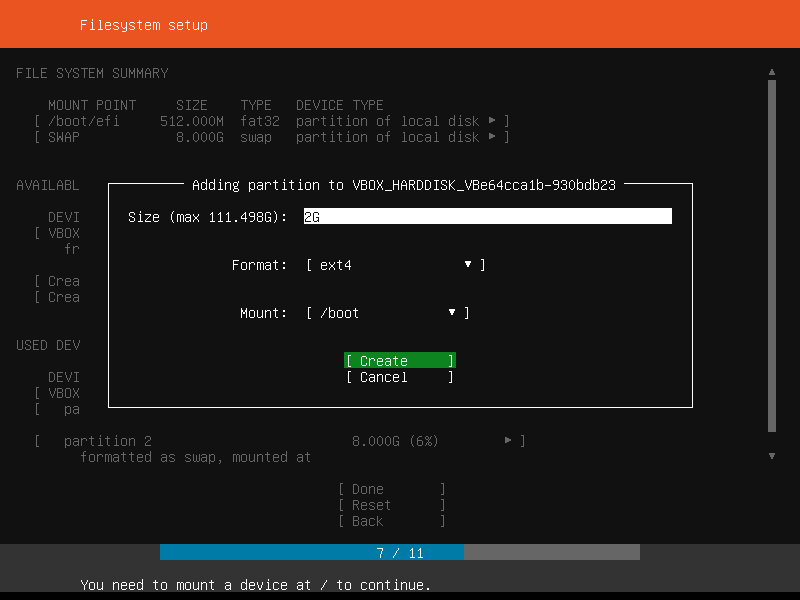
Step 7d: Choose the first partition, for example an 8GB swap partition. Enter the size, and format as swap. Then press Create:

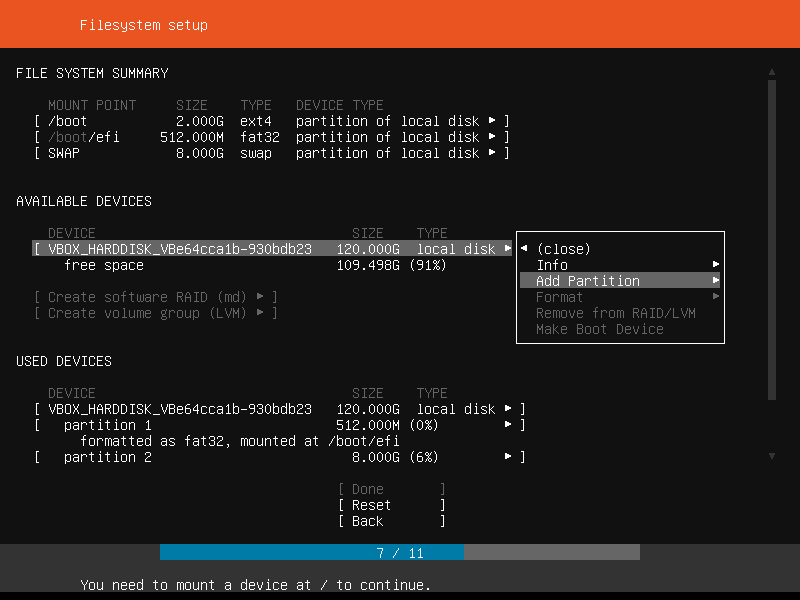
Step 7e: Select the correct disk again and again 'Add Partition':
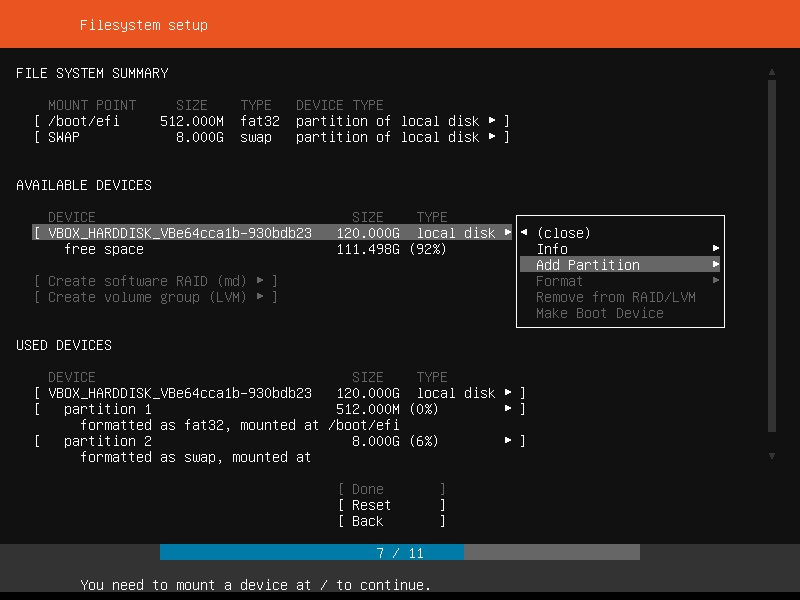
Step 7f: Choose the second partition, for example an 2GB boot partition. Enter the size, and format as ext4, and use /boot as the mount point. Then press Create:
Step 7g: Select the correct disk again and again 'Add Partition':
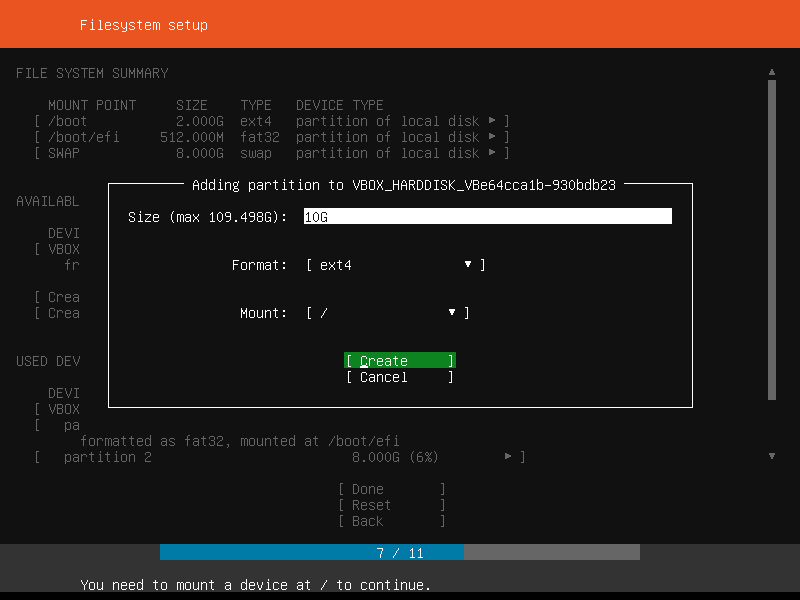
Step 7h: Choose the third partition, for example an 10GB root partition (/). Enter the size, and format as ext4, and use / as the mount point. Then press Create:
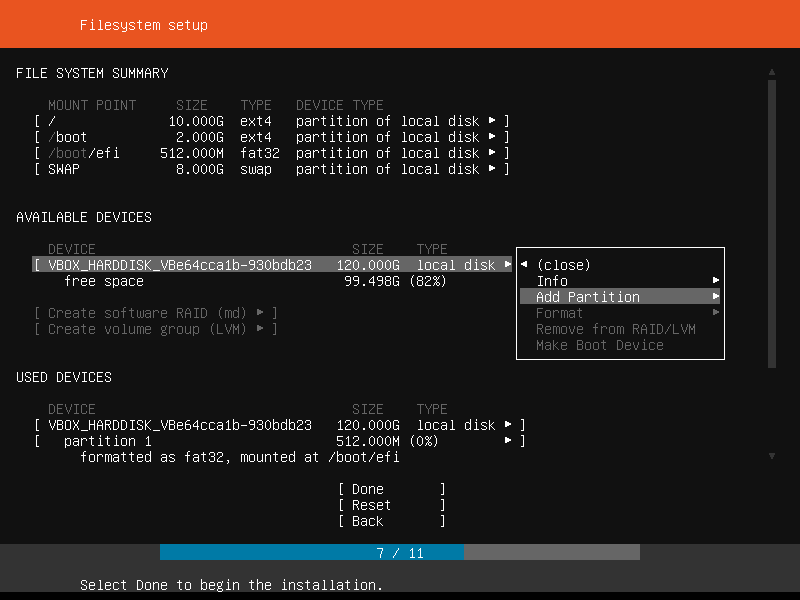
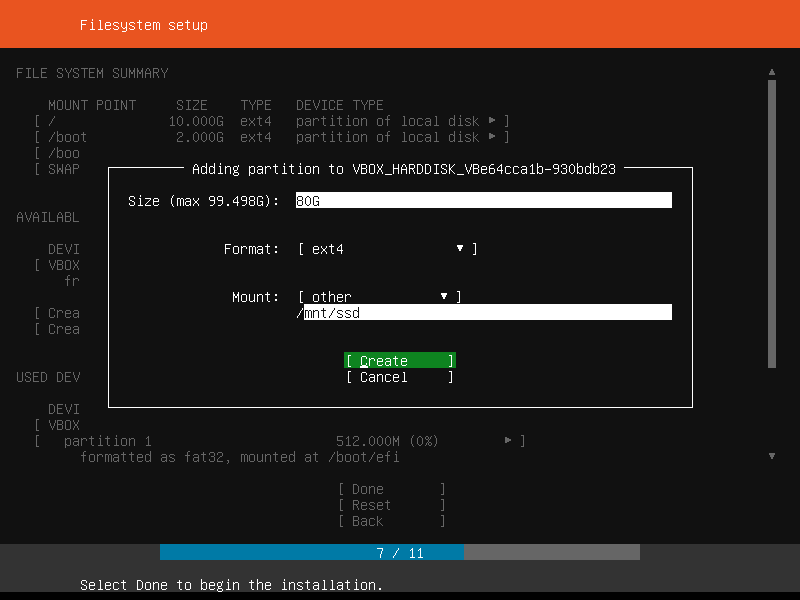
Step 7i: If we have some space left, we can use that for /home or even our own mount (for sharing). Select the correct disk again and 'Add Partition' once more:
Step 7j: Choose the final partition, for example an 80GB partition on /mnt/ssd. Enter the size, and format as ext4, and use your preference as the spare mount point. Then press Create:
Step 7k: Verify you are happy with the partitioning scheme, and then press 'Done':
Profile setup and finish
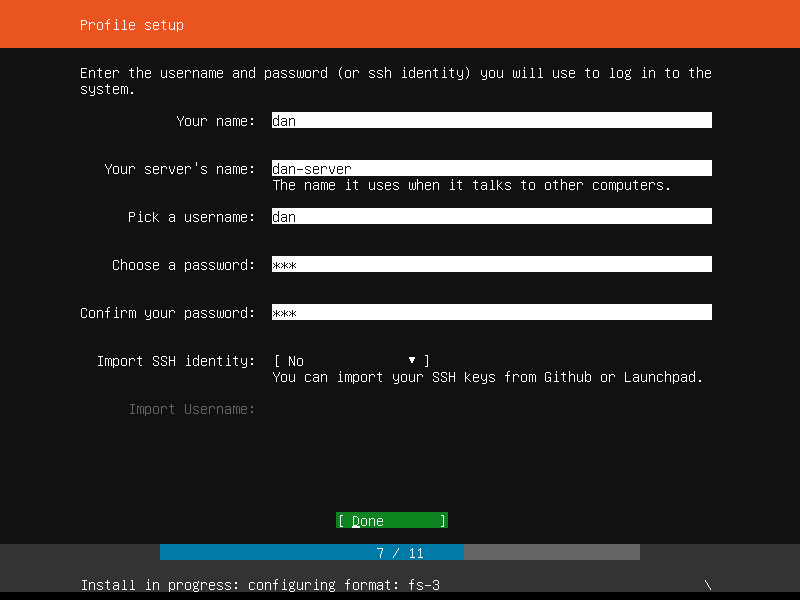
Step 7l: The install starts right away, but still needs to ask for your name, the server name and login username and password. Enter yours and press Done:
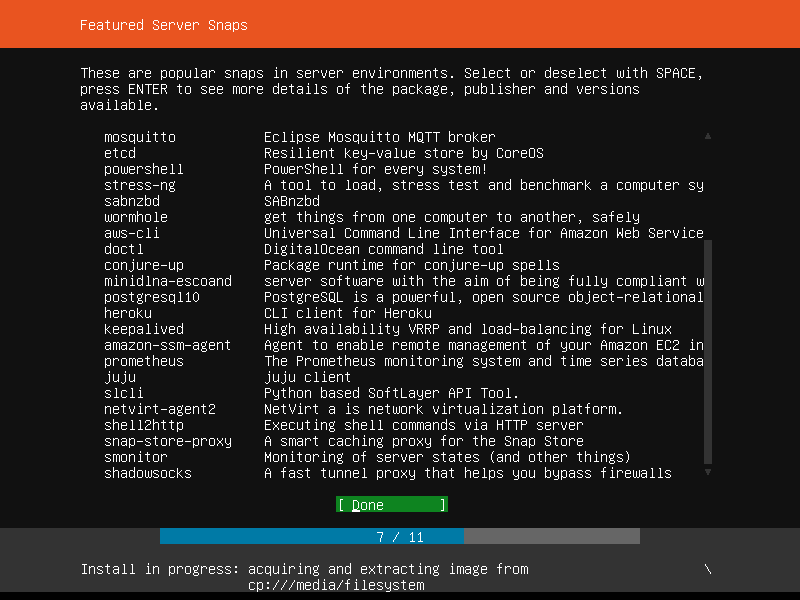
Step 7m: You'll be offered snaps to also add to the install. None are needed for our setup, so just go to Done. If any are really interesting to use for you, you can select
them, or choose to add them later:
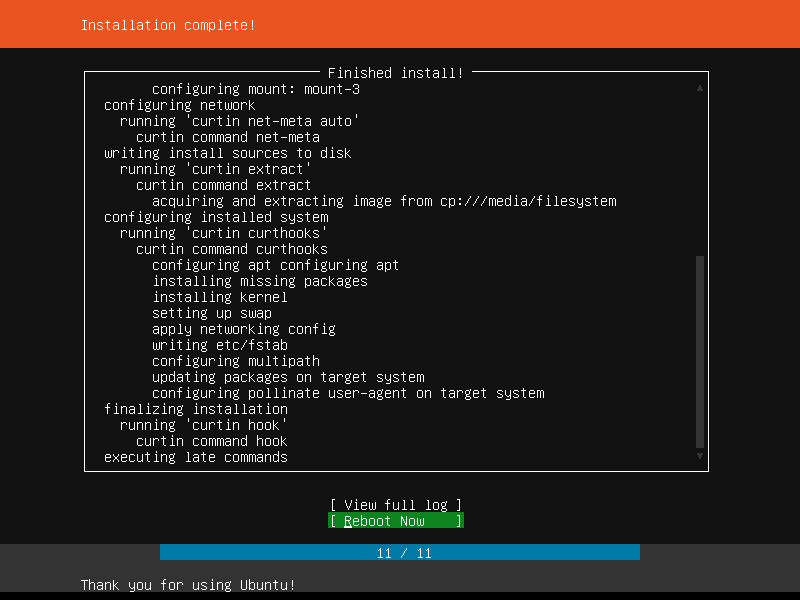
Step 10 and 11: Install will then continue and then choose to reboot. When prompted, remove the DVD or USB boot disk:
Get Updates:
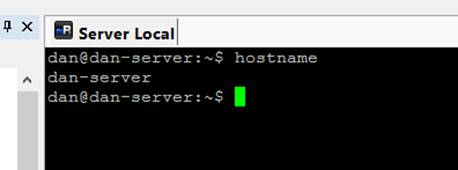
After the reboot, login with your user defined in Step 7l
Now let's update everything first:
sudo apt-get update
sudo apt-get upgrade
sudo apt-get dist-upgrade
sudo reboot
Remote access.
For this build - the PC will eventually be sitting with no monitor, keyboard or mouse plugged in and placed in a cupboard or wherever the Internet WAN connection comes in.
When we need to connect and administer it though, we can use terminal to connect in.
SSH
SSH is a great way to connect in and run terminal commands. Most of the time, this is exactly what you'll need to administer the server, including updates, reboots, backups, file manipulation and so on.
Open SSH Server does the job we need. To install it:
sudo apt-get install openssh-server
sudo nano /etc/ssh/sshd_config
In this file, uncomment the line 'PasswordAuthentication yes'. Then save and enter these commands:
sudo service ssh stop
sudo service ssh start
You should now be able to connect from another PC to this one. I use either mRemoteNG, which comes with PuTTy, or MobaXterm which also comes with an X-client (so you can install and run GUI programs from your GUI-less server and display them on your laptop), and an SFTP to allow easy transfer of files via SSH.
Connecting to the server with mRemoteNg