
Home-made PC Router and NAS Server [Page 5] - Virtual Machines and GUI
- Introduction
- Install
- Router
- NAS
- VM Hypervisor and GUI
- VPN
- Power saving and Conclusion
VM Hypervisor and GUI
This is a section about two areas you might not need, but they are particularly useful in general and a requirement for the enhanced VPN setup on the next section.
VM Hypervisor - VirtualBox install
A virtual machine is basically like a whole separate PC but running within the same hardware as the host that you run the machine on. Virtual Machines are widely used these days and most companies use them, and most of the entire public cloud services are running virtual machines.
It's extremely useful for me because it means I can build or download pre-built virtual machines for databases, software installs etc.
The other crucial use for me is to have a Windows 10 virtual machine that I can start and stop when I please, for whenever I really need to use a Windows only piece of software.
To run Virtual Machines (VMs), there are a couple of requirements:
- A Hypervisor. I'll choose the free and open source VirtualBox software, developed by Oracle. There are alternatives if you prefer, but VirtualBox has a fairly large community behind it, and it's supported and very easy to install on Ubuntu
- A CPU with VT-x (Intel) / AMD-V (AMD) extensions support. OK technically this isn't a requirement, but without it your VM will be terribly slow and limited to 32-bit only. Pretty much every modern Intel or AMD CPU from 2015 or after should support it, but it's usually OFF by default in tghe motherboard BIOS so you may have to go into the BIOS to enable it (vendor specific).
If you're intending to run big VMs such as a Windows machine, database or applications software machine, hardware will become important and I'd suggest a quad core CPU and 16GB RAM as a minimum. Disk space for each VM will also be important and since each VM will have an operating system running on it too, disk speed is also important (so I suggest creating VMs on an SSD).
For the CA server example below though, since that too is a GUI-less server, there's no need to allocate that much extra resources.
VirtualBox is easy to install on Ubuntu or Debian/Ubuntu based distros:
sudo apt install virtualbox
For personal use, the VirtualBox Extentions are also easy to install:
sudo apt install virtualbox-ext-pack
VirtualBox is mainly a GUI based tool, although you can do everything with the command line, this is a hard way to do one-off setups of a new virtual machine, so next I'll cover how to access GUI programs from our headless server which has no monitor connected.
GUI programs
We didn't install a desktop environment on our server, mainly because you shouldn't need one and it'll mostly just waste resources. Your 'desktop' environment would either be the desktop or laptop you work on, not the server, or you would install one in a VM later.
Occasionally we'll need GUI programs though, like VirtualBox, or gparted if we want to easily setup a new disk, or Firefox if we need to see a web service on the server without opening the iptables ports first etc.
In my opinion, there are two effective ways to view GUI programs (run on the server) on the desktop/laptop you're working from:
- X forwarding over SSH
- X2Go
Neither of these will offer amazing performance and 3D graphics support, but that's generally not required.
SSH X forwarding
X is the popular display server for Linux and whilst it was designed for drawing graphics locally, it can be forwarded over a network to a display on another PC.
To do this, we'd connect via SSH, but with an extra parameter and some initial configuration to tell the SSH server to forward X packets over SSH.
This way is secure, as the GUI traffic is encrypted over the same SSH port, but it doesn't perform well and often shows artifacts.
Nonetheless, it's easy to setup. As a one-off on our server, we will edit /etc/ssh/sshd_config
sudo nano /etc/ssh/sshd_config
Locate 'X11Forwarding' and uncomment (remove the #) it or change it so the whole line says:
X11Forwarding yes
Now restart the SSD daemon:
sudo service sshd restart
Connect to the server again from a client that supports X forwarding. From a Linux client, you just need to connect with the -X argument added, for example 'ssh -X 10.0.1.2'. From Windows, either use MobaXTerm which has a X client built in or install one like Xming.
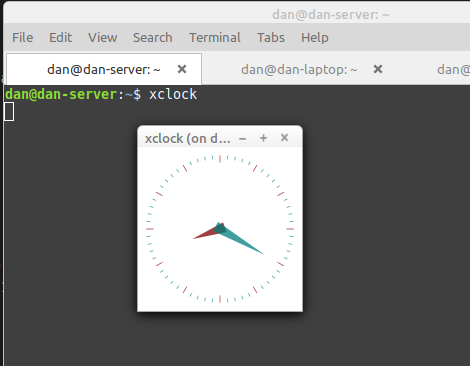
Once you're connected, over ssh launch the GUI program e.g., 'xclock' and it should pop up on your laptop or wherever.
X2Go
As mentioned, the performance isn't great with X-forwarding and a nice alternative is X2Go. This is designed to forward displays over networks and offers compression.
X2Go is mainly geared towards making a desktop environment accessed remotely, but it can display individual applications instead.
To install X2Go, we need to install it on the server and the client. Each is different, but both are easy.
On the server, run:
sudo apt install x2goserver
On the client, if it's a Debian/Ubuntu based Linux client:
sudo apt install x2goclient
On Windows, there is a client installer on the x2go website.
The client can connect over SSH using port forwarding. This is secure and doesn't require you to change iptables rules, so go to Session -> New Session ...
Give a name of your choice. Host would be the IP address of your server (i.e., 10.0.1.2 if you're following my config exactly). Login would be your SSH username. SSH port should be 22.
In the 'Session Type' area, select 'Published applications'.
On the Connection tab, you can experiment with speed here, but I go for 'LAN' because my local network and Wi-Fi is fast enough.
Press OK, and it appears on the right. Double click it to connect. Once connected there is a small 'Applications' icon which when pressed will pop up a window listing all available applications.
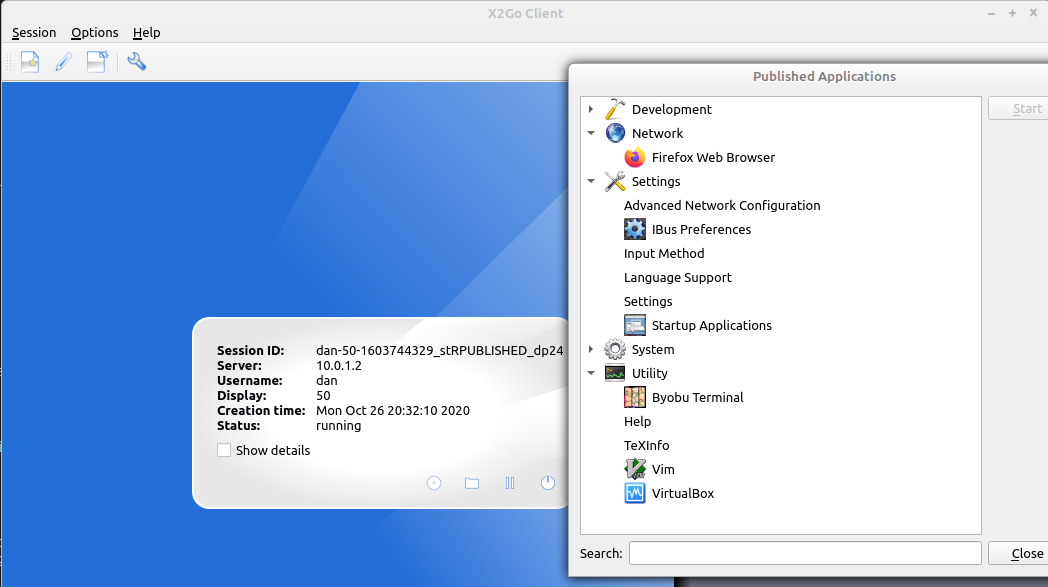
The xclock isn't there, but pretty much any application that will create a shortcut will be available (based on what is in /usr/share/applications). Firefox can be installed for testing, and VirtualBox if installed will also be there, but so will a variety of GUI settings applications too, at least for Ubuntu.
Note: Installing x2goserver will install a GUI desktop environment as a dependency. Therefore, it's quite a big download with lots of packages. Once installed, and the DE is installed, you may now find your server automatically goes to sleep when it 'thinks' it's inactive. To prevent this, see some commands here that will stop the default Ubuntu GUI from putting the server into sleep.
As a side note, running Firefox via x2go works well and I can launch Firefox remotely from a low powered Celeron N4000 laptop, and it's got all the power of my server so feels really snappy when loading web pages. Best of all the battery life of the low powered Celeron is much longer because it's just a screen, and the session can be closed and resumed when you like without closing the browser on the server.
Creating a VM
There's two ways we could do this. Either we can create the VM on the server itself, or alternatively VirtualBox could be installed on your desktop / laptop and a VM could be created there and moved to the server once you're happy with it.
In this example I'm going to create a light VM to act as a Certificate Authority signing server, but for the installation I'll allocate some more resources, so it installs quicker. I'll do it on my laptop and move it to the server later.
Before creating a VM, we need some media to install the operating system from. I'm choosing Ubuntu Server 20.04 again for my VM, but you can choose the right OS for your needs. The OS will usually be on a .iso file, whether that's Windows, or most Linux distributions.
Before creating a VM, check the Preferences and change the Default Machine Folder to a location that preferably has plenty of space, and is your fastest disk (i.e., SDD).
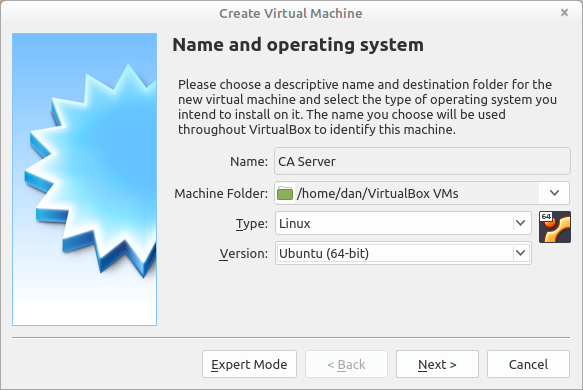
Click New.
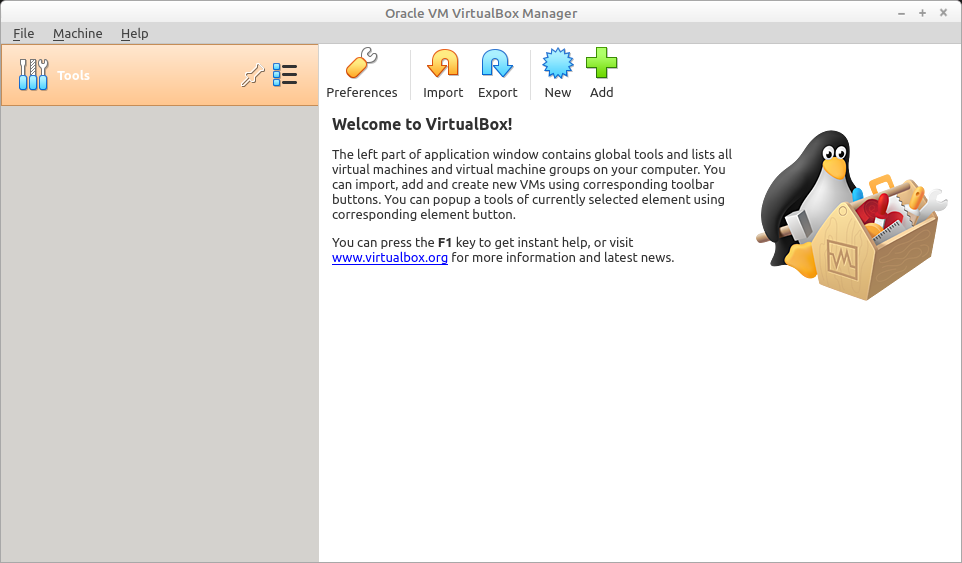
Give the VM a name, choose a folder, type and version.
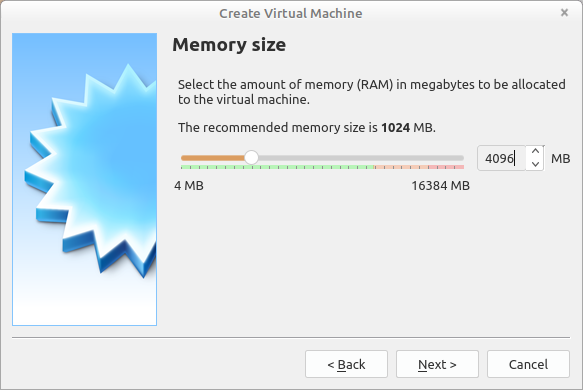
Allocate some memory. For a quick install, I suggest 4GB.
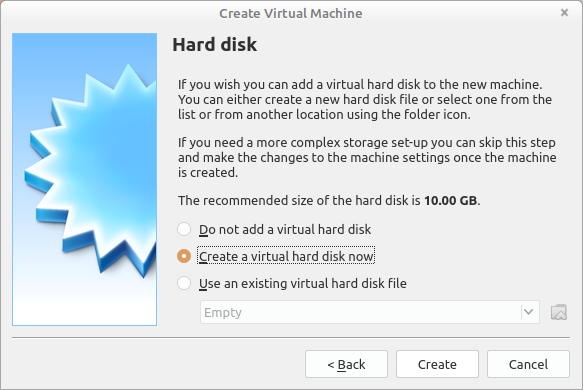
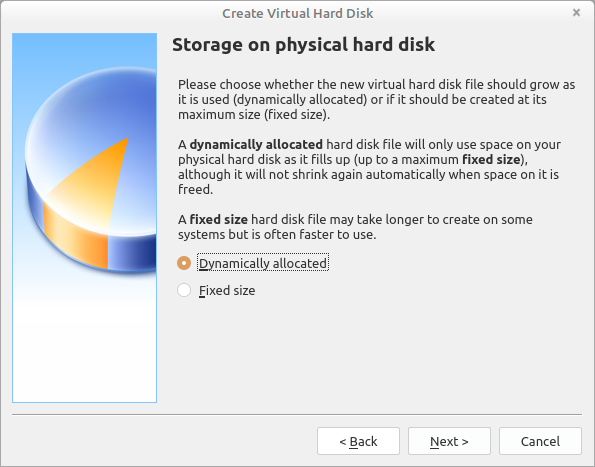
Choose to create the virtual hard drive now, press Create.
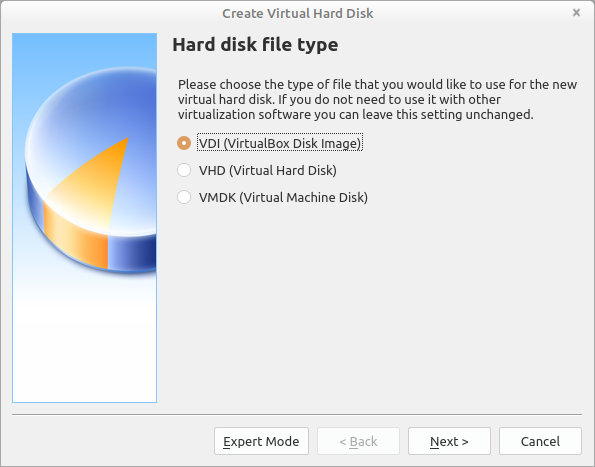
VDI is the default and best option for VirtualBox.
Dynamically allocated is a good choice. Fixed size is quicker but means the virtual disk will consume the maximum space you set on the host.
20GB is a recommended maximum size for Ubuntu, allowing space for some software and dependent packages. Set a maximum as you need
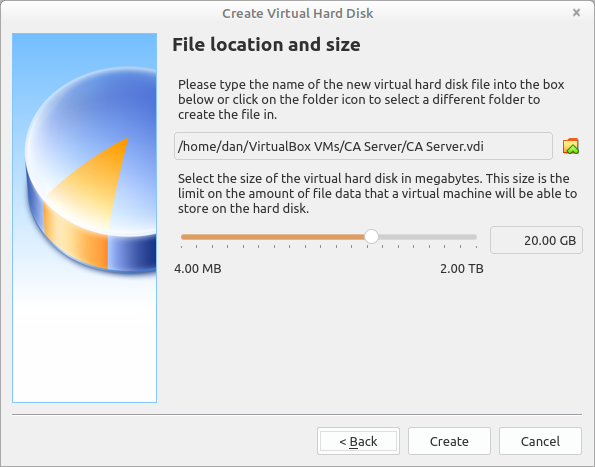
Don't start it yet - go to Settings first:
Under General -> Disk Encryption - we can add VirtualBox Disk Encryption here if our data is sensitive. A CA server could be considered sensitive, so I'll turn that on. Most use cases may not need it though. It requires VirtualBox Extentions.
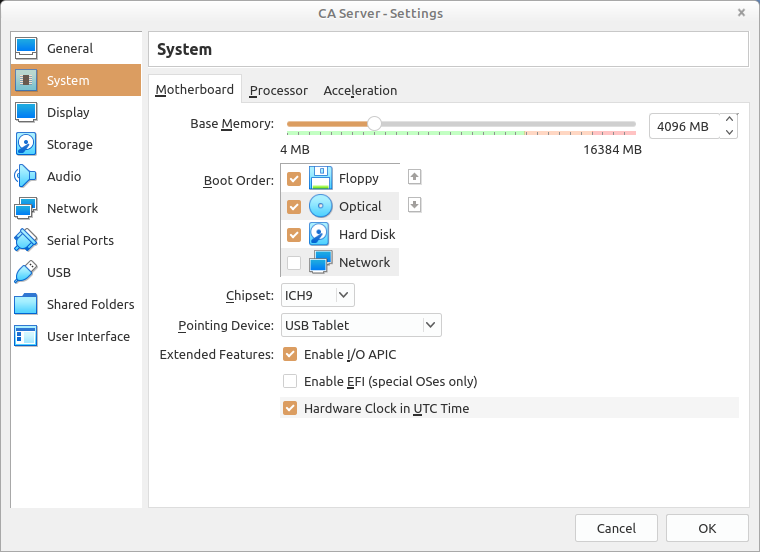
Under System -> Motherboard - this is where memory can be adjusted again later, for now the 4GB set is fine. The chipset I recommended changing to ICH9 because it seems to use less resources on the host. This isn't essential though, and support for ICH9 is still experimental so it's not for mission critical VMs.
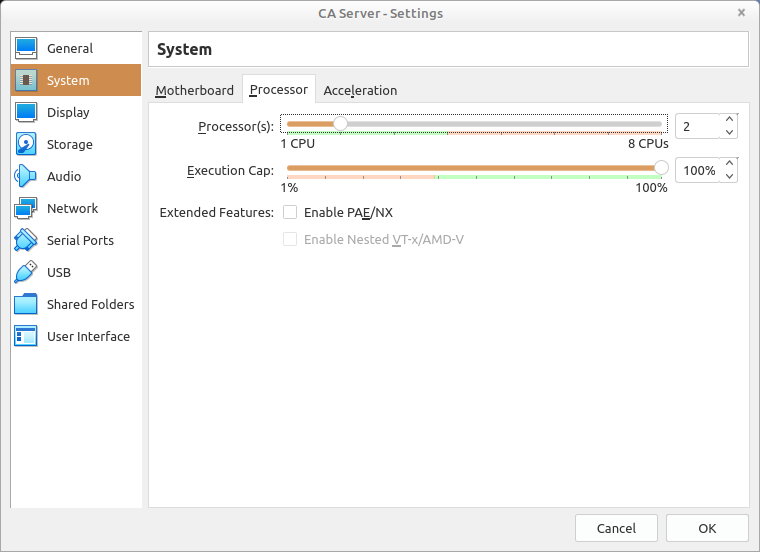
Under System -> Processor - boost the threads if you have them. PAE/NX should be disabled.
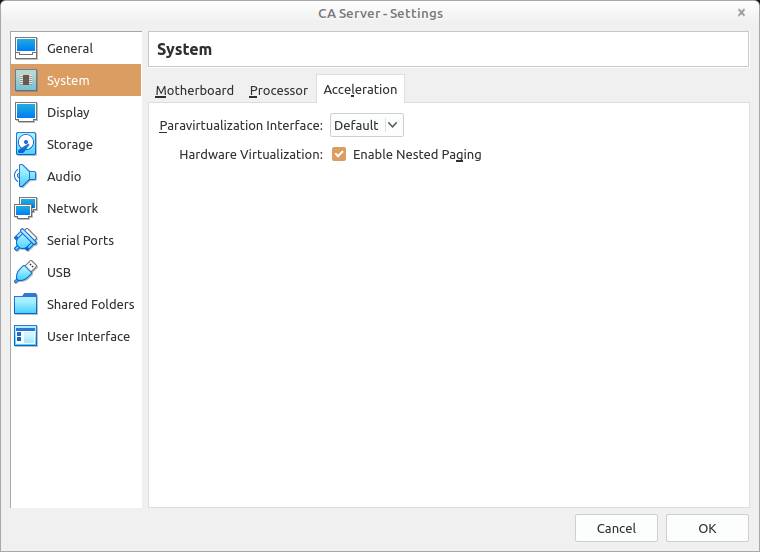
Under System -> Acceleration - Enable Nested Paging should be enabled.
In Display, the defaults for all tabs are fine.
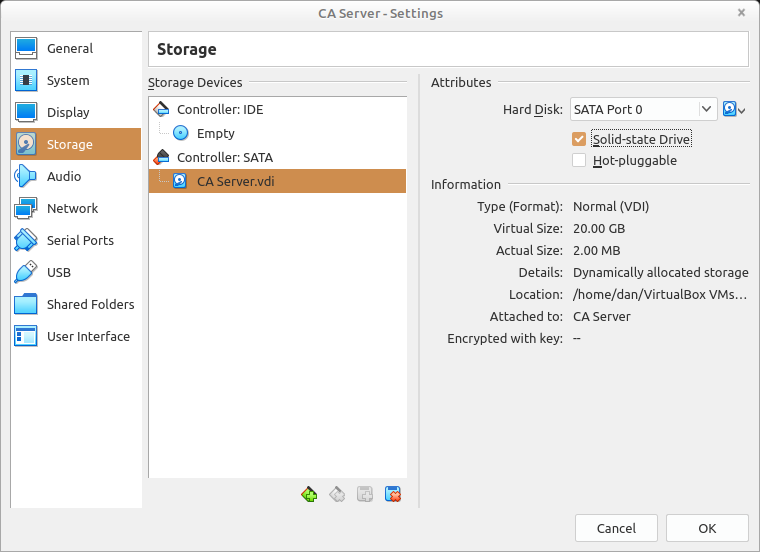
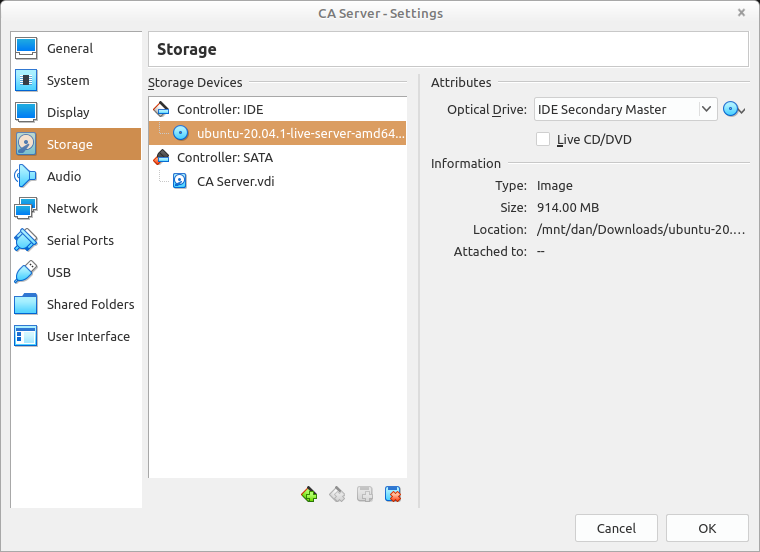
Under Storage, choose Solid State Drive for your virtual hard disk if you are using one on the host. For the virtual CD/DVD drive, pick the .iso file for the OS you want to install... I've selected Ubuntu.
Audio can be disabled, unless you know you'll need it.
Network is the important one. If we want our VM to reach the Internet, NAT is the standard setting. If we are going to allow external systems to access the VM though (such as SSH), we'd have to either port forward the NAT to unused host ports (such as forwarding port 22 to port 2222), or alternatively a bridged adaptor can be used. I recommend the latter because it'll ensure our VM gets assigned its own IP address by the DHCP server, and it gets treated more like an individual machine.
Network is the important one. If we want our VM to reach the Internet, NAT is the standard setting. If we are going to allow external systems to access the VM though (such as SSH), we'd have to either port forward the NAT to unused host ports (such as forwarding port 22 to port 2222), or alternatively a bridged adaptor can be used. I recommend the latter because it'll ensure our VM gets assigned its own IP address by the DHCP server, and it gets treated more like an individual machine.
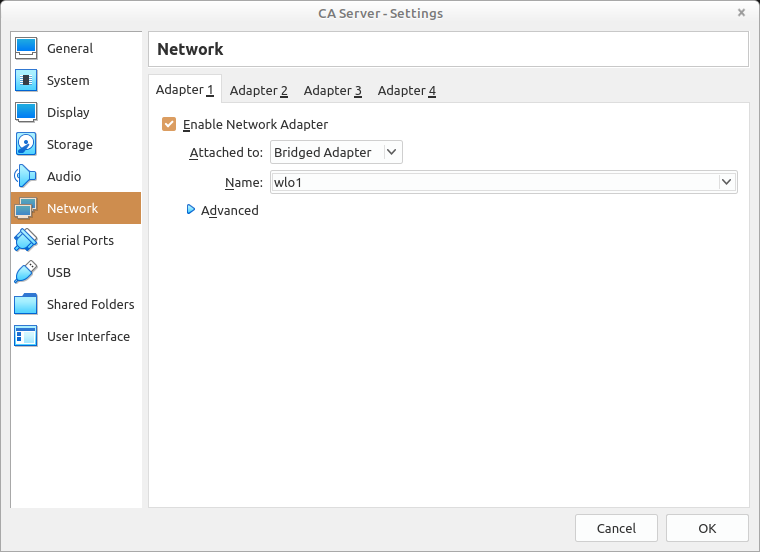
Take care though. For a bridged adaptor, you need to specify the hosts physical network interface you want the adaptor to use. For my laptop, that's the Wi-Fi card (wlo1), but on the server I'll want to choose the LAN port (enp1s0f0 for me). Pick the LAN port, not the WAN port, because the VM should be accessed from our local network, not the Internet!
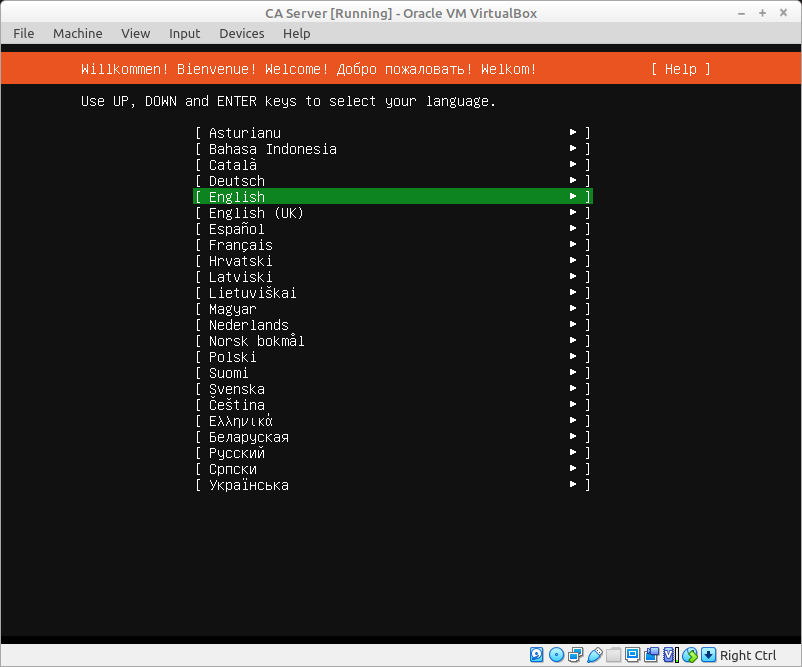
Now the VM can be started. If you picked a good iso file to install from, it'll recognise it's there and boot from it.
Install your OS on this virtual machine guest. For the Ubuntu CA Server, the install instructions are as per the main server install instructions here.
Once we're done with the VM, if you created it on another machine and now want to move it to the server, we can close VirtualBox, then find the directory of our VM. This will contain a .vdi file, which is the virtual hard disk, a .vbox file, which is the configuration, and some other files including a Logs subfolder. Copy the whole parent directory to a location on the server. You can use the Samba file share, or SCP.
Now X2Go and/or SSH X forwarding is setup, we can launch the VirtualBox GUI from our server and add the VM. Specify the directory you copied to and add the VM. Now go to Settings. You may want to decrease or increase the memory and CPU cores. You will definitely need to adjust the physical network adaptor the virtual bridged adaptor is attached to. As mentioned before, this should be your LAN (not WAN) adaptor.
Now start the VM. This could be a headless start if you prefer to leave it running.
Note that the firewall/iptables will need adjusting if we've any extra services we want to make available to our own network. My VM though will only allow you to connect to it via SSH though and because port 22 is already open in my IP tables rules, I can get to my VM from any machine on my network by connecting to the IP address of the VM (instead of the server/host IP address).
If you selected NAT though but need SSH access, you couldn't port forward port 22 to port 22 on the host because SSH on the host is already using that port. Instead, you would need to forward to a different port on the host (say 2222) and adjust IP tables to allow connections to port 2222 (as well as 22 and any others you have). Then you'd be able to connect to your VM using the host server IP, but port 2222. That's why I prefer the bridged adaptor.
- Introduction
- Install
- Router
- NAS
- VM Hypervisor and GUI
- VPN
- Power saving and Conclusion