
Kolink Rocket Case Cooling Airflow Mods
Update 24th November 2024 - made further improvements
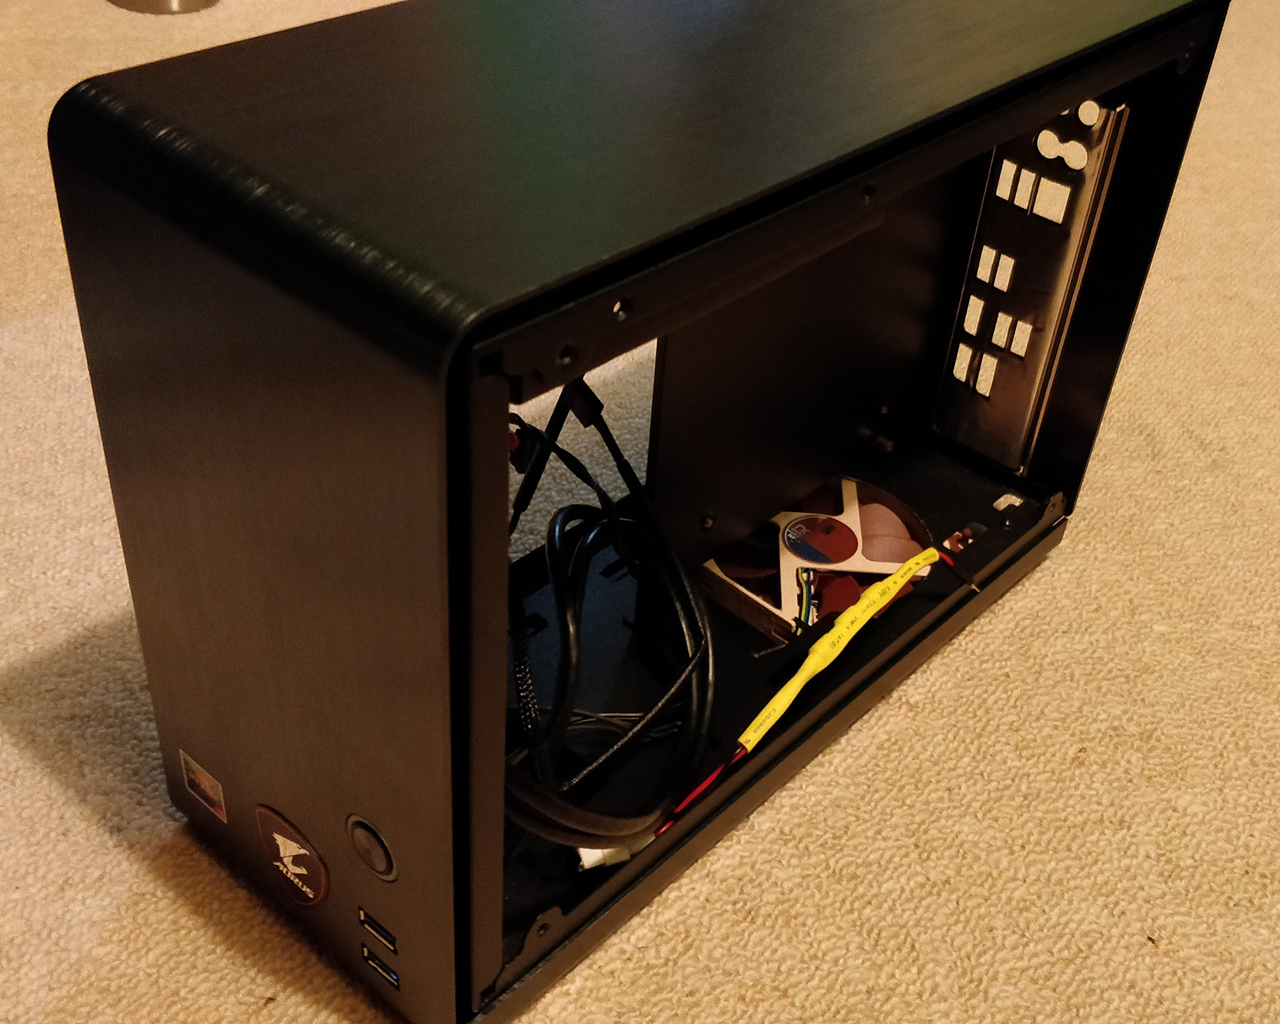
I was pleased to have come across a case like the Kolink Rocket. Whilst far from being my smallest Mini ITX case, it is far more capable because an SFX PSU will go inside, and most impressively, the majority of desktop class Graphics Cards.
It's quite a clever design - on one side the graphics card sits nicely, and on the other side, the motherboard is flipped over and mounted there. A PCIe Riser connects the two. The SFX PSU instead of adding real estate to the back, is mounted in spare space at the front, and a mains extension leads to it.
I built a reasonably powerful, but reasonably priced (at the time of writing early 2020) mini ITX system, components consisting of:
- AMD Ryzen 5 3600 3.6GHz 6 core 12 thread processor
- Gigabyte B450 I AORUS PRO WIFI Mini ITX motherboard
- Corsair Vengeance LPX 16GB (2x 8GB) 3000MHz DDR4 RAM
- Kingston A2000 500GB M.2-2280 NVMe PCIe SSD
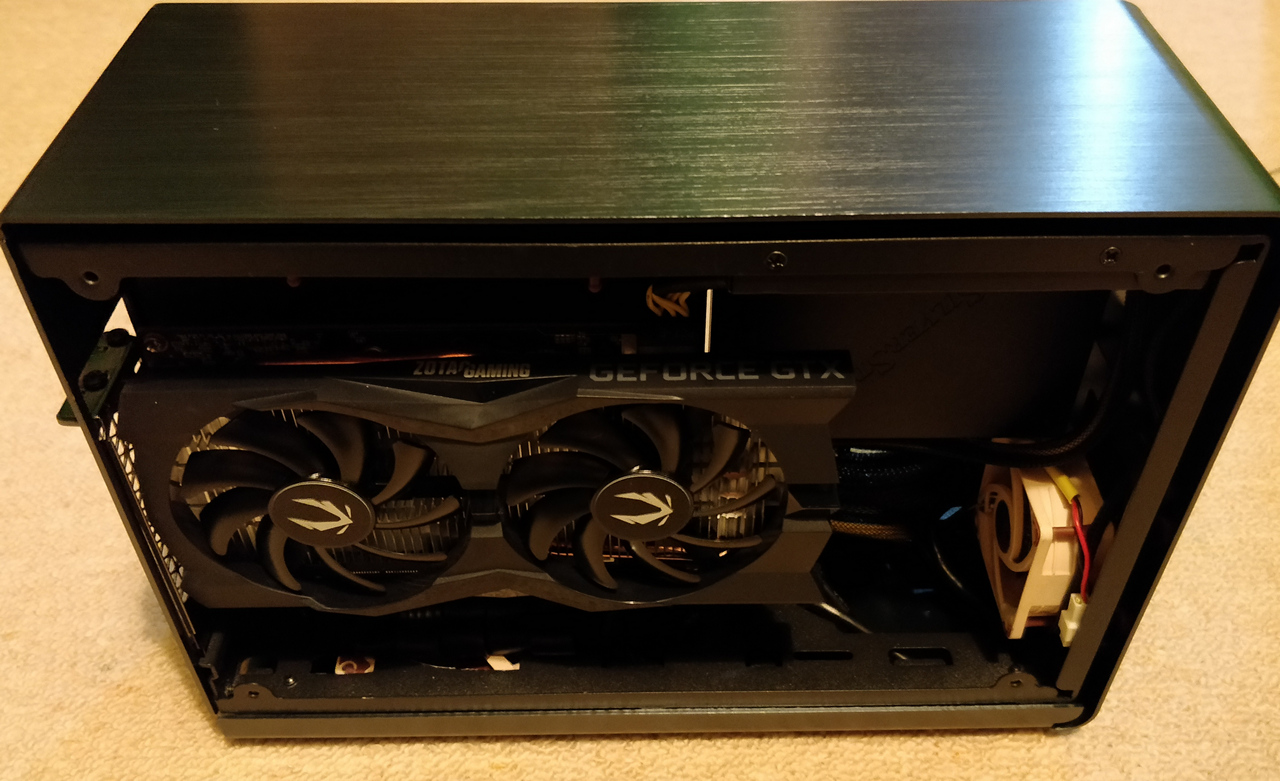
- Zotac GeForce GTX 1660 Twin Fan 6GB GDDR5 Graphics Card
- Corsair SF450 Platinum SFX PSU (originally SilverStone SST-ST45SF v3.0 - SFX Series, 450W 80 Plus Bronze PSU)
It worked, except when punished with more than an hour of gaming where the PC would shut off (no display, fans stopped, but power light on) with the only recovery being to unplug from the mains for a bit and then re-plug and switch on.
Logging the CPU and GPU temperatures didn't highlight any great cause for concern, but there was some heat after opening up the side of the case.
Gaming again with both sides of the case off, there was no problem. With one or the other side on (but other still off), again problems occurred, but after a longer time than with both sides on.
Update August 2020: a summer heatwave came to the UK, and the extra heat caused my PC to shut off again during gaming. CPU and GPU temperatures were higher, but again neither were above 80 degrees. I swapped out the SilverStone SST-ST45SF PSU with a Corsair SF450 Platinum and this solved the problem! You get what you pay for I suppose, but I'm still happy I did the cooling modifications in this guide though.
Overheating
The conclusion I came to was something was overheating. Support for monitoring all temperatures for my motherboard under Linux isn't great, so I did not work out what particular area was overheating, but having looked at the case, it's obvious the cooling is not good enough:
- Whilst the case sides have many holes, they're quite small and air doesn't really flow out of them. This is proven by putting the case side in front of a 12" desk fan - substantial reduction in airflow. It feels like a sail.
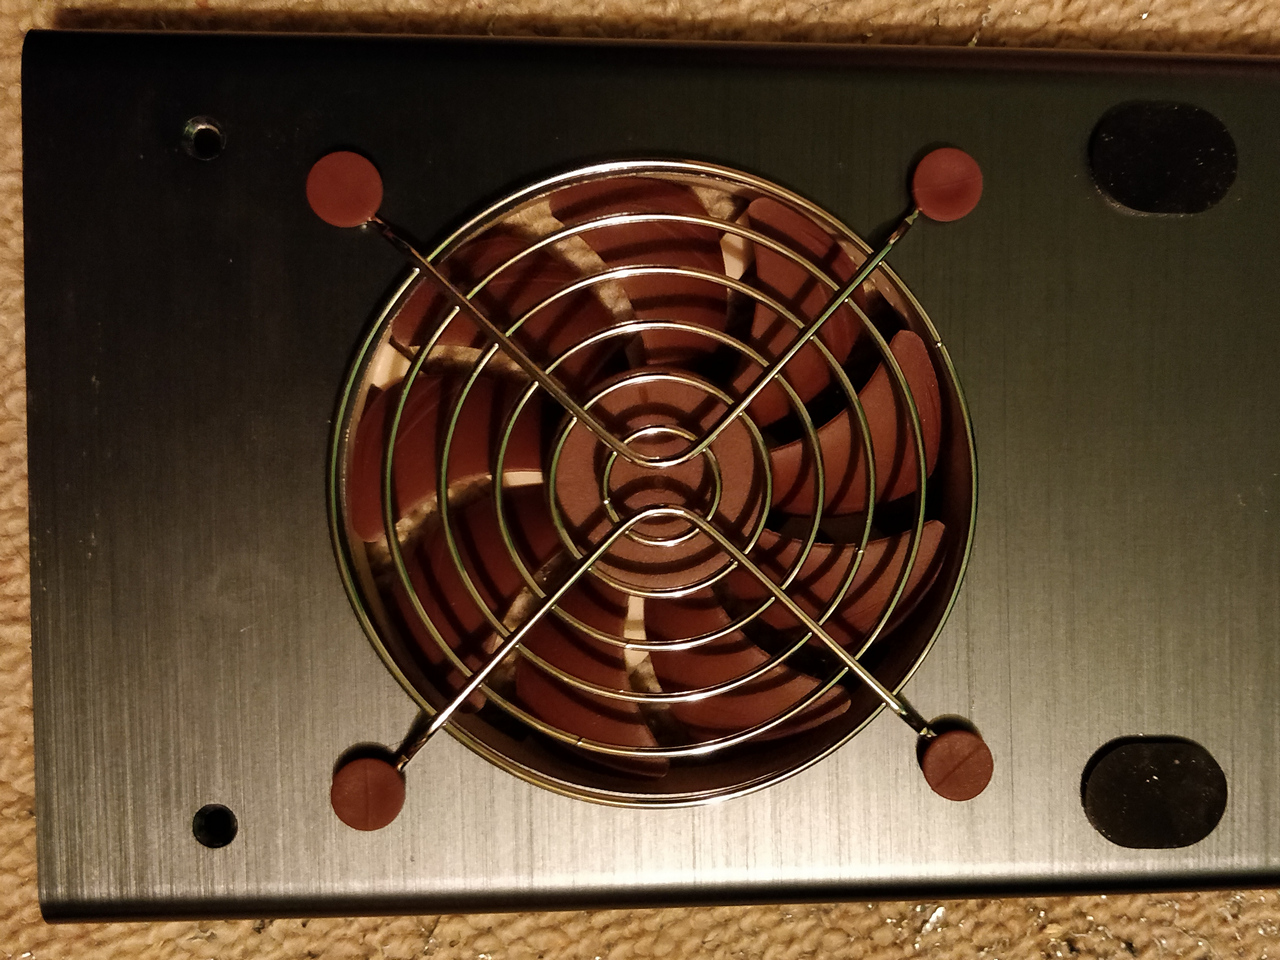
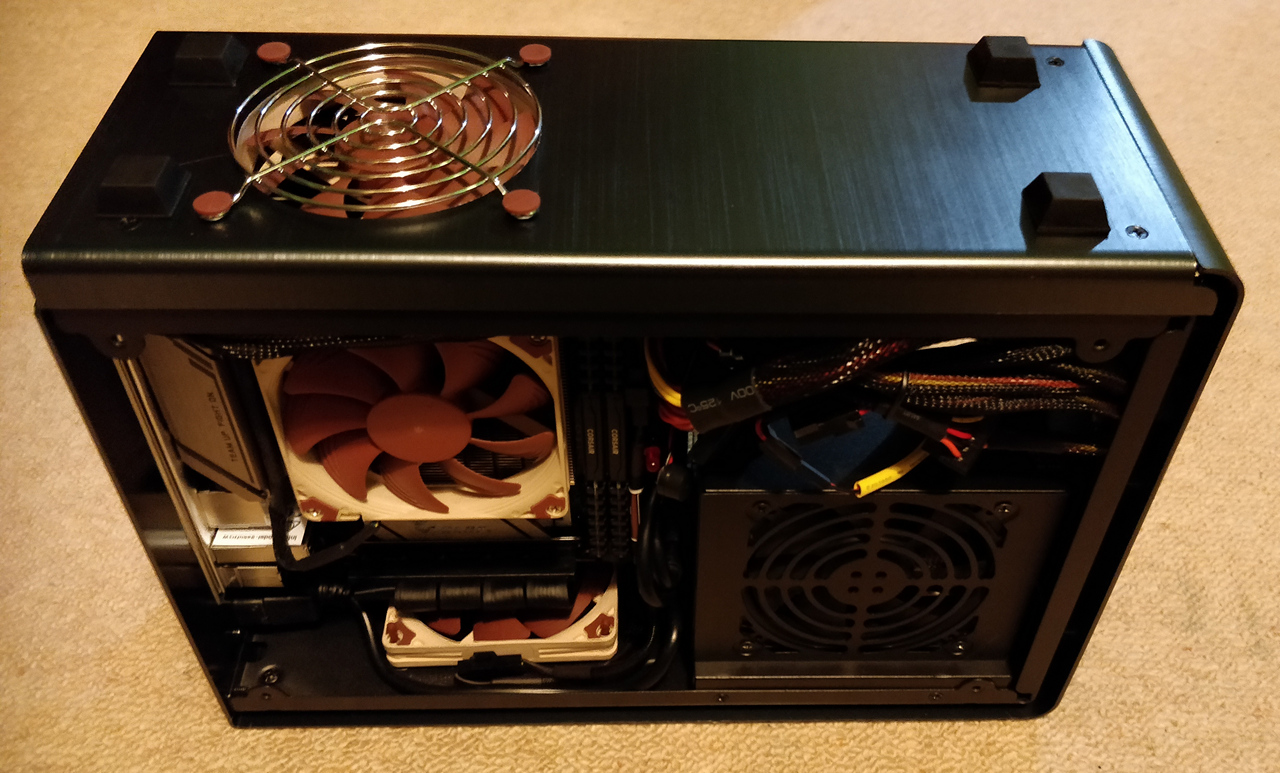
- The only case fan is at the top, blowing out. This is compromised by
- The exhaust of the fan blows directly on to the case top, leaving the air to flow out the narrow sides. This will cut airflow considerably
- The PCIe connector blocks about 70% of the intake of the fan, reducing air flow even more
The CPU and graphics cards generate the most heat, but they have their own fans which transfer the heat from their heatsinks to the air around them.
The problem is that heated air just builds up inside the case and doesn't escape, causing some other piece of silicon to breach its temperature limit and shut down to protect itself.
My solution
I didn't want to part with the case. It was a gift. Instead I had a thought about how to solve the problem:
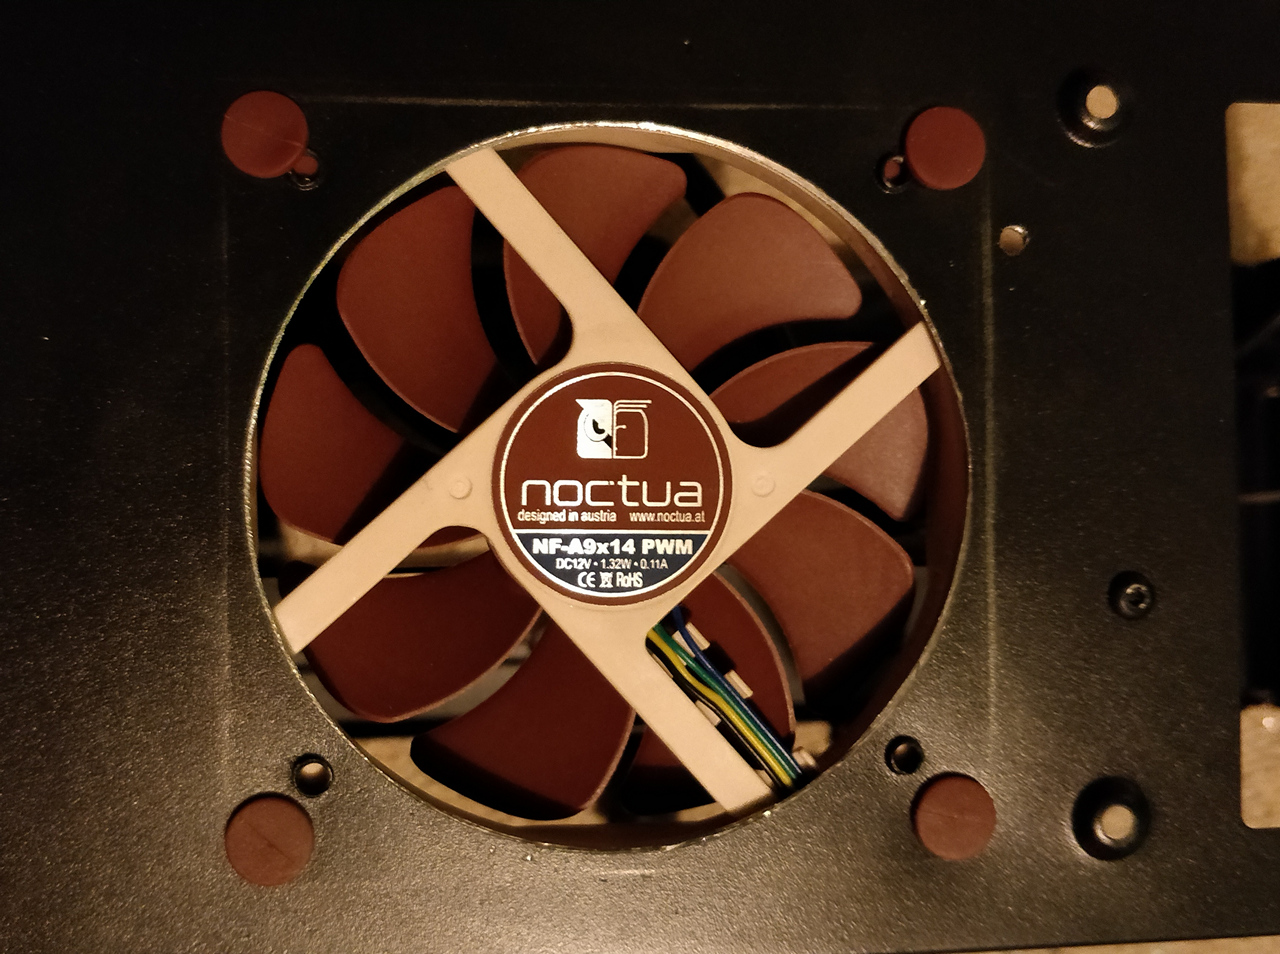
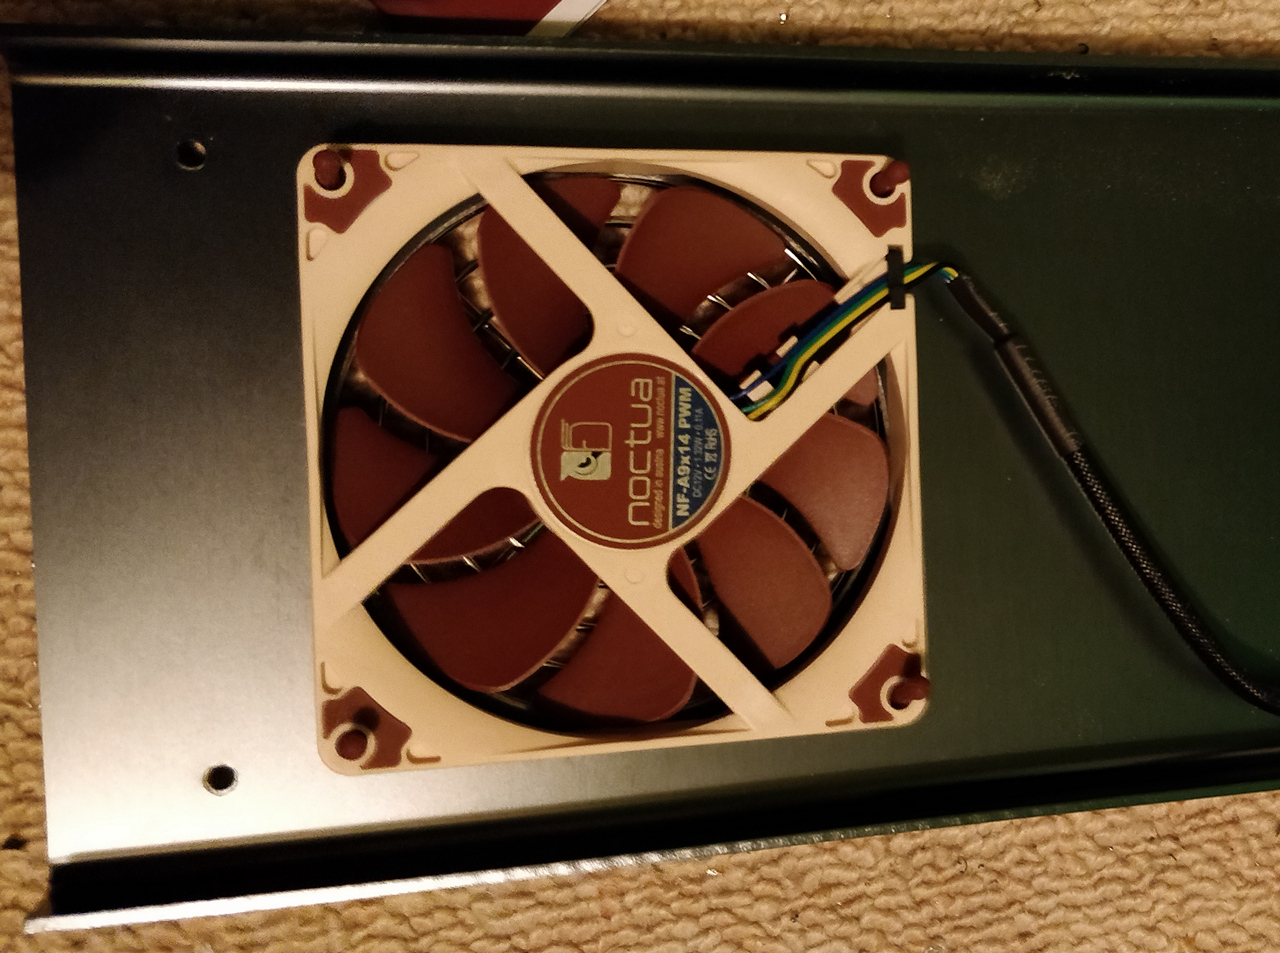
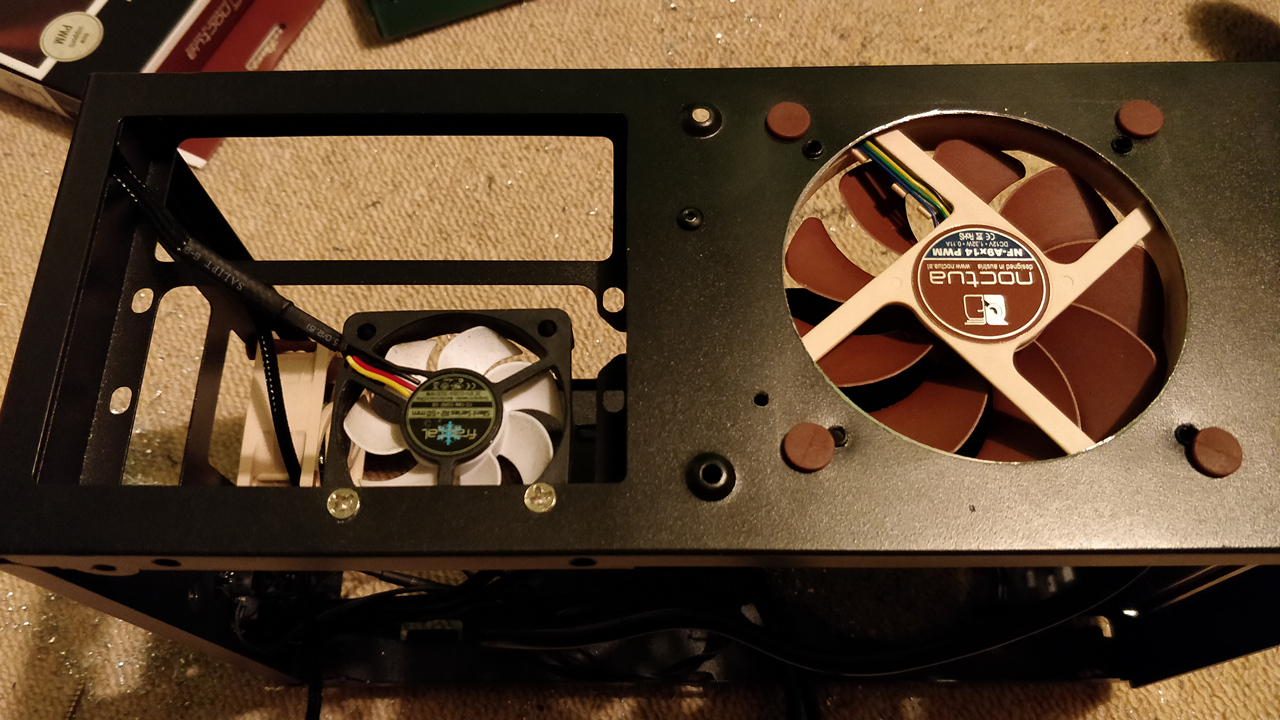
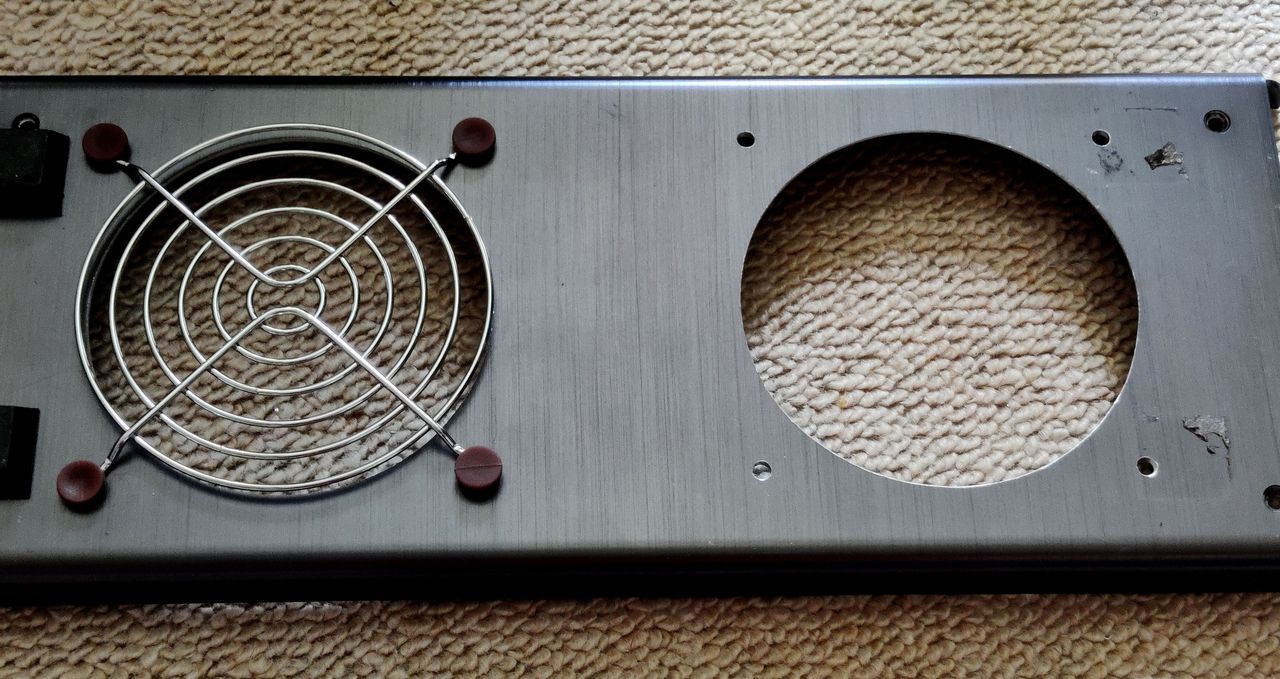
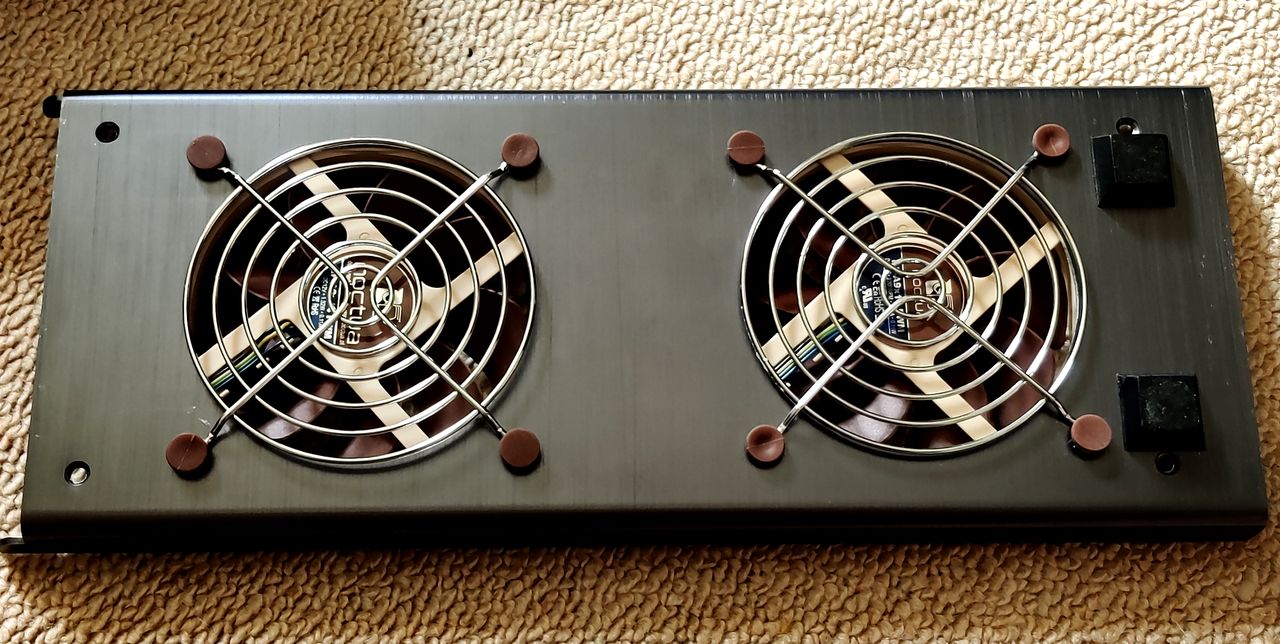
- Top fan - options were to cut a hole in the top to improve airflow (didn't like this idea though), or just install a bigger fan. The Noctua NF-A9x14 is a 14mm fan that fits the height fine, and the 92mm diameter also fits the case fine. This is only a bit bigger, but it will still be an improvement, plus it is a quieter fan anyway.
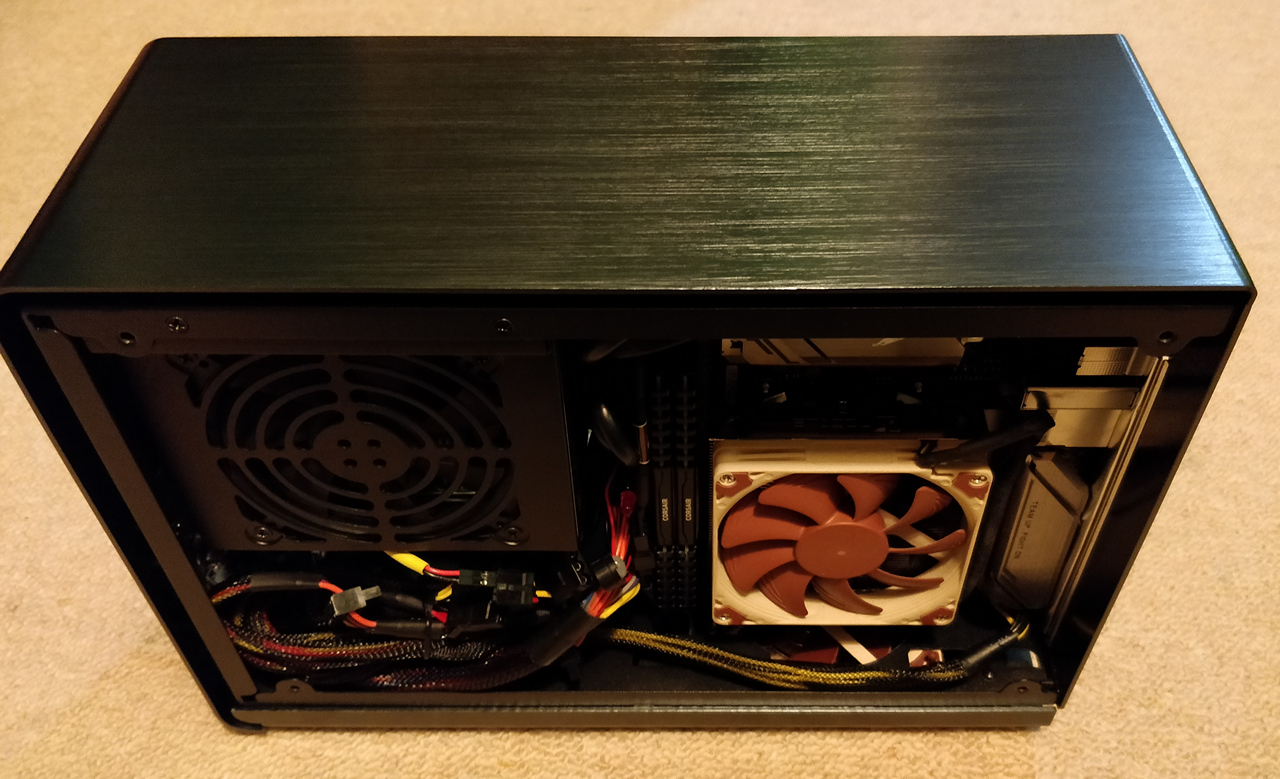
- Bottom fan - improving the top fan wouldn't make a significant difference, the case really needs another fan near the motherboard/GPU.
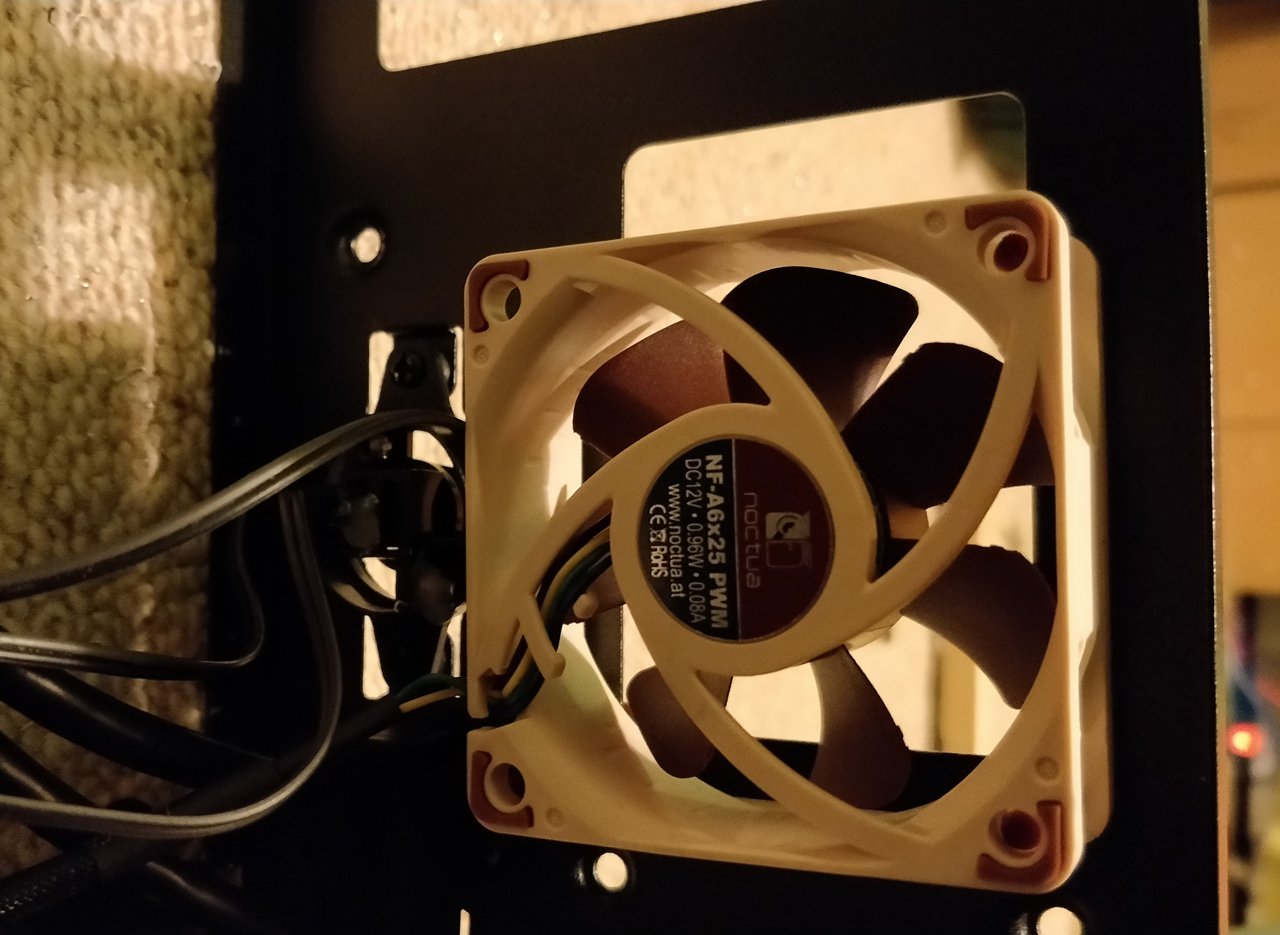
I was not using the SATA tray in the bottom of the case and its height is perfect to fit another 14mm fan in. Therefore, I would install one in the bottom of the case and cut a hole in the bottom to allow the air to flow. To allow air flow out the bottom, I'd raise the case height slightly using thicker stick on feet. - Front fan - to blow some air over the GPU and motherboard, there was a hole that I could easily mount a 60mm fan in, so I added a Noctua NF-A6x25.
- PSU fan - to encourage any heat generated in the PSU to escape from the case top, I added a 40mm fan at the top of the case, which is the rear of the SFX PSU.
The third and fourth mods are perhaps not necessary, but easy to include. I had the 40mm fan anyway, and adding the Noctua 60mm fan to my order was an excuse for free delivery :-)
Why Noctua? Well for 92mm fans slim profile fans, there isn't much choice. They are also good performing fans, come with rubber vibration free mounts and 4 pin PWM fan splitters, which is really useful since the Gigabyte B450 I AORUS only has one system fan header.
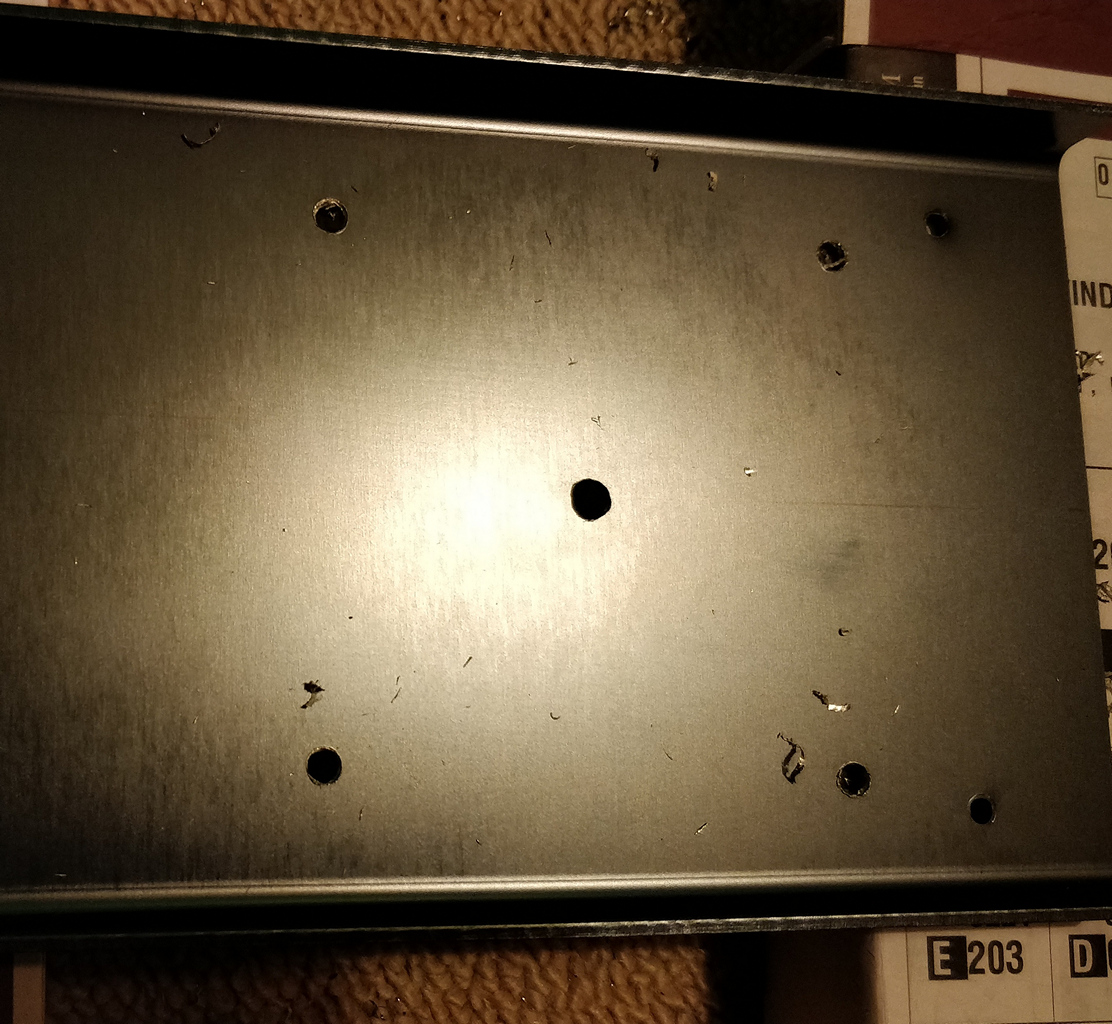
Cutting holes for these fans was a challenge. Whilst the case is advertised as aluminium, only the outer case is, the frame is steel (as it's magnetic), and feels like some hard steel too!
Cutting large circles can be difficult. The best circles I've ever cut was done using a hole saw. These are toothed circular saw that fit into a normal drill.
They're mainly meant for wood but may be used on aluminium or thin steel if done carefully. They tend to need some power too so for this job I used the mains powered drill rather than the battery operated one.
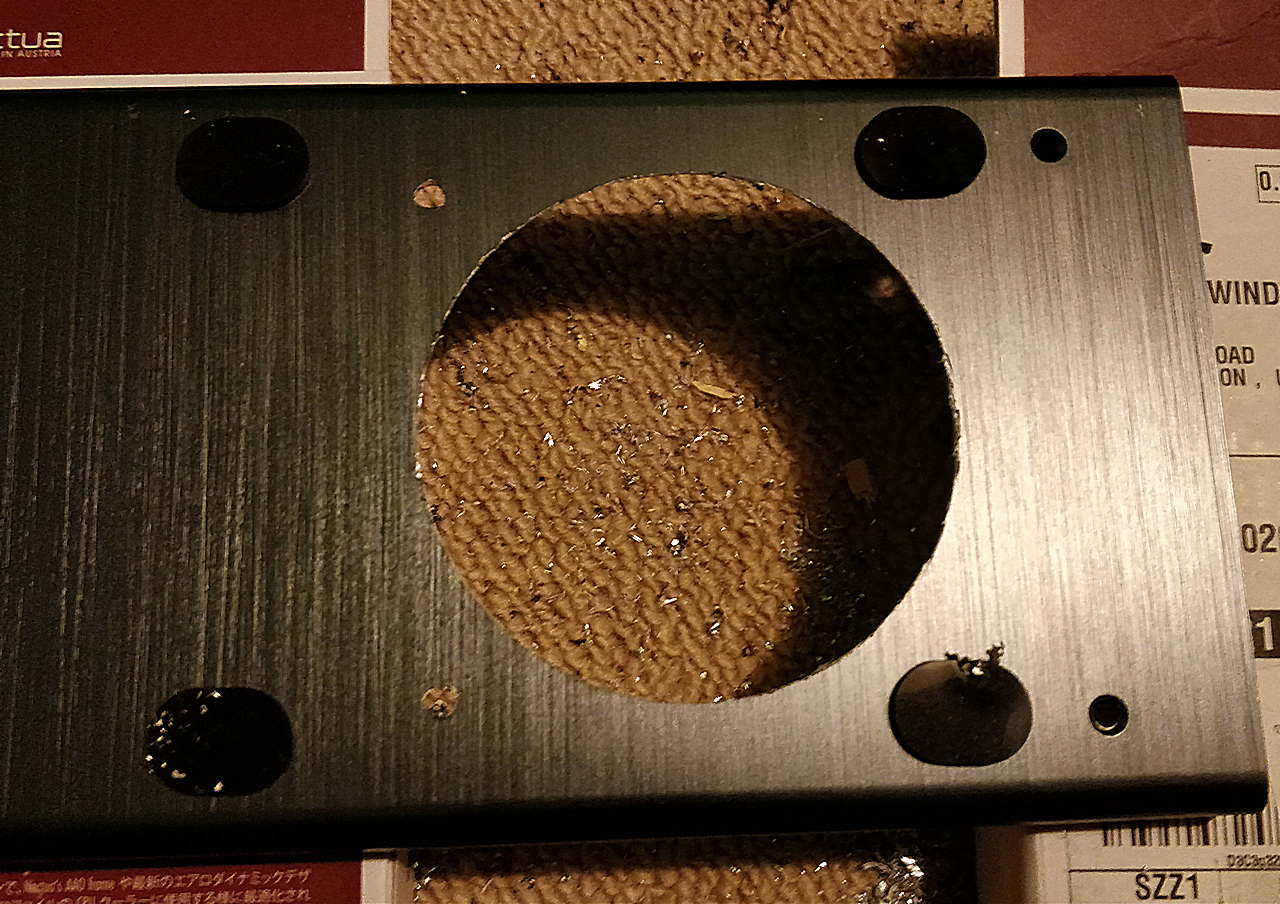
Cutting the hole is easy if you don't have to widen an existing hole, but unfortunately I wanted to widen the 80mm hole already there for the top fan, and widen some oblong hole in the bottom for the other 92mm fan to push air unimpeded.
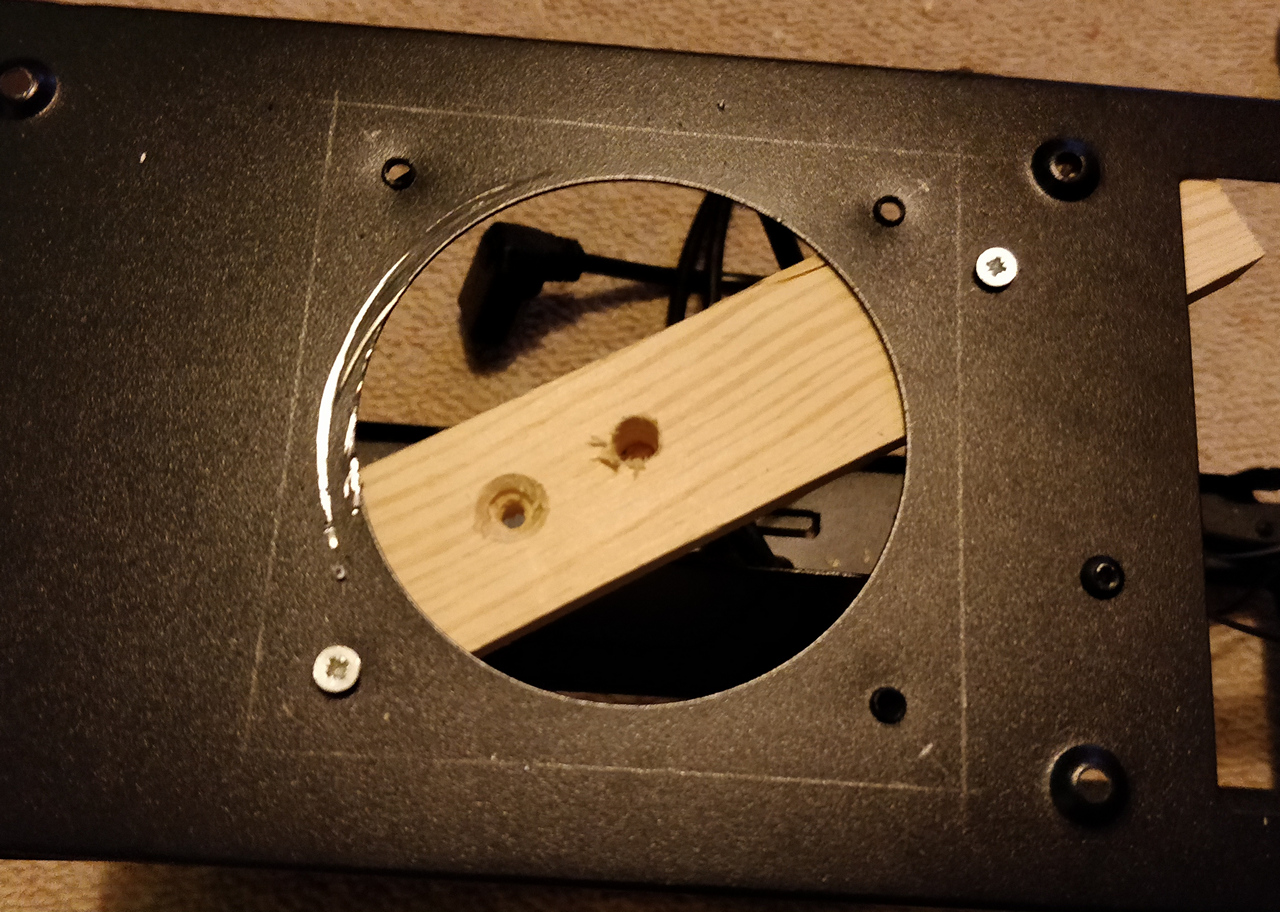
I solved this problem by using a piece of old wood from a shelf bracket I didn't need. By using existing, or drilling new holes, I could mount the piece of wood so that it crosses the centre of where I need to drill the hole.
As my wood was pine though, it tends to split under pressure if the temporary screw holes you make are too close to the edge of the wood. This happened to me when enlarging the top hole, and as a result the enlarged hole ended up slightly off centre. Fortunately, it wasn't too much of a problem as there was still room for the fan and since I hadn't drilled the screw holes yet, I could offset those by the same amount so the fan would still sit centre to the hole.
Drilling the aluminium case bottom was easier because it was just drilling a new hole. I drilled from the inside of the case bottom as it tends to end up neater.
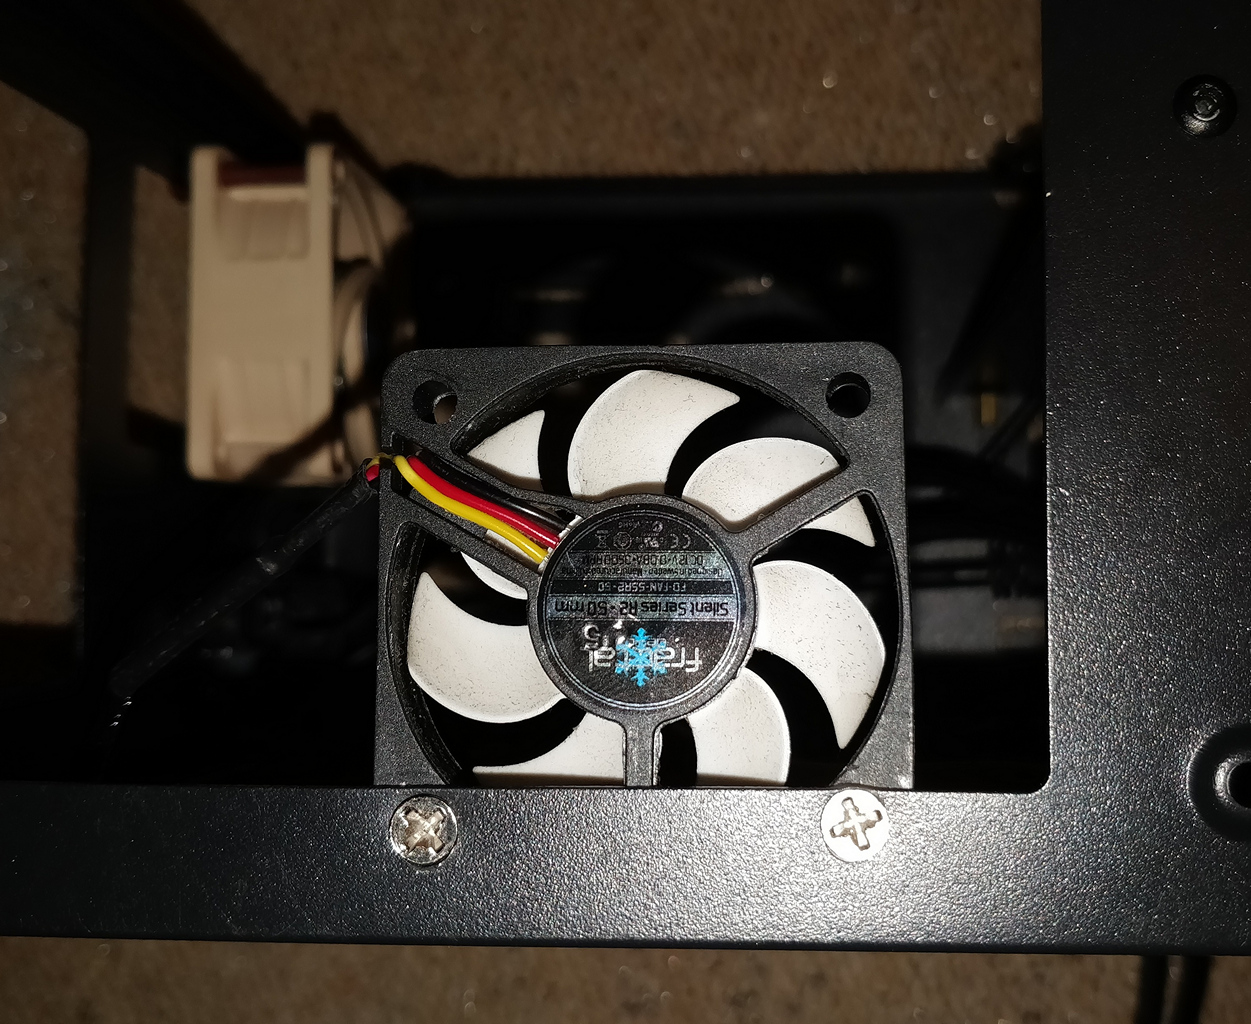
For the 60mm fan, I just used the space available at the front and only drilled three holes to mount the fan (leaving one hole empty). Likewise, the 40mm fan I drilled only two holes to mount the fan.
Initially I had the bottom fan blowing in, top fan blowing out (like the default configuration) and front fan blowing in. Whilst this arrangement did improve my runtime, I still got an overheating shut down.
Reversing the bottom fan so it was also blowing out of the case solved the problem though. It just goes to show that the problem with small cases is really just getting the heat out. With two 92mm fans blowing hot air out through the top and bottom of the case, I'm now running reliably with no overheating.
The whole mod took most of a day, and I'm pretty sure it voided my warranty and dropped the resale value, so beware. I'm not intending to return or sell the case for some time though, so felt these modifications would be worthwhile, and it has proven so!
Below are some pictures of the work in progress and the final result.
Checking the fan height will fit in the bottom of the case

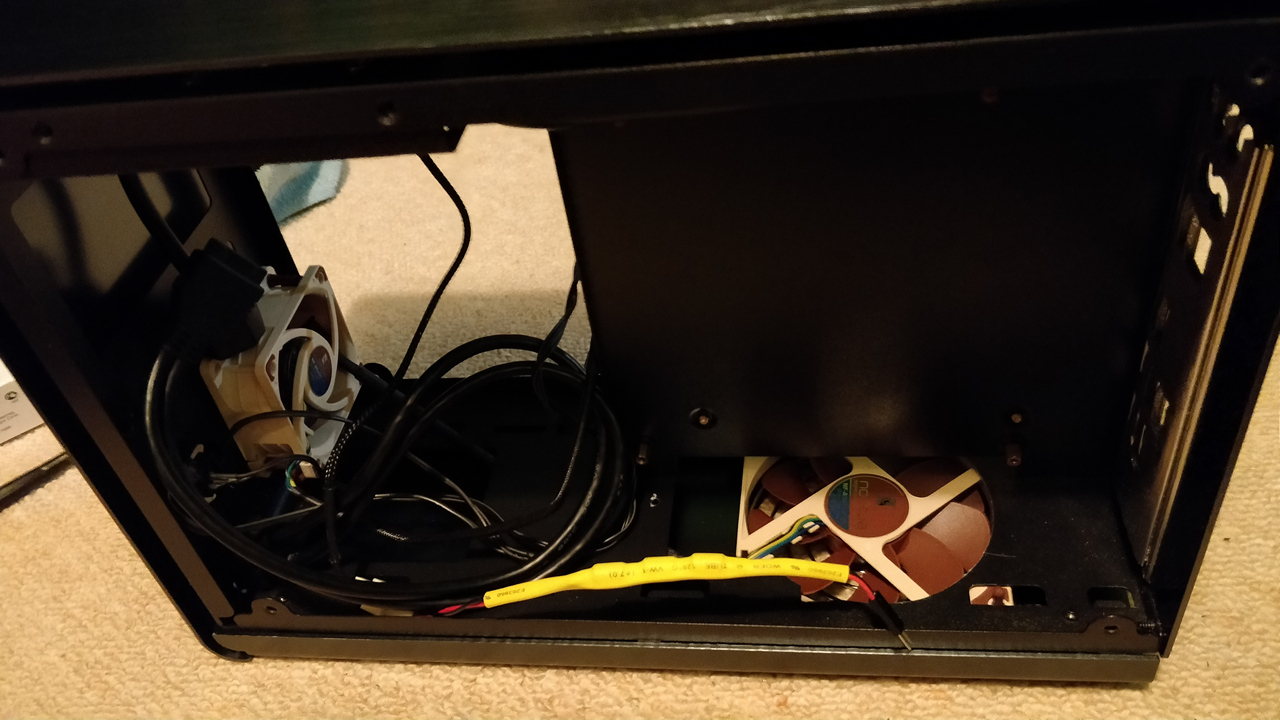
The existing 80mm fan, which has to spin really fast (therefore noisy) to make any difference
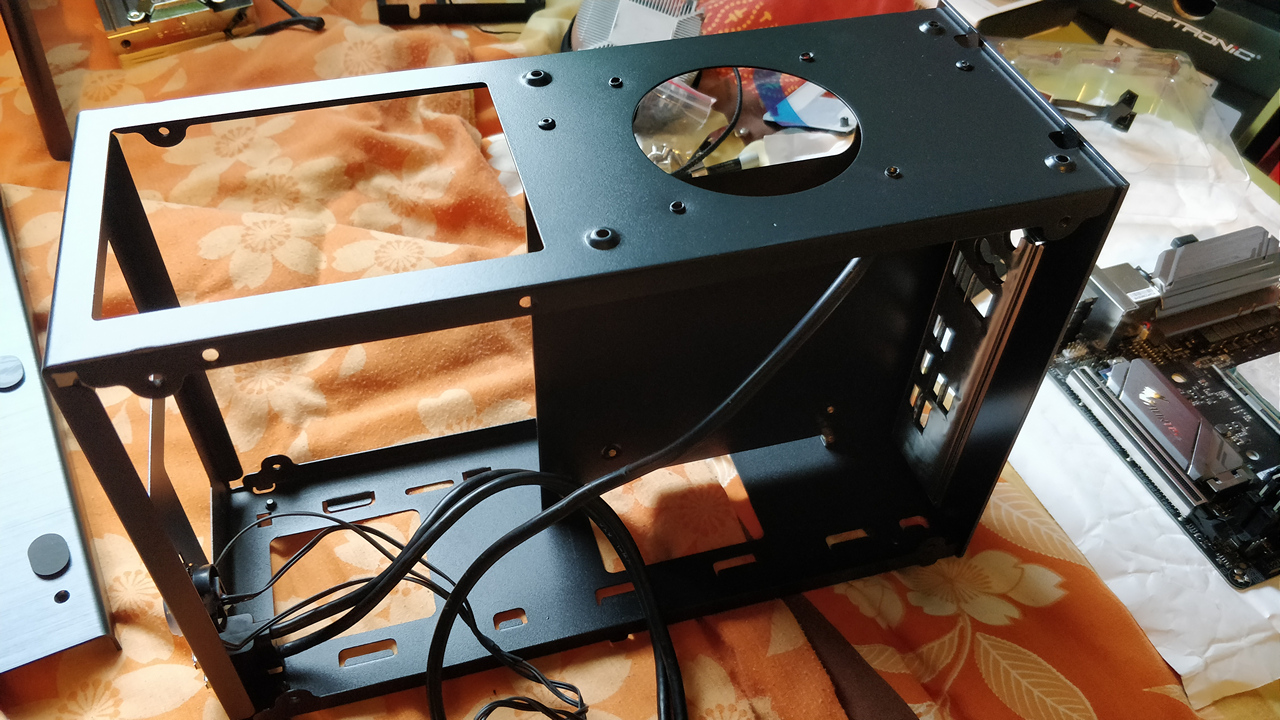
The naked case frame before cutting
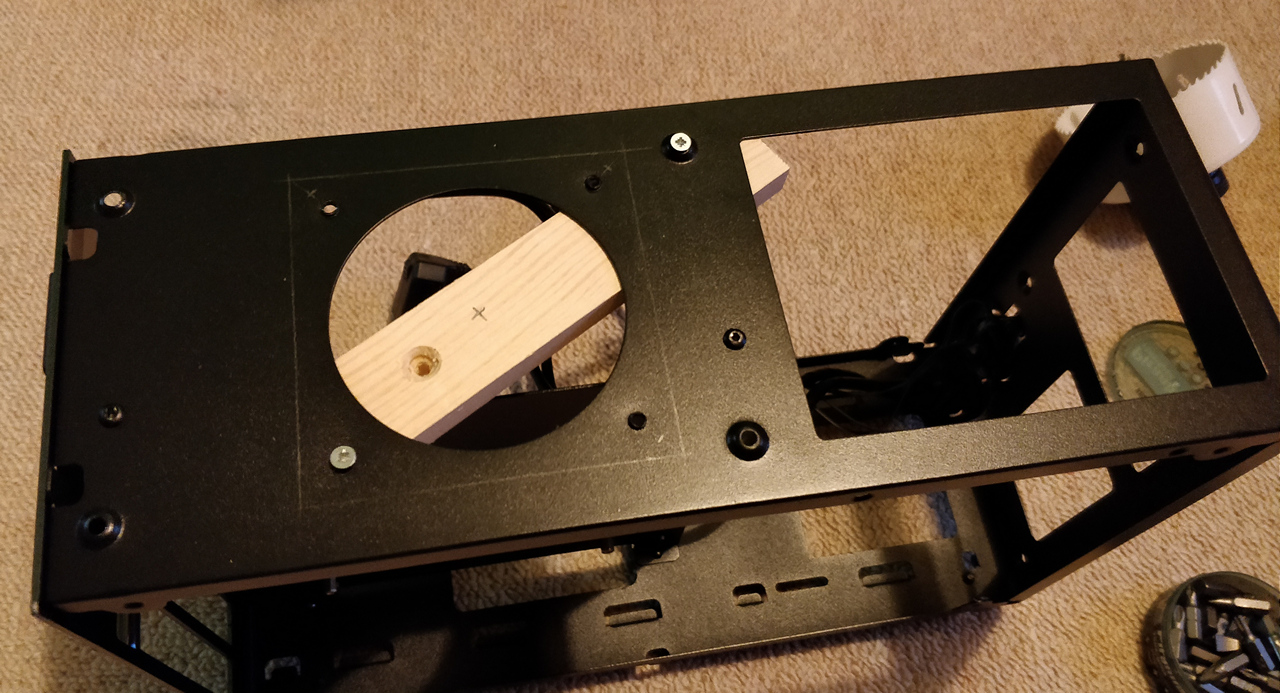
Installing a piece of pine wood to guide the hole saw
Re-installing the wood because it split - top right screw I drilled a new hole for
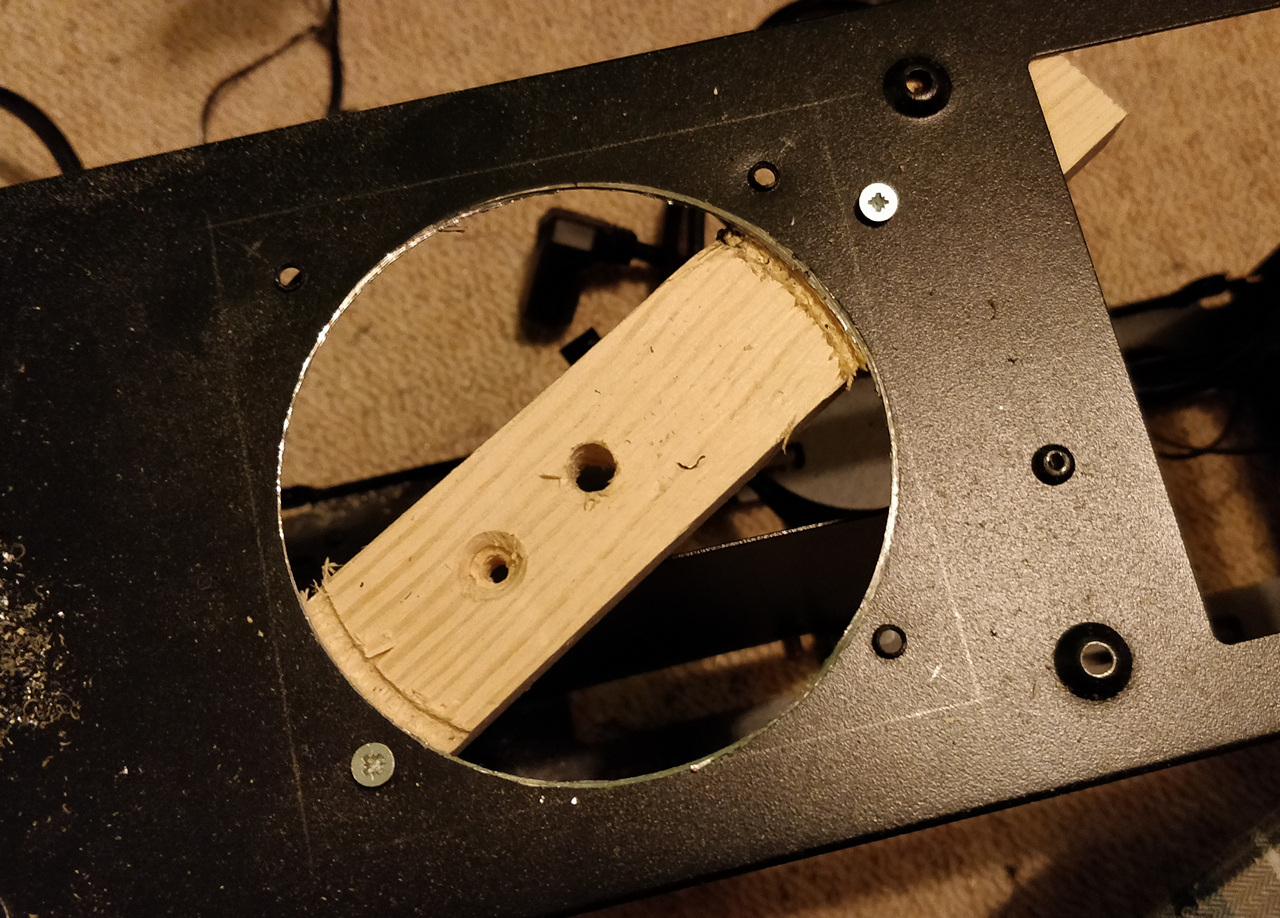
The 92mm hole after cutting
Cutting the bottom fan. Holes drilled for mounting the wood as a guide again. You can see where I tried to make the hole without mounting the
wood properly, and failed
Bottom fan hole after cutting
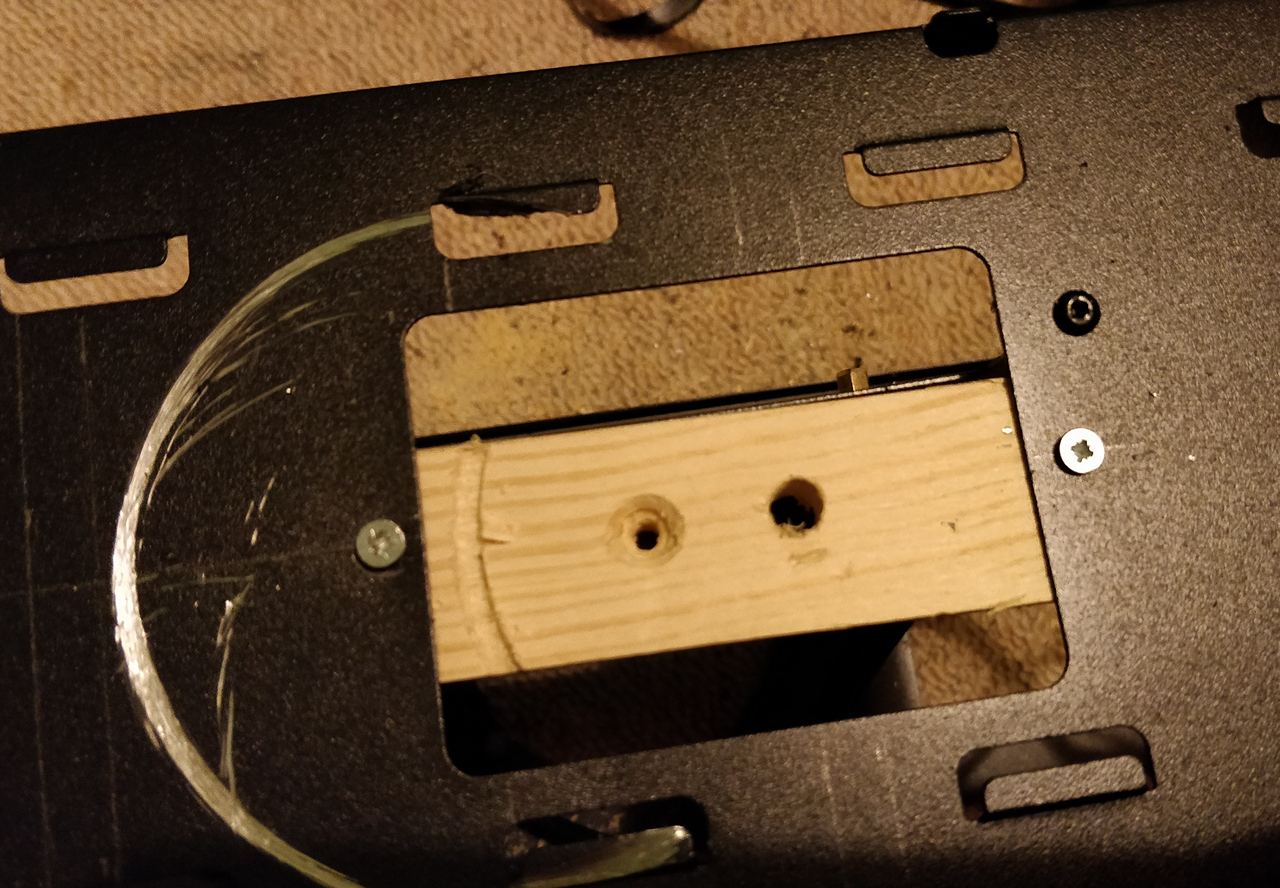
Drilling guide hole for the bottom panel hole
Bottom panel hole after drilling
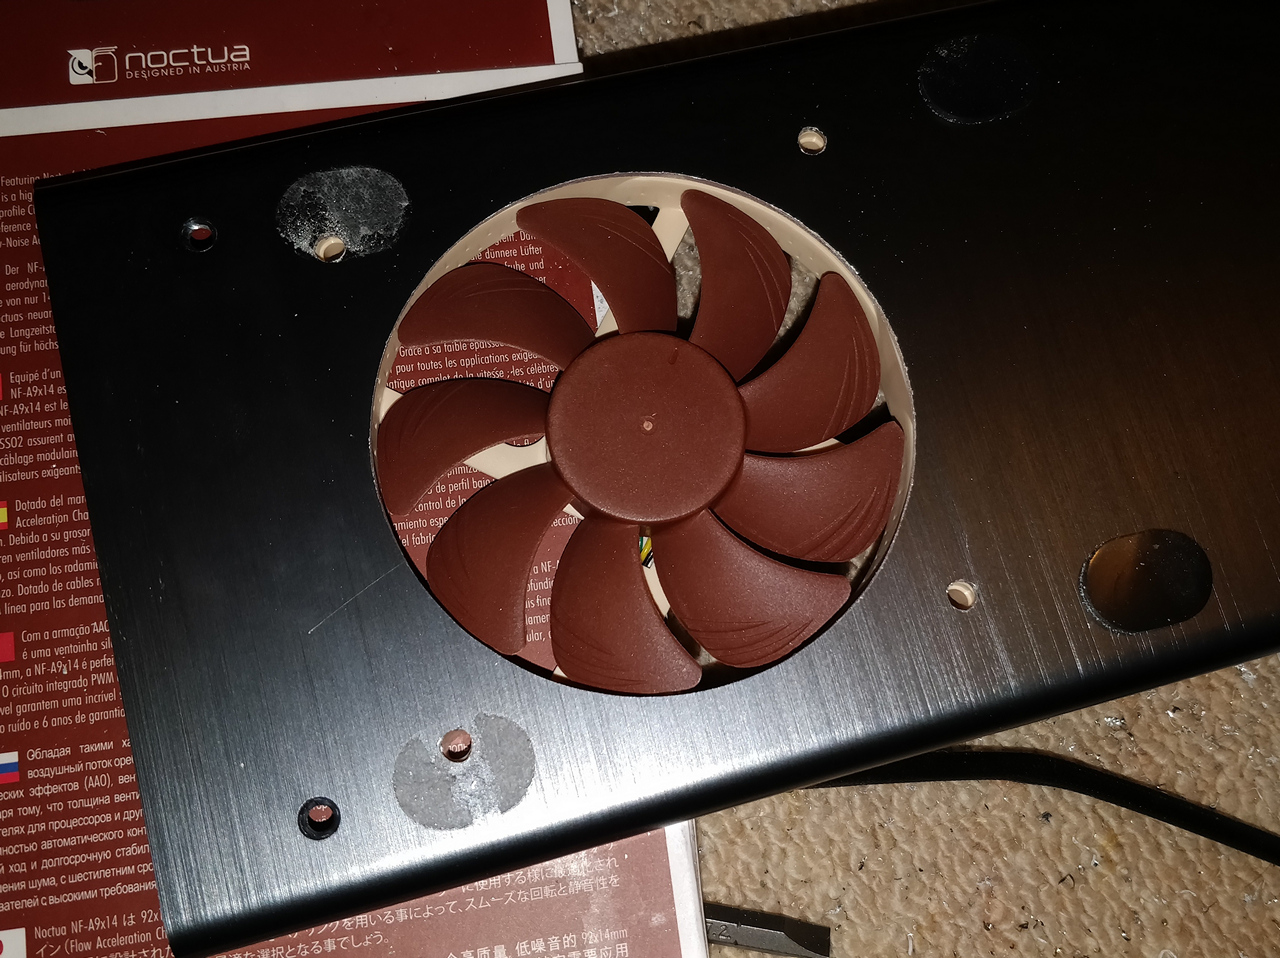
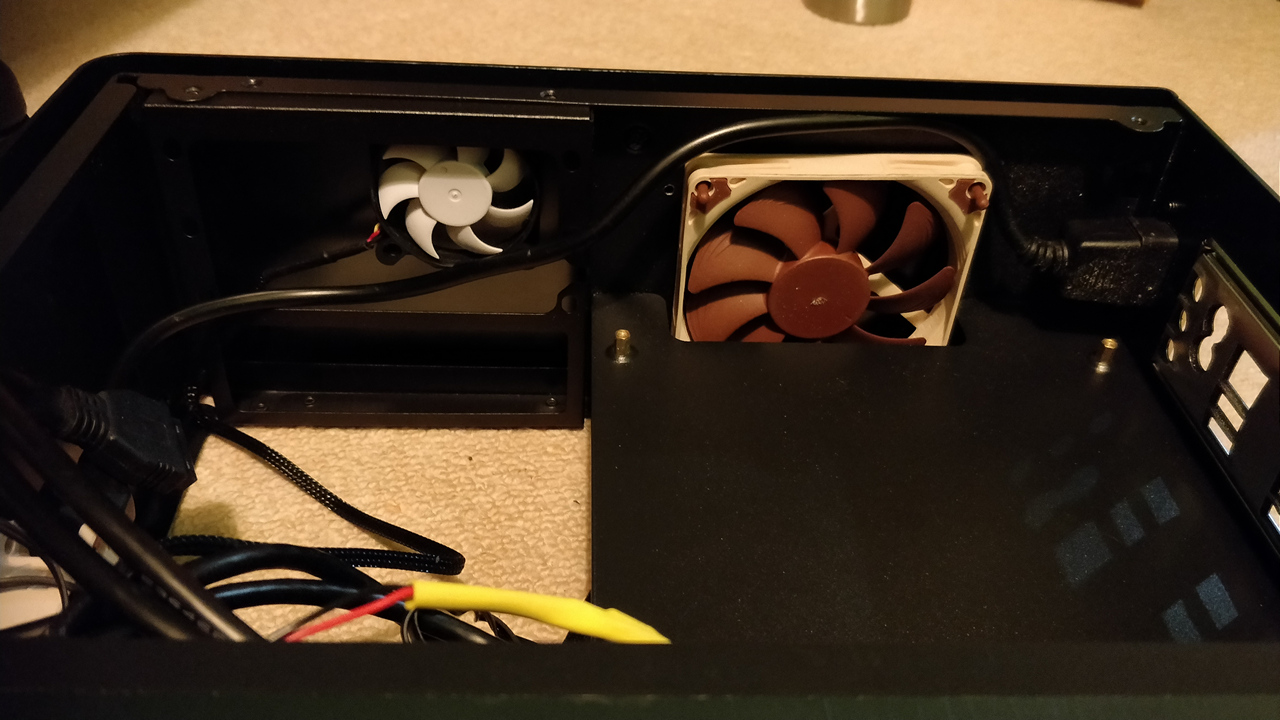
Fan nicely sits in the hole
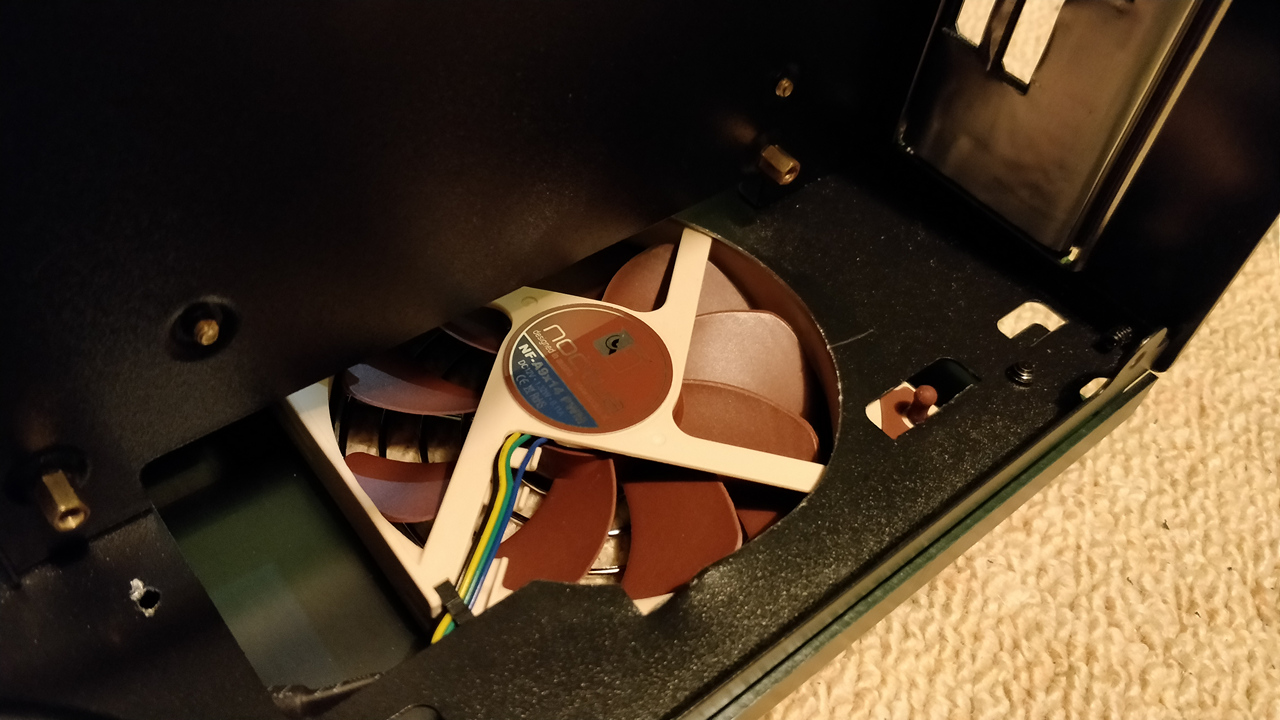
Top hole with mounted fan
Bottom hole with mounted fan (note I reversed the direction later)
Bottom hole with mounted fan (note I reversed the direction later) - inside view
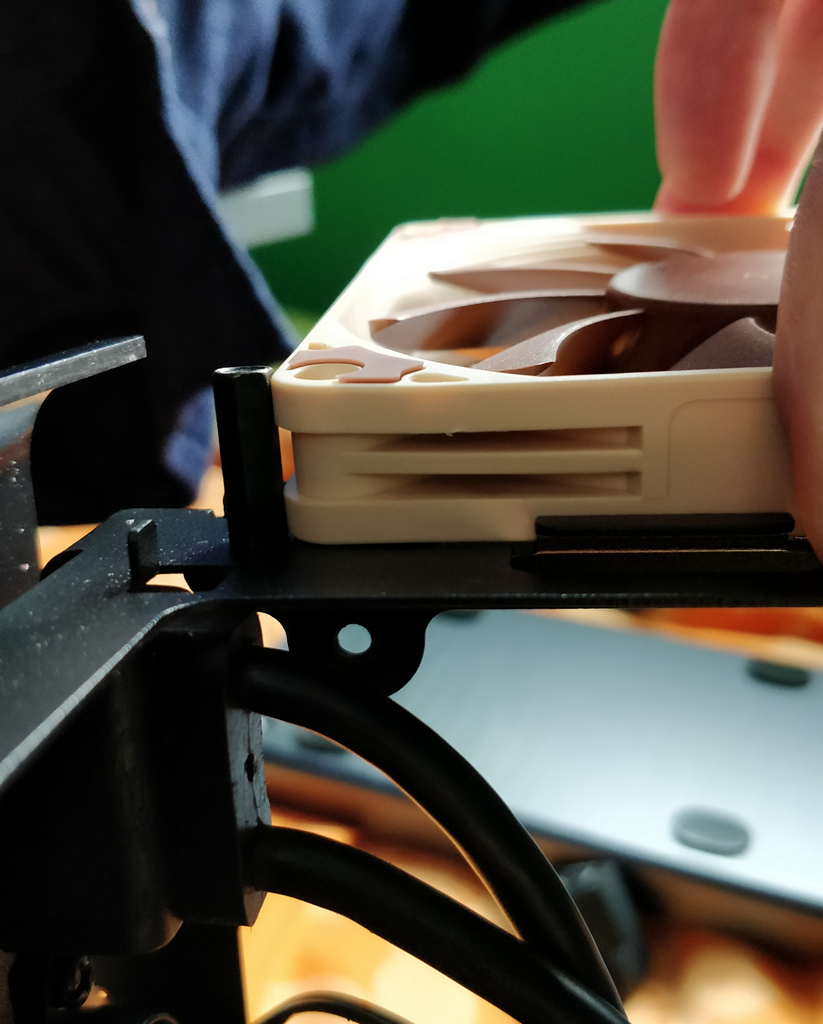
60mm fan mounted
60mm fan mounted - inside view
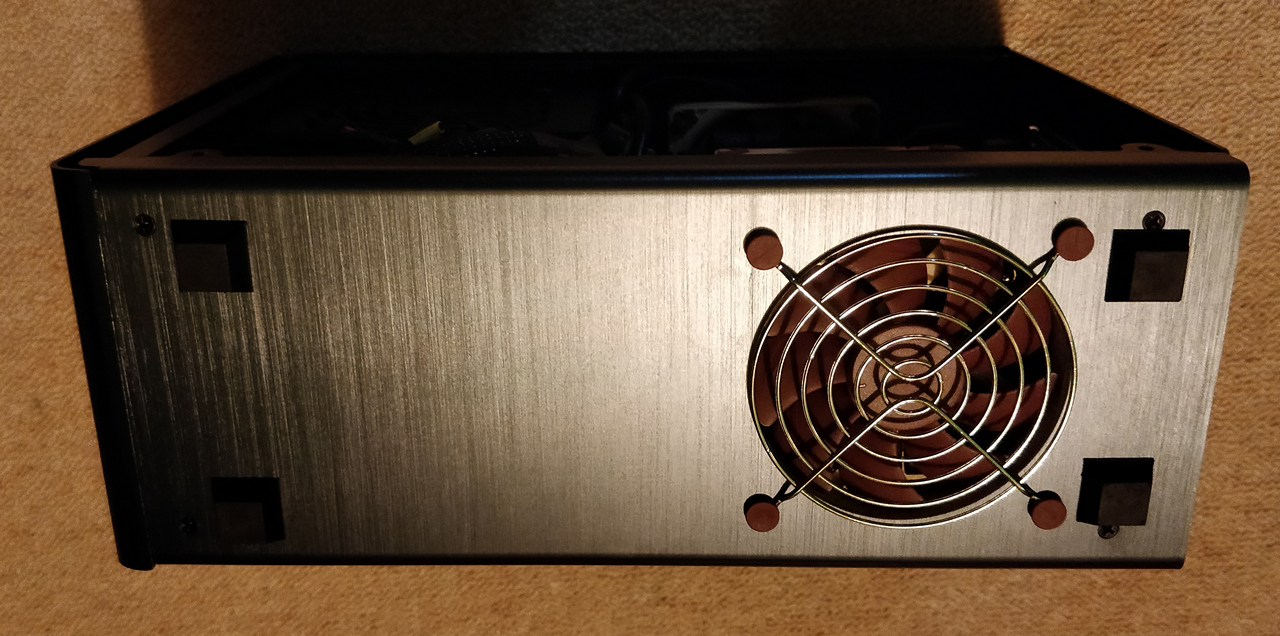
40mm fan mounted
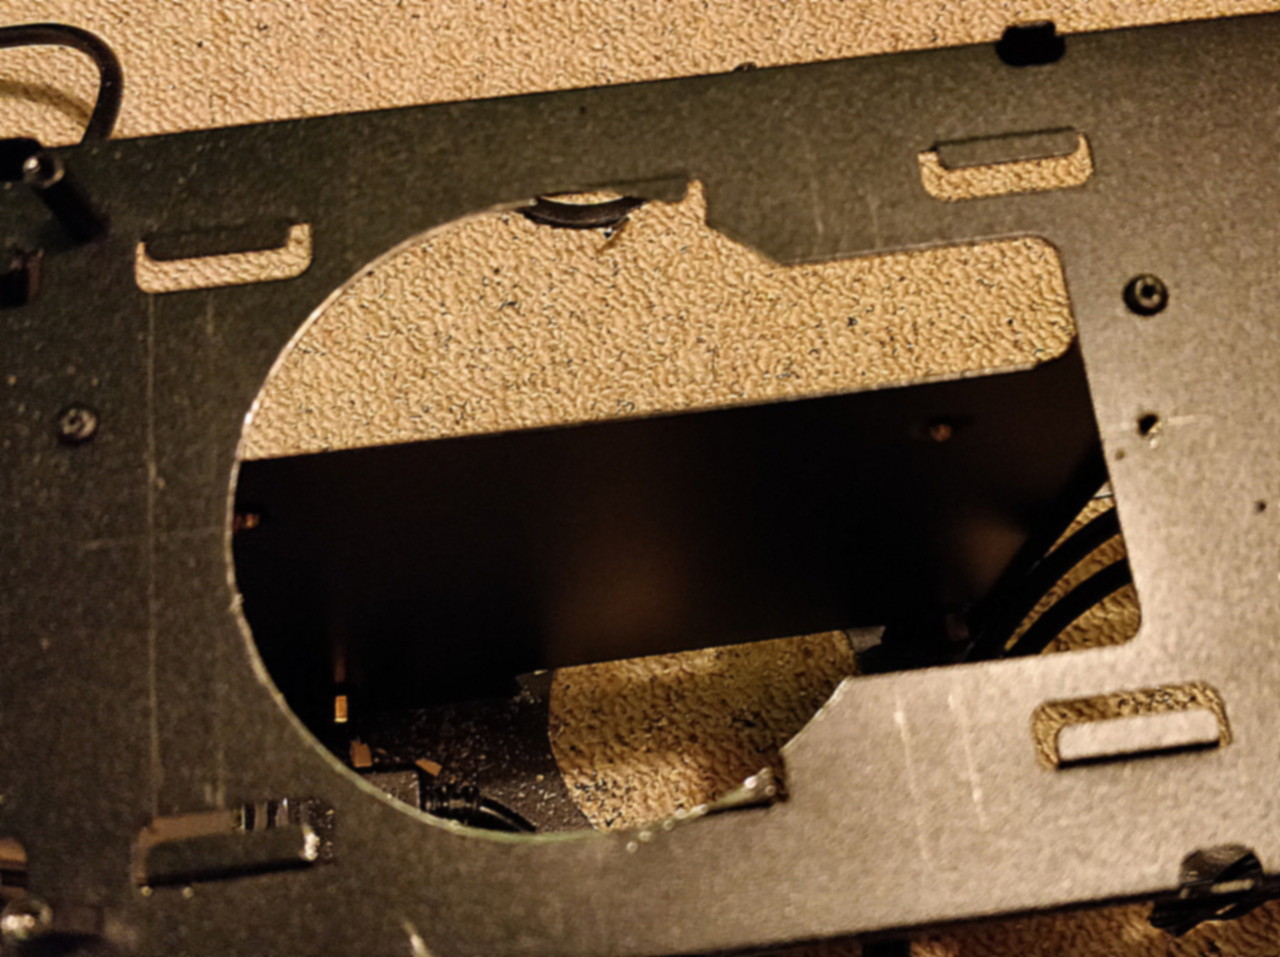
View of top frame
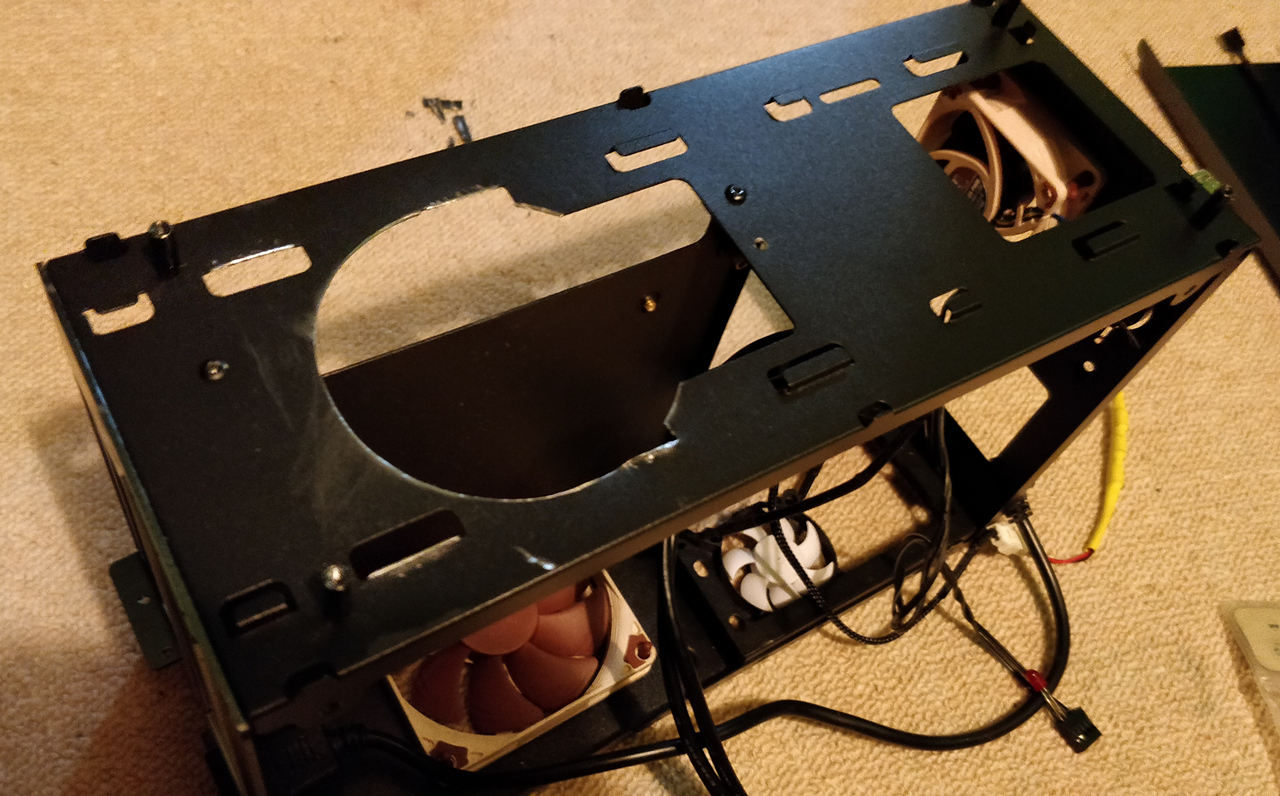
View of bottom frame
View of bottom frame after mounting the outer panel
View of case after installing back the outer panels
View of case after installing back the outer panels
View of case after installing back the outer panels
View of the case bottom, showing new fan hole
View of the case bottom, graphics card side, showing new fan hole, note the larger feet I installed
View of the case bottom, motherboard side, showing new fan hole, note the larger feet I installed
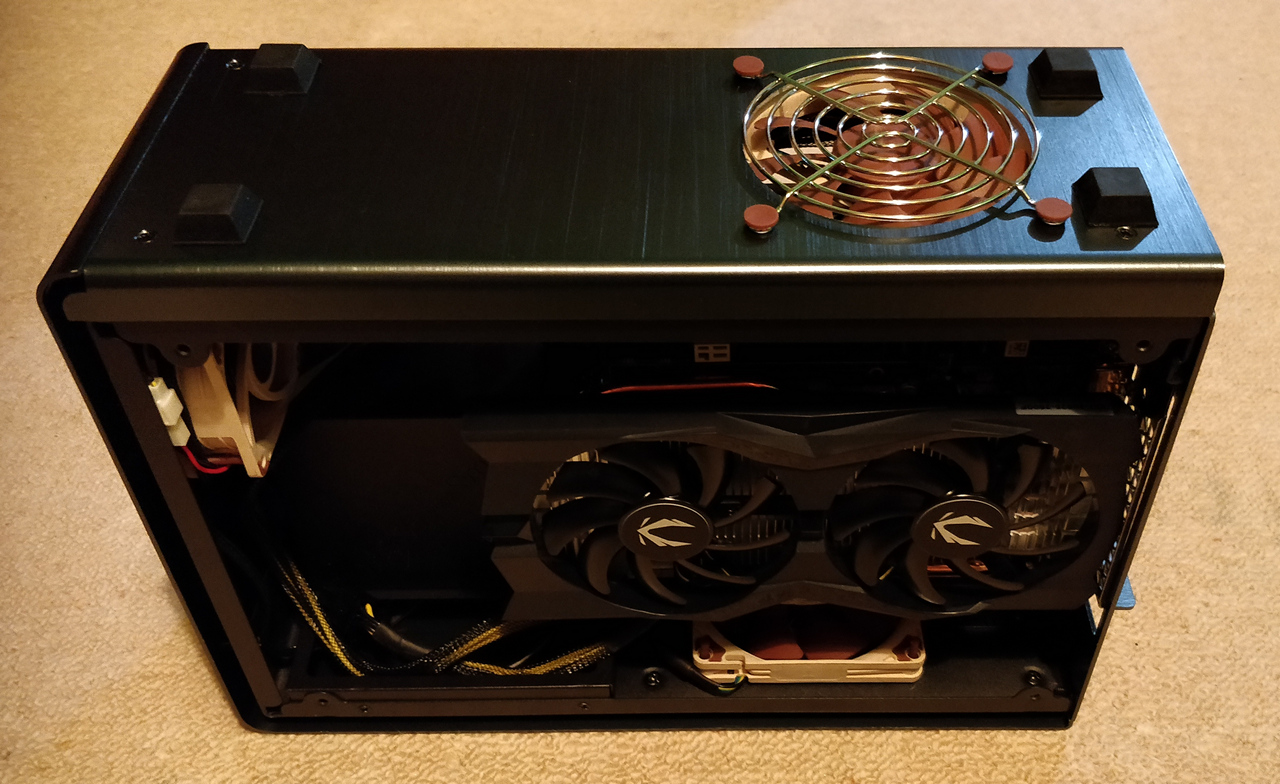
View of case, motherboard side
View of case, graphics card side
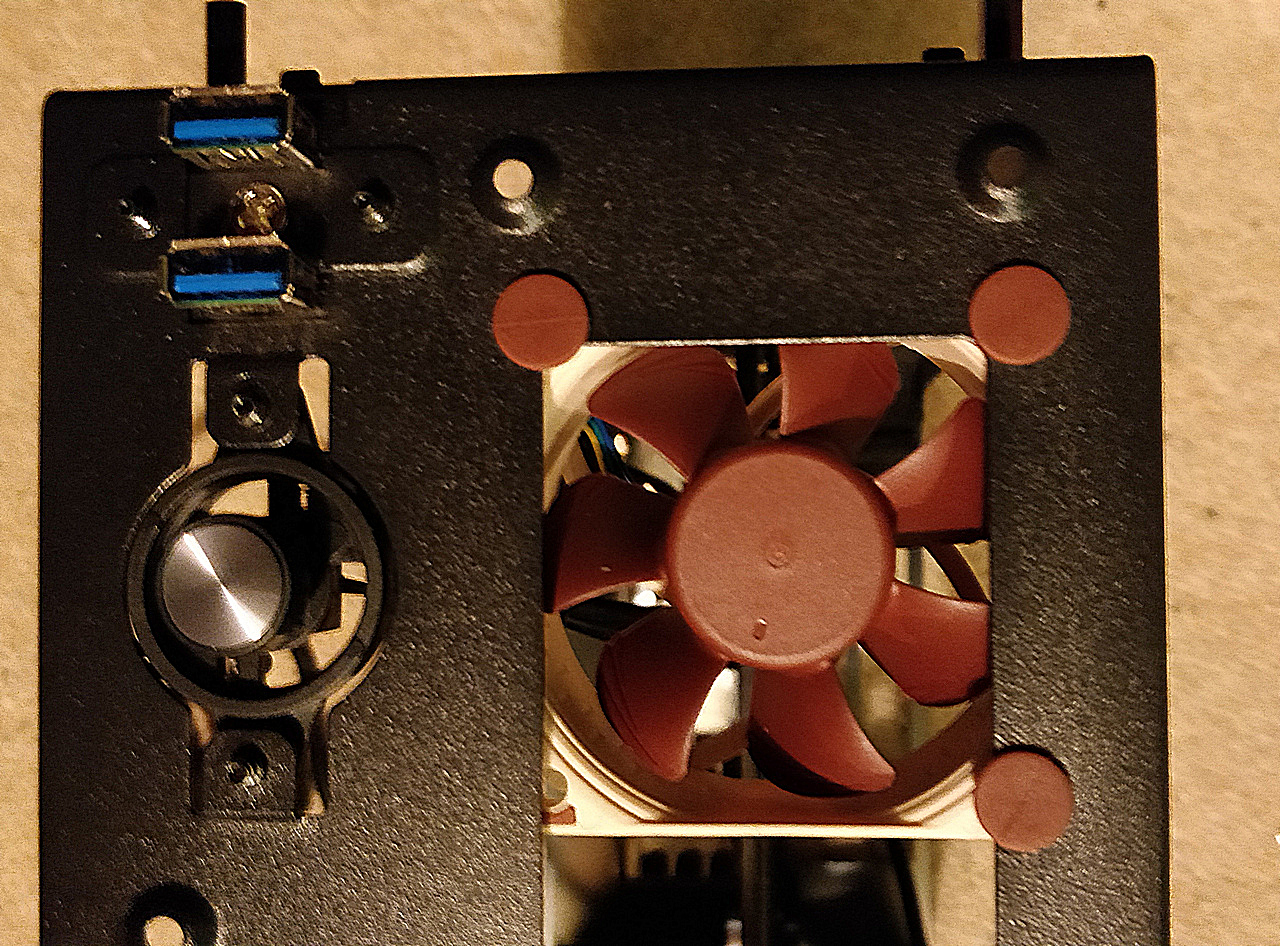
View of PCIe connector (still mostly obscuring that fan)
New improvements (2024)
Since my initial build, the processor has now been changed to an AMD Ryzen 5900x and the Graphics Card upgraded to an AMD Radeon RX 6700 XT (one of very few 2-slot compatible GPU options these days).
Whilst the system worked, thermals were uncomfortable once again and even the front of the case felt uncomfortably hot to touch after an hour of gaming. So, I made these further improvements:
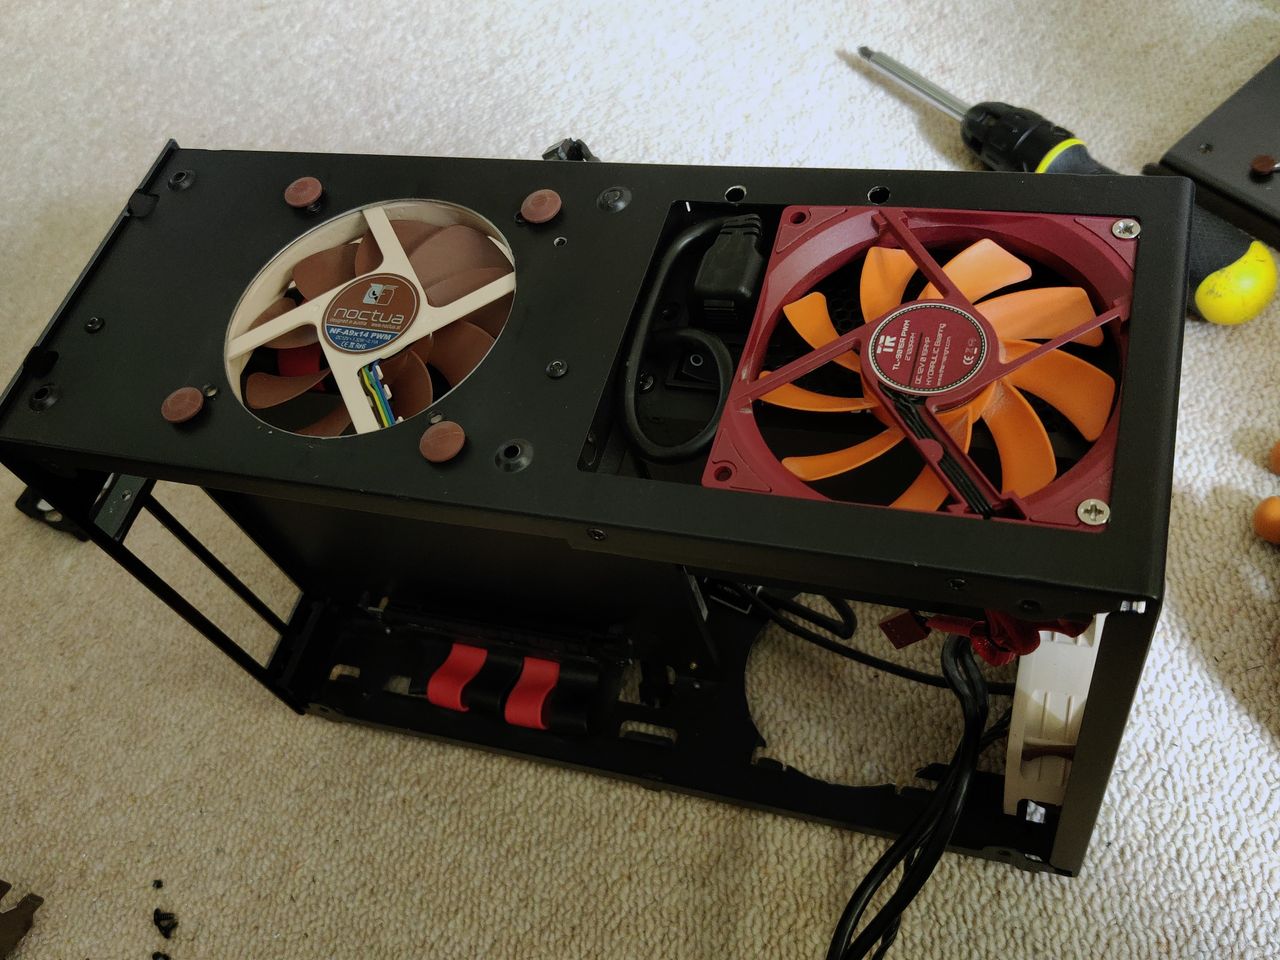
- An additional two fans were added as exhausts - one below and one above.
- PSU was reversed so the intake fan was no longer directly under the GPU
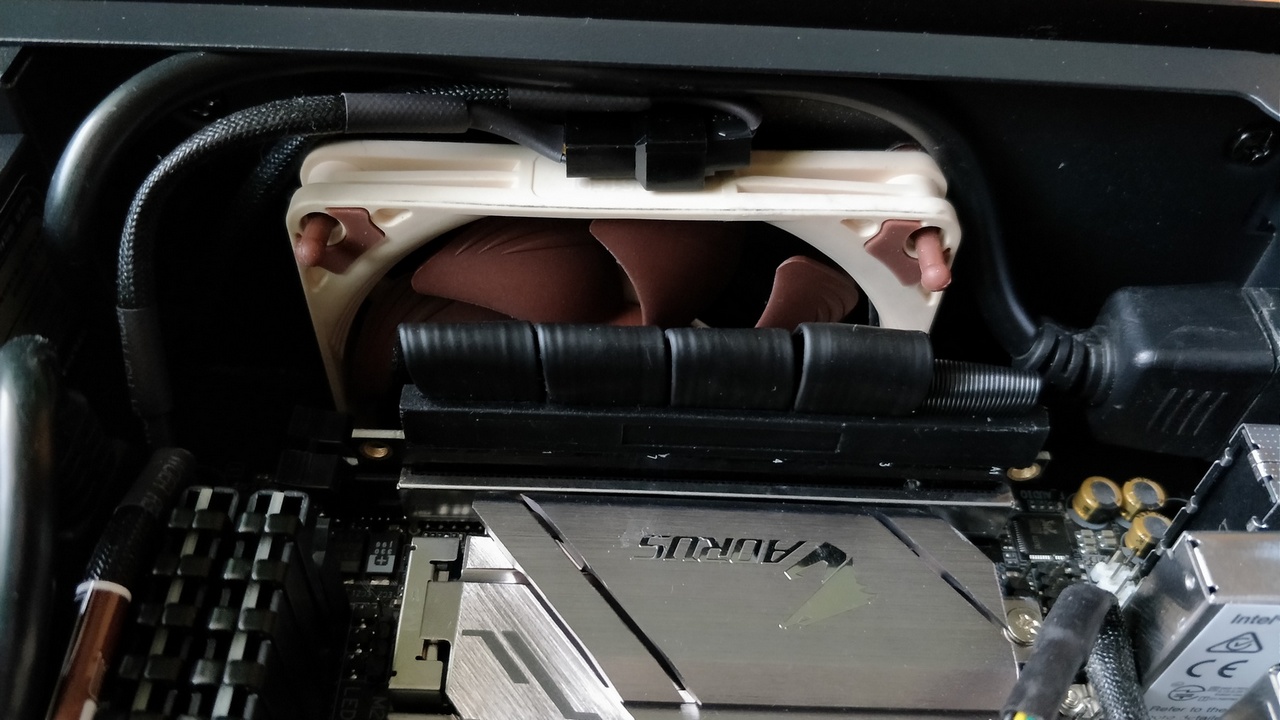
- CPU heatsink fan changed and fan duct added
Once again, another day was spent taking out all components and drilling holes in the case with a hole saw. A new 92mm Noctua AF9x14 was added, and a Noctua NF-A9x14 HS-PWM chromax.black replaced the Thermalright fan for the CPU since the Thermalright started making a knocking sound. The Thermalright fan is perfectly fine when running horizontal for now, so I moved it to being an exhaust fan above the PSU.
I did the maths and found that running the five case fans from the single motherboard header is possible since they are all still draw less than 1 amp.
Drilling two holes in the bottom was not too tricky and that extra exhaust helps make a difference.
Drilling the extra hole at the bottom. Yes, feet had to be moved.
New fan mounted in place.
The exhaust fan and PSU rotation needed some work too. Here the PSU was rotated 180 degrees so that the intake is now on the right hand side of the case (no longer blocked by the longer GPU). The mains cable makes a just about comfortable bend to do it.
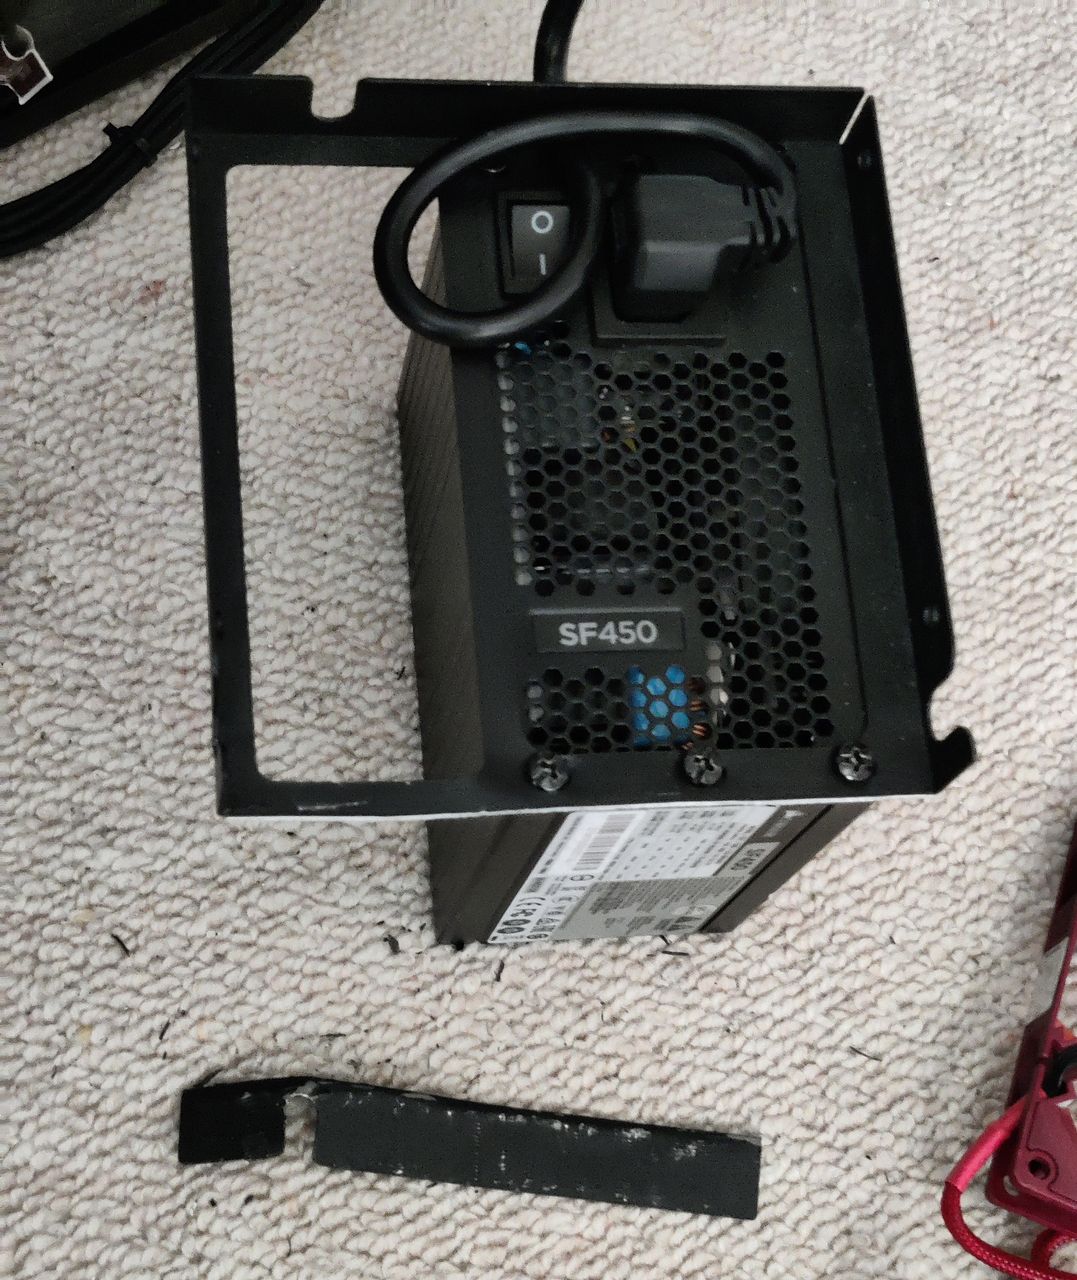
Modified PSU orientation and bracket.
I also had to break off some of the metal bracket so the fan would sit above the PSU outtake. This was done by bending back and forth many times until the side broke away, followed by a little sanding so there's no razor sharp edge.
How the PSU exhaust fan will look in place.
Below are more photos of the adjusted build:
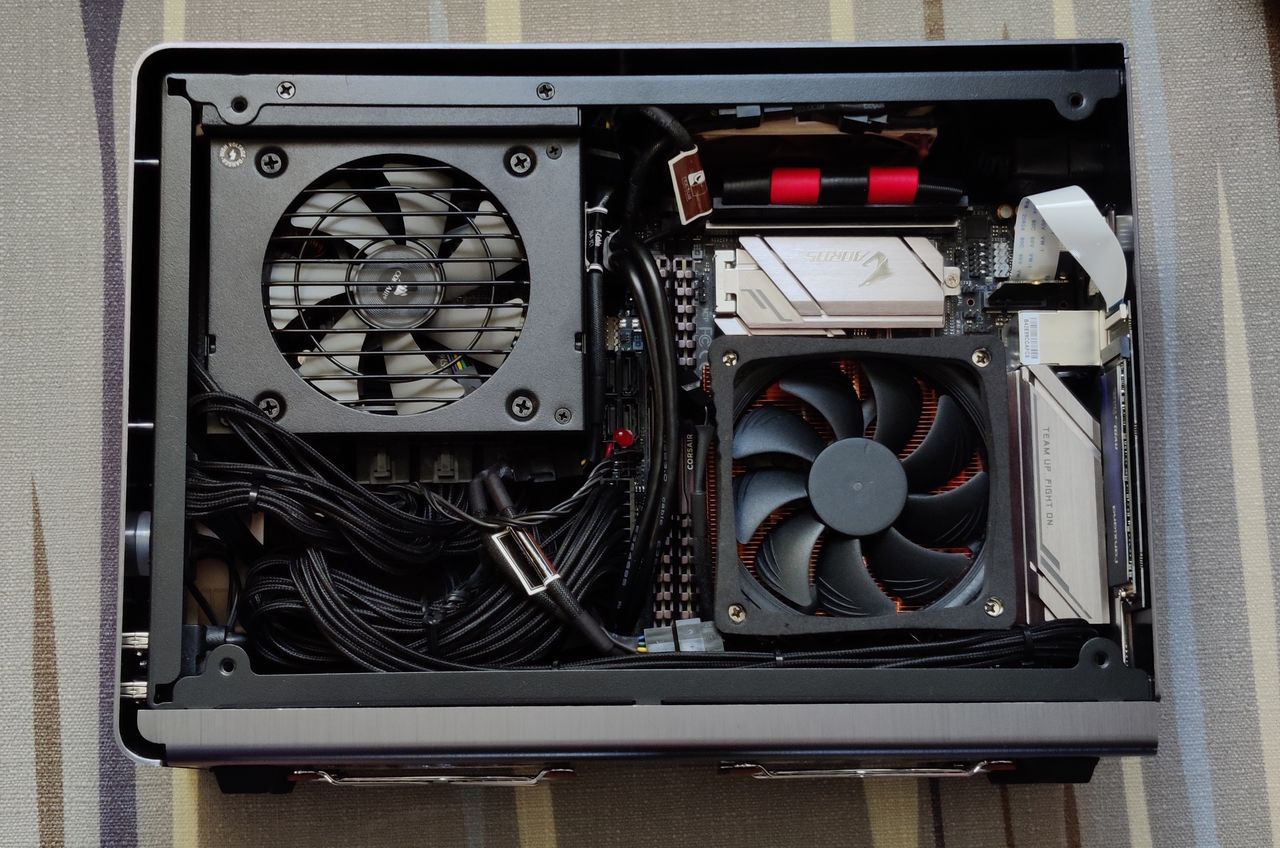
Motherboard side, now showing the PSU fan as an intake. Also showing CPU fan including duct.
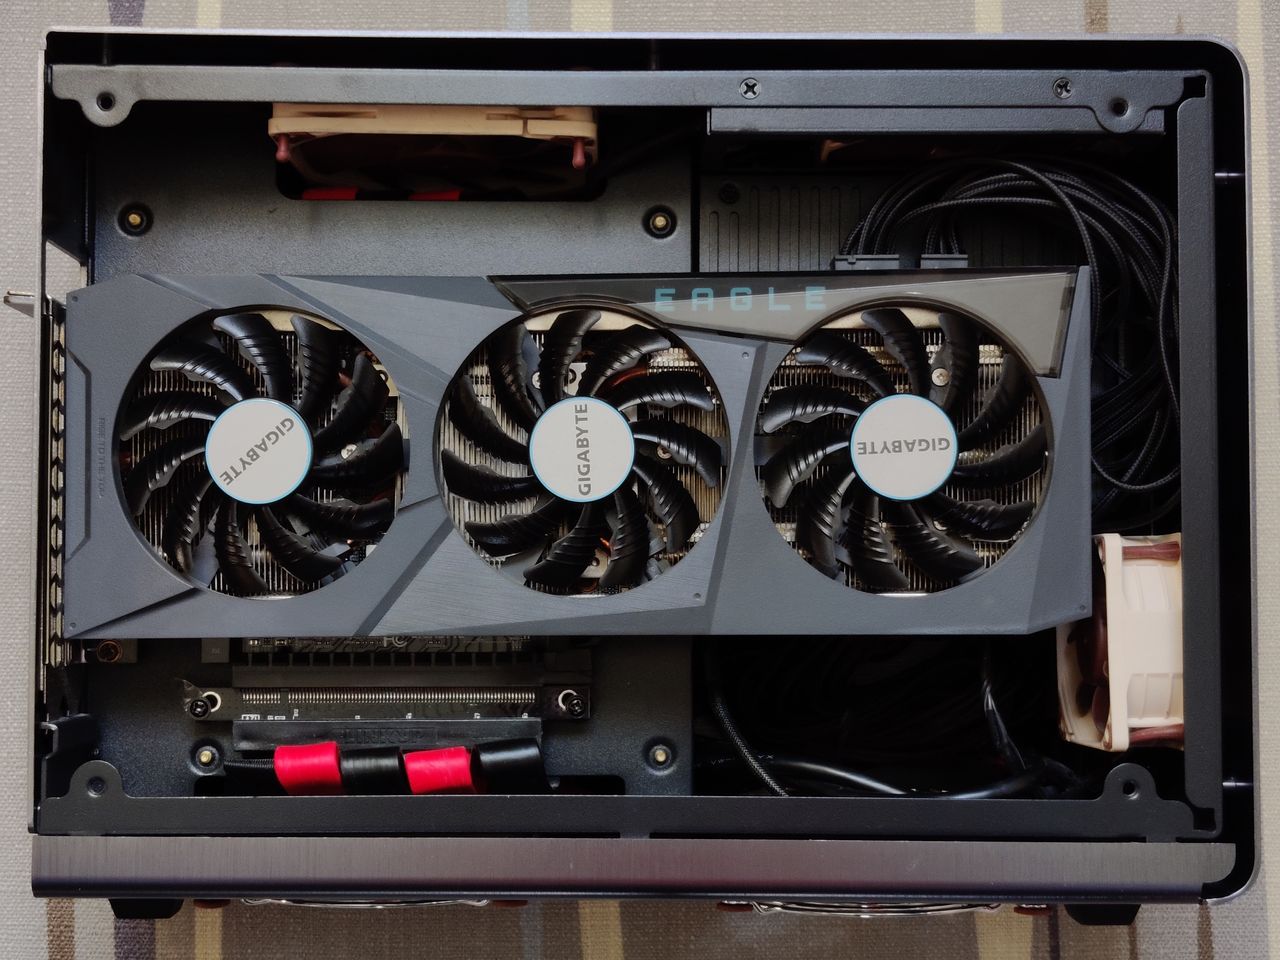
Graphics card side.
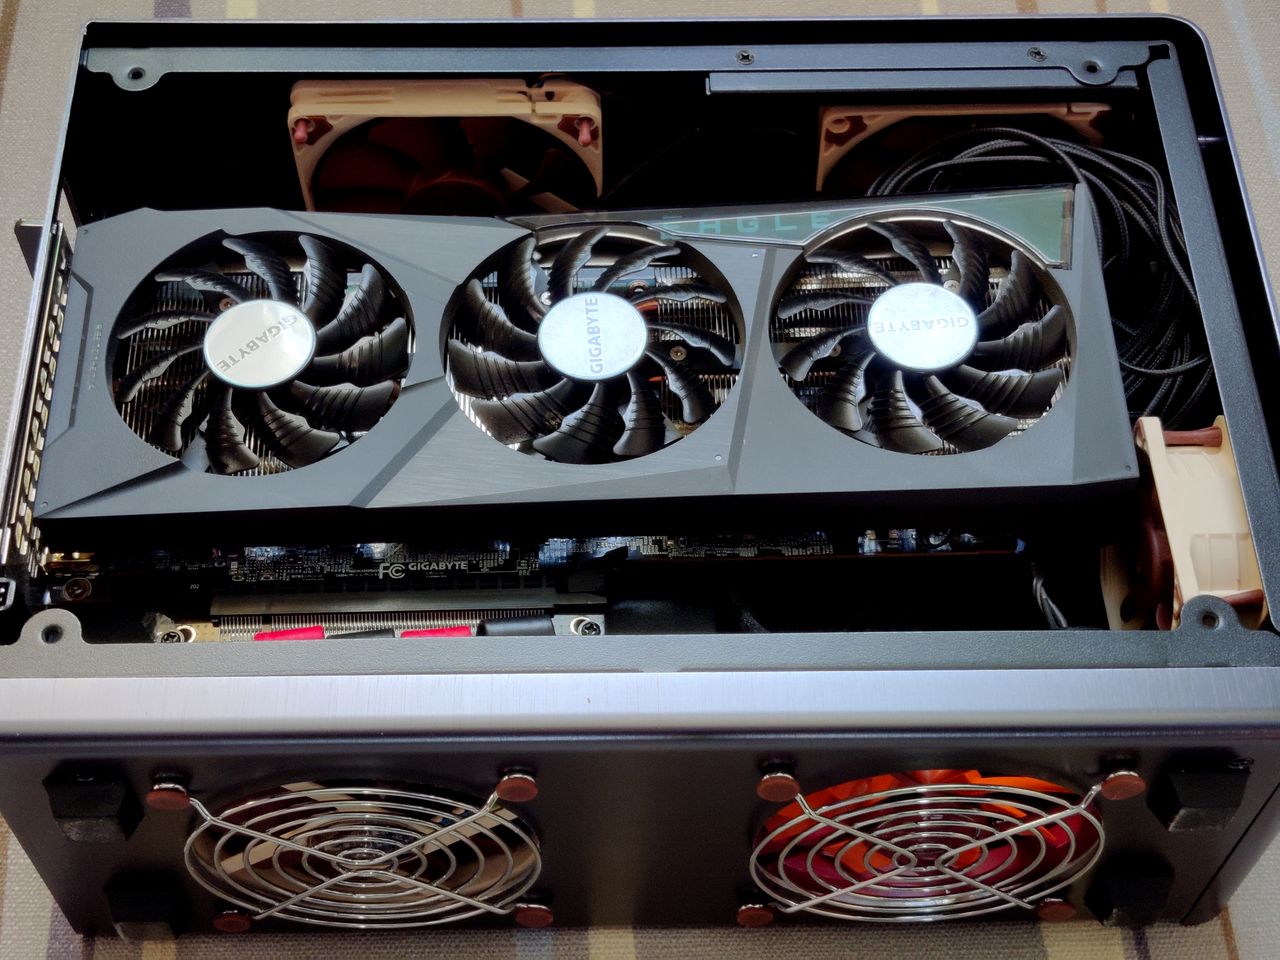
Graphics card side, showing exhaust fans on the rear.
Improvements have helped a lot and aesthetically, the case looks the same as before. It's still an awful case for thermals though and I undervolt and power limit both the CPU and GPU to aid temperature. Still, it's a nice small machine and good mini itx cases are expensive so I'm pleased to have been able to extend the life of mine for longer.