
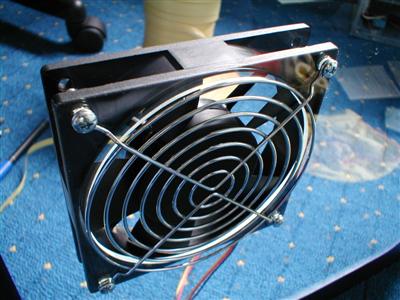
Blow hole fan mod... and the repaint
Part 5 - Window and final results
The window finally came with the right dimensions. I had one chance of getting this right without going wrong at any point so I had to be careful when it came to the last stage of making my PC look brilliant.
Obviously the start to any sort of drilling or cutting activity is to mark out first. Those CD-R pens have many uses, and this time I used them to mark out on the plastic what was to be cut and drilled.
There are four holes for mounting the window to the case side. Already cut in the case side this made it easy for me to just place the window in its place, flip the whole side and then mark the holes through the ones already there.
I cheated for the others - I had kept the old window so I used that to mark out the fan screw holes and the circle for it. Otherwise it would be a case of measuring, using compasses and using the fan guard.. rather like I did for the blow hole at the top of my case mentioned in part 1.
Once everything was marked, I set up my work bench in the garden and started to drill the four outer holes.
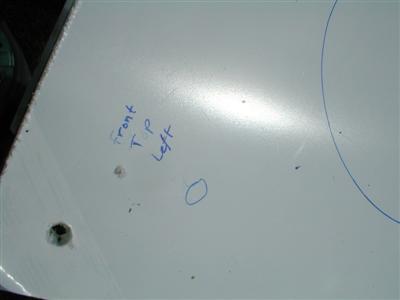
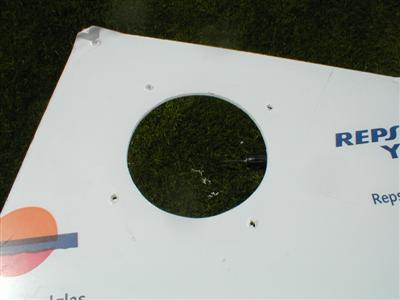
Marking can sometimes involve labelling too. Here is the side with the outer hole drilled
and fan holes marked.
I used a metal drill bit for marking the holes.. perhaps I should'nt have. The problem with these is there cut well, but bite and kick back hard once they pierce through the plastic.
This can cause the plastic to suddenly jerk upward and can result in chips and cracks - I got a very minor case of both. 5.5mm was the size I needed though which I only have in metal drill bit sizes.
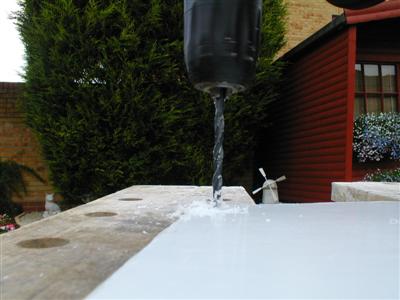
A picture of me drilling the final outer hole for the window. This was done by self timer and
the drill bit was spinning.
Once I had finished all eight holes, it was now time to cut the big hole for that 120mm fan. I moved swiftly on to cutting - but first there was two more holes to drill.
Why? Simple - I need something to put that jigsaw blade into the circle and one 5.5mm hole itself is a bit of a squeeze. So I drilled two very close to each other, resulting in an oval shape which happily aloud the jigsaw blade in. These holes were not done anywhere near the edge of the circle, I planned to come in towards that with the jigsaw - make sure that if you do this too not to come in too steep, otherwise it will notice.
Another self timer shot - my error of coming in too steep to the circle edge can be seen here
and as a result I had to back out and come in more shallow. You can see how fast the blade
on the jigsaw was moving.
Cutting with the jigsaw does need some care - and it will involve lots of rotating positions as you are cutting a full 360 degree circle. If you stop the saw and rotate comfortably, make sure you bring the blade away from the end of the cut and keep it as straight in the cut as possible before starting it up again. As these things kick up and down with a lot of force, if it jumps then you will get a large crack in the plastic... exit one piece of plastic
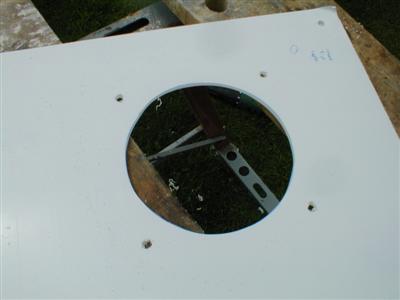
My result after cutting - not quite round but close.
The result after the time consuming task of going round the whole circle is quite a round cut. However I wasn't happy enough with mine and I new I would have a task bringing it round enough using standard sandpaper.
Out came the B&Q rotary tool again - with a sanding head on it. I carefully went round making the cut a bit better. Be warned though - press too hard with the sanding bit in and it will start to make notches. Carefully do the smoothing, even though it can be quite time consuming.
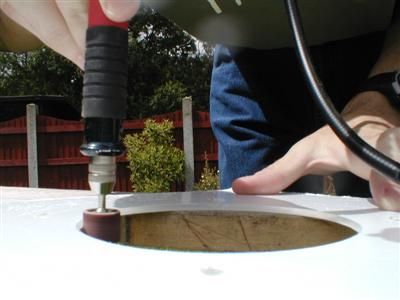
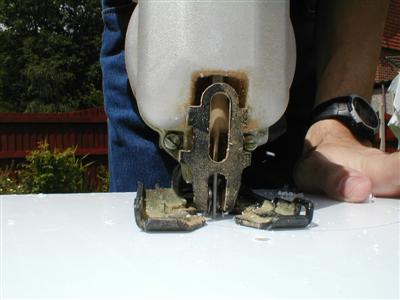
Final self timer shot - this is me using my rotary tool to sand down the edges of that circle.
The bit is rotating, I used speed setting four.
After I had used the rotary tool, I used a bit of sandpaper (P100 I think) to finish the job.
Here we have my result after sanding, much more pleasing \o/
Once everything is how it should be and you have finished sanding and everything else, it is time to remove the protective film over the plastic...

Looking good - here is the result seen without the film, in our garden.
Mounting the window
It was not quite finished yet. As explained in the previous part - I used special mounting pieces which were from spare drive bays from my Verre V770 case. They are square in shape and this meant that I had to square off the holes in the plastic by the same method I used to square off the holes in my case side.
As the film had been removed - this had to be done very carefully as again I did not want me to slip because I was going too mad with the file. This could have resulted in a large deep scratch, or even worse - a crack. Definately didn't want that to happen now I had got this far.
So I carefully filed the holes until they were square, but I found out one of my holes was not quite right, as below.
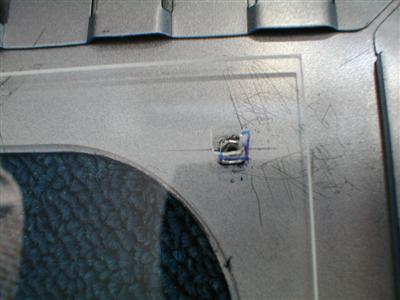
I had to mark out where the square hole needed to be a file some more.
This happens sometimes - but fortunately the consequences were very little, just more effort.
Once they were happilly seated in the holes, I made an attempt to mount the window.
I thought using draft excluder to dampen down the virbrations would be a good idea, but after trying, my fear was true. The draft excluder was quite thick and as I tightend the screws that hold the window in down, the window warped a little, causing it to have big gaps around the sides and smaller ones in the corner. Even losing the screws couldn't solve this fully and left the window a bit loose.
So I decided to use blu-tack instead. Just a blob in each corner and round the sides was enough to make the window sit comfortably in its place without touching the metal side - something I did not really want.
I put washers on the screws as the grip was a little small - especially on the hole I had to re-locate a bit. This looks a little better too, and as I tightend the screws onto the blu-tack there was a re-assuring grip - this would be very satisfactory :-)
Here you can see the back. You can just see how the screws fit in nicely with their washers
and you can also spot the blobs of blu-tack
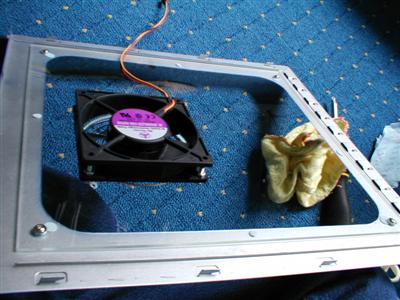
Mounting the fan was easy. I changed my nuts and bolts over to more shiny ones so they match in better with the fan guard and the rest of the case. I was careful not to over-tighten, this would cause cracks in the plastic!
The fan mounted in well - all the holes were perfect and I was pleased how it looked
Result
Not to grow a big ego, but I feel over-joyed at my efforts to make this case look 'cool' and I think it really will stand out from the crowd now. I've just to be a lot more careful handling it in future now! Its not moving far without a box...
But why care what I feel, you want to see pictures... and I am happy to boast pictures indeed.
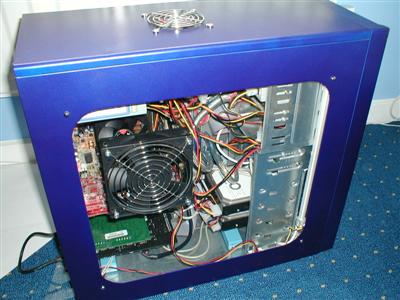
Complete case picture.
Conclusion
This is the last part of my almost two week long case change. The cost.. well it set me back £9 for the window, about £40 for the spray cans of primer, blue and lacquer, and thinking back it must have set me back £17 for all three cold cathodes and the single round IDE cable and round floppy cable. The coloured fans were about £1.70 each, I'm using three so thats about a fiver. Finally that big 120mm fan set me back £8 with its guard too.
So yeah, expensive for mostly just looks - a total of £79 spread out over the time. But that figure may be higher or lower depending on what you want to do.. and I am sure people have spent more than that on modding their cases. Difference with mine too is it is all entirely my own work... I have not seen many Verre cases modded like this as most come with their own windows now, and other such stuff.
If your thinking of doing what I have, then maybe your a bit more confident after reading my experiences, or maybe your not and have a question I didn't answer.. if so you can e-mail me.
Anyway if I haven't made the point enough already - I can say that I am happy with it and hopefully you have found this article good and interesting.