
HP Pavilion Laptop 14-bf101na Upgrades

Introduction and Hardware Upgrades
At the end of 2017, I decided to look for a new laptop. My old laptop (a Lenovo Flex 2-14) was still working fine, but its low power dual core CPU held it back.
Intel finally decided to increase the number of cores on their mobile processors with Kaby Lake Refresh '8th Generation'. Now a Core i5 processor would come with four cores, and eight threads. Although that was at the cost of base clock speed, the doubling of cores over previous i5 laptops was enough to tempt me to upgrade.
Buying laptops at that time, and still now, gets complicated. As a programmer, one of my 'must' have features is a keyboard that has all the function keys. That is F1 to F12, but just as importantly dedicated Home, End, Page Up and Page Down keys. Using these keys in combination with other keys makes document navigation much quicker and I don't want to be holding a function key to do it, meaning I'll often need three fingers for shortcuts, and sometimes four!
That limits choice considerably. There are so many laptops that miss these keys!
The common standard is the Lenovo ThinkPads and ThinkBooks (inherited from IBM before it) and I've used a couple and they are good. But you have to pay top end for decent hardware, and in particular a decent screen.
My previous laptop had a IPS display, and the colours, deeper blacks and viewing angles of these screens are good. I sometimes view and edit photos on my laptop, so I didn't want to go back to an old style screen.
Anyway, browsing around I came across the HP Pavilion Laptop 14-bf101na. Direct from HP, it comes with an Intel Core i5-8250U (1.60 GHz base, 3.40 GHz boost, 6MB cache), 8GB RAM, 256GB SSD, 14" full HD screen, GeForce 940MX graphics and weighs a reasonable 1.5kg.
The other key requirement for a laptop for me is the possibility to upgrade. OK, so gone are the days of processor upgrades because with the exception of bulky desktop replacements, all other laptops come with soldered down CPUs.
Many laptops come with soldered down RAM too. Some may have partial soldered RAM, and a slot for another module, but the ideal is a laptop with two RAM slots. For HP laptops (and other brands), service manuals are available online and this allows me to check for upgradeability.
The laptop also comes with two NGFF M.2 slots. There is a 'B' keyed slot for SSDs in 2280 format. There is also an 'E' keyed slot for 2230 Wi-Fi / Bluetooth cards.
Finally, there is an empty space for 2.5" SSDs or hard drives, but there is no SATA connection for them included, however the motherboard does have FFC/FPC flexible flat cable connector named JHDD.
The battery is also fairly easy to remove with a few screws and one connector.
Overall - that's not bad at all. Again, with the exception of (huge) desktop replacement laptops, it's one of the most upgradable in this new decade of slim laptops. So, what did I upgrade and how?
Opening
Getting inside to do the upgrades is not as easy as older laptops (which had doors / sections you could remove easily), however it's not that difficult.
On the rear, there are five screws to remove. Three smaller silver ones are obvious and visible alongside the rear front edge.
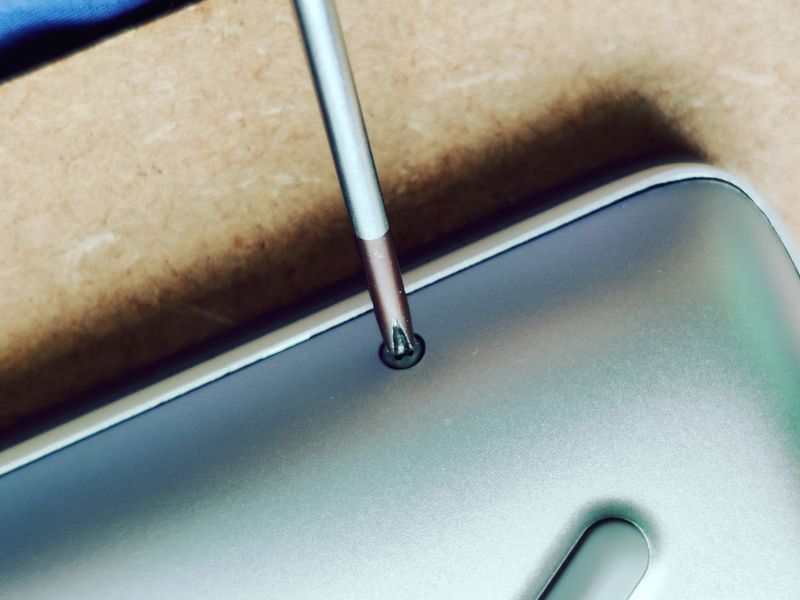
Above: Removing the front screws
A further two larger black screws are hidden under the feet. Peel these back partially at the corner closest to the rear of the laptop, and unscrew those screws.
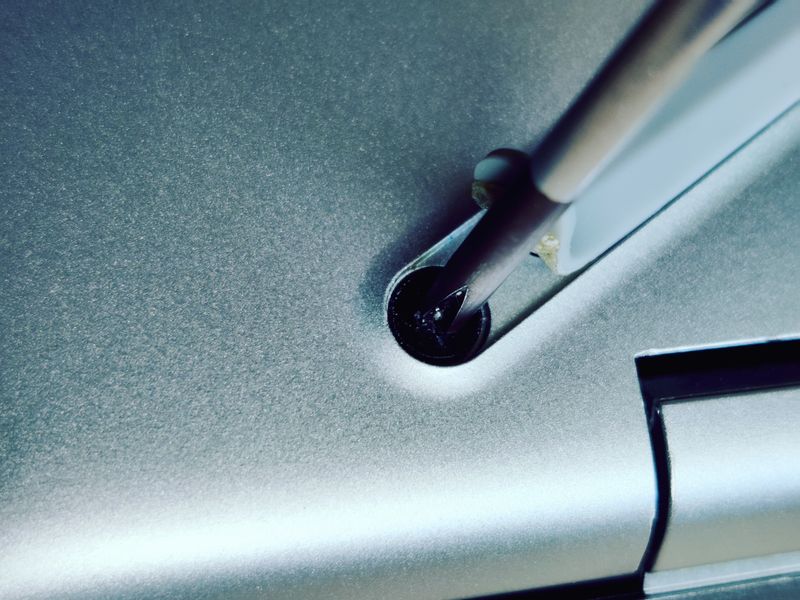
Above: Removing the back screws
Once all five are fully removed, the plastic back can be carefully removed. It's clipped in with plastic clips. I found it easiest to start at the rear corner and could lift that with my fingers with a bit of outward and upward force. Then slowly work around the perimeter of the laptop until every clip detaches.
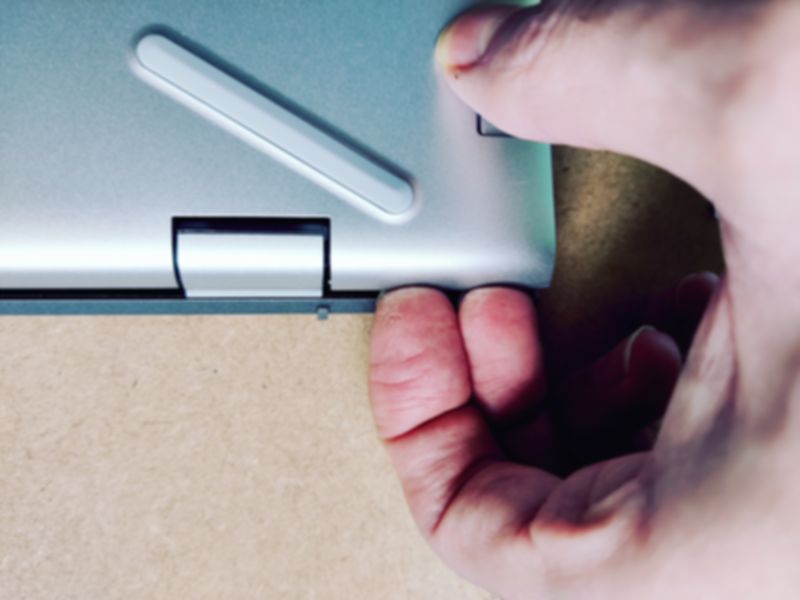
Above: Start by lifting the back off here
The entire back then lifts off nicely. There are no cables to detach. Here's the components you can see:

Above: Inside the laptop with the back removed
RAM
At the time I frequently ran database and software VMs from my laptop. Particularly as I travelled between clients for my job. 8GB wouldn't cut it and even my previous laptop I upgraded to 16GB, so I'll do the same for this one.
After removing the back cover, it's immediately obvious that one slot is free. So rather than buy 16GB of RAM, I could just buy another 8GB module and put it in the spare slot. An easy upgrade!
By the way, one RAM slot is easily visible, however the other is hidden under a cover. It's easy to bend this cover back though to add or remove the RAM module under it. The cover is there because the RAM in this slot goes face down.
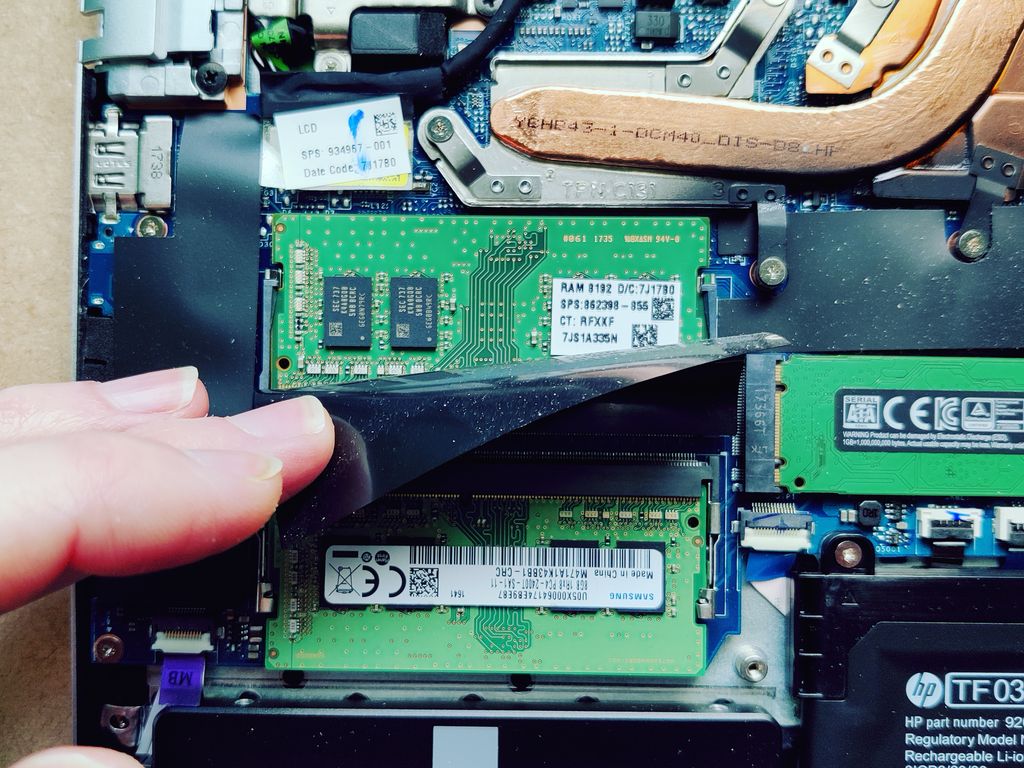
Above: Showing both RAM modules. The top one is behind a cover.
Two clips either side of the module can be bent back slightly to remove a module, then lift it up and out. To insert, slide into the socket at about a 20 degree angle. Push fully into the socket, then push the RAM down to its seated position. The clips should click and secure it.
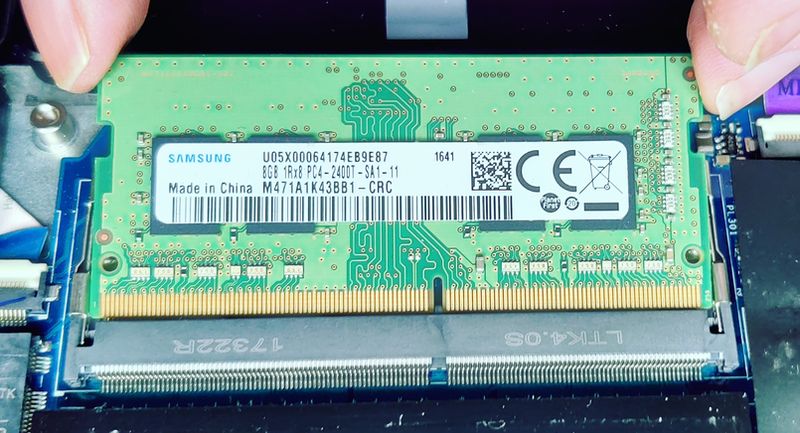
Above: Inserting a RAM module.
These days laptops are not as fussy as they used to be with mixing RAM brands and speed. They can run the RAM at the speed of the slowest module and still run in 'dual channel' mode when there are matching sizes, but it could still cause trouble, so I always aim to buy the same model of RAM as the module that's already installed.
There's no guarantee that even if you have the same laptop as me, you'll have the same RAM model, but mine came with a Samsung 8GB 1Rx8 PC4-2400T SA1-11 DDR4-2400Mhz 260pin Sodimm Laptop Memory module, part M471A1K43BB1-CRC.
I brought the same type of memory pretty much as soon as I got the laptop and looked inside it. I left it a little while before installing, just to ensure the new laptop was stable in its factory configuration before upgrading, but then I installed the RAM after about 30 days. Extremely easy and absolutely no problems, a 15 minute job. In 2017, that upgrade cost £65, in 2020 it'll cost only £33.
SSD

Most laptops will come with an SSD these days, and upgrading it will be primarily for space, not extra speed. My HP laptop came with a 256GB OEM SSD, which is a Sandisk X110. It's OK - 256GB is a fair size, but not a great amount of space for Windows and a few documents and games. It's also entry level speed, so not the best IOPS.
The biggest problem though was the lack of hardware encryption. As I travel, with sensitive data, I don't want a lost laptop to also be lost data, as a thief could have benefitted further by popping out the SSD into another laptop or USD enclosure and being able to read it.
The HP Pavilion laptop does have a TPM module built in, so that, combined with a self-encrypting drive (SED) SSD and Windows Bitlocker gives data encryption. Without the laptop being unlocked by my passcode, the SSD is basically useless. You can't even reset it and use it in another computer.
The M.2 slot is only B keyed, which implies that the only type of SSDs supported are SATA ones.
At the time NVMe (PCIe) SSDs were very expensive so rather than gamble on that slot accepting an NVMe drive, I went with the one of the best SATA based M.2 drives at the time - the Samsung 860 Evo 500GB.
This has good speed, IOPS, and is a self-encrypting drive. At the time (March 2018) it was £145, but in 2020 it's less than £70.
Again, it was an easy upgrade - simply remove the back cover, unscrew the one screw holding the existing stick down (be careful not to lose the extremely small screw), remove the old SSD, pop the new one in, secure it with that small screw, then put the back of the laptop back on. less than 30 minute job and the SSD worked perfectly.
The longer job of course is backing up all files from the old disk before the upgrade, reinstalling Windows after and restoring files.
The original SSD was then used to build my living room home theatre PC, but it could be sold for a bit of cash if you've no use for it.
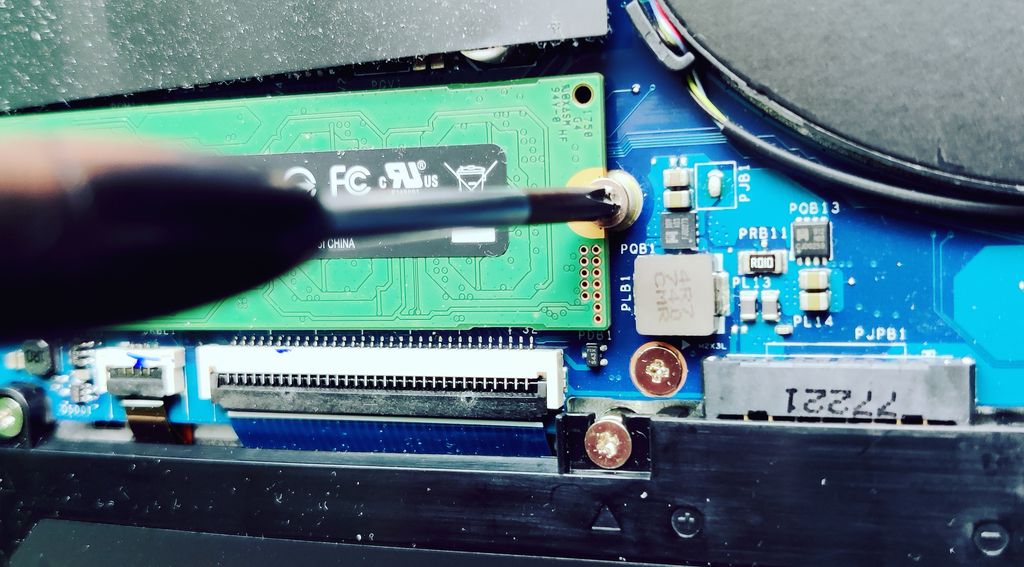
Above: To remove the M.2 SSD, remove this one screw.
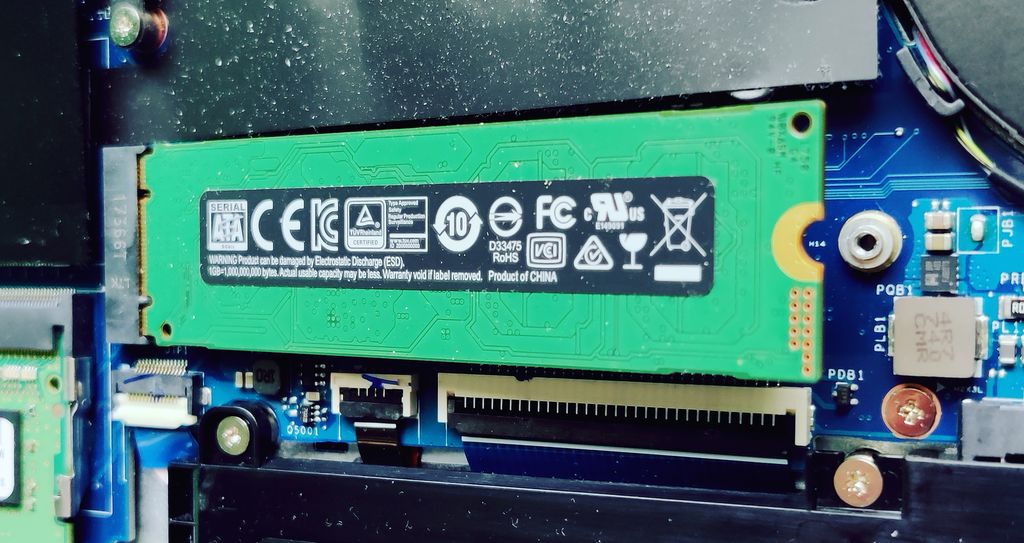
Above: The SSD can then be raised slightly, then pulled from the socket. Do the reverse to insert a new one.
Wi-Fi
The Wi-Fi card that came with the laptop is the Intel Dual Band Wireless-AC 3168NGW. This is does support wireless 802.11ac (Wireless 5), but it's the basic implementation of it, with a 1x1 TX/RX stream and a maximum speed of 433 Mbps (realistically a lot lower).
For just £7, I bought a Wi-Fi card intended for the HP ENVY 13-AD 13-AD013NA. This is an Intel 7265NV which has 2x2 TX/RX and has a maximum speed of 867 Mbps. It's a noticeable improvement, and an easy upgrade for a very small cost taking less than 30 minutes to install. The only complication to watch out for over the SSD/RAM upgrades is you need to connect the antenna wires. Firstly they are under a small plastic cover, which is just stuck with adhesive. Remove this slowly. Then find the very small and fiddly antenna connectors. Remove them very carefully, and make sure they are properly centred before pushing them back on the new card. Ruining them would be a nightmare because you would have to find a new antenna and install it through the laptop (some of it is probably in the screen).
After installing, Windows recognised the card automatically and no drivers were needed. I brought a card for another HP laptop in case there were BIOS whitelists only certain HP compliant cards, but I think it doesn't and you'll be fine to put any upgraded Intel or Killer card in it.
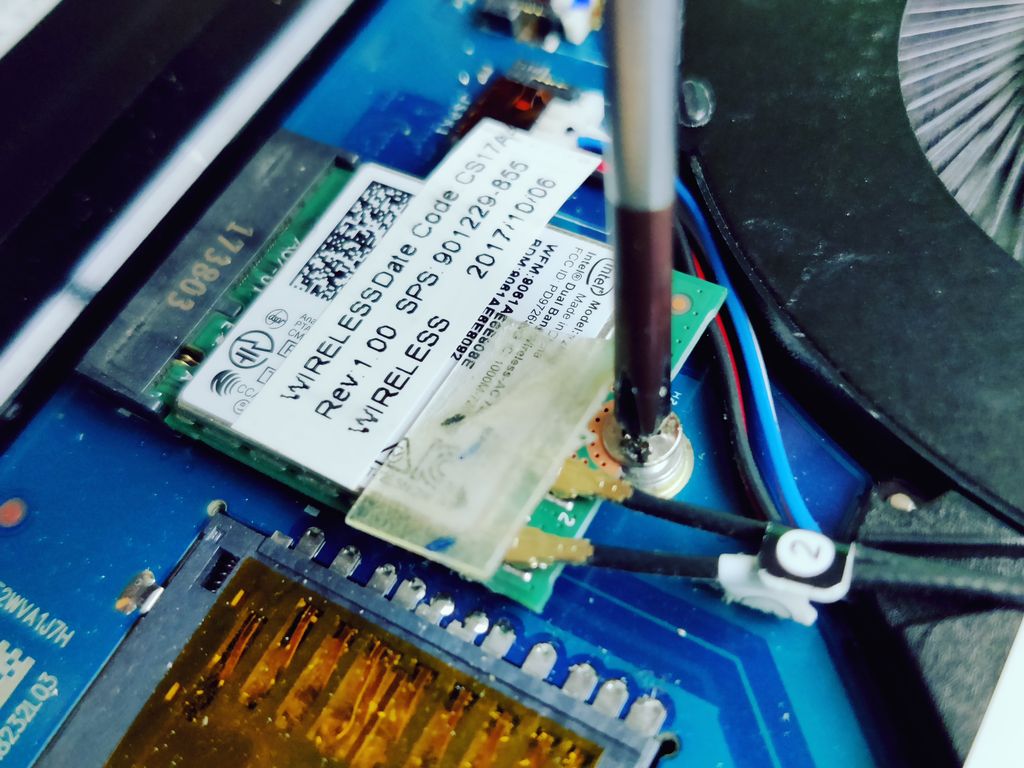
Above: To remove the M.2 WiFi, remove this one screw.
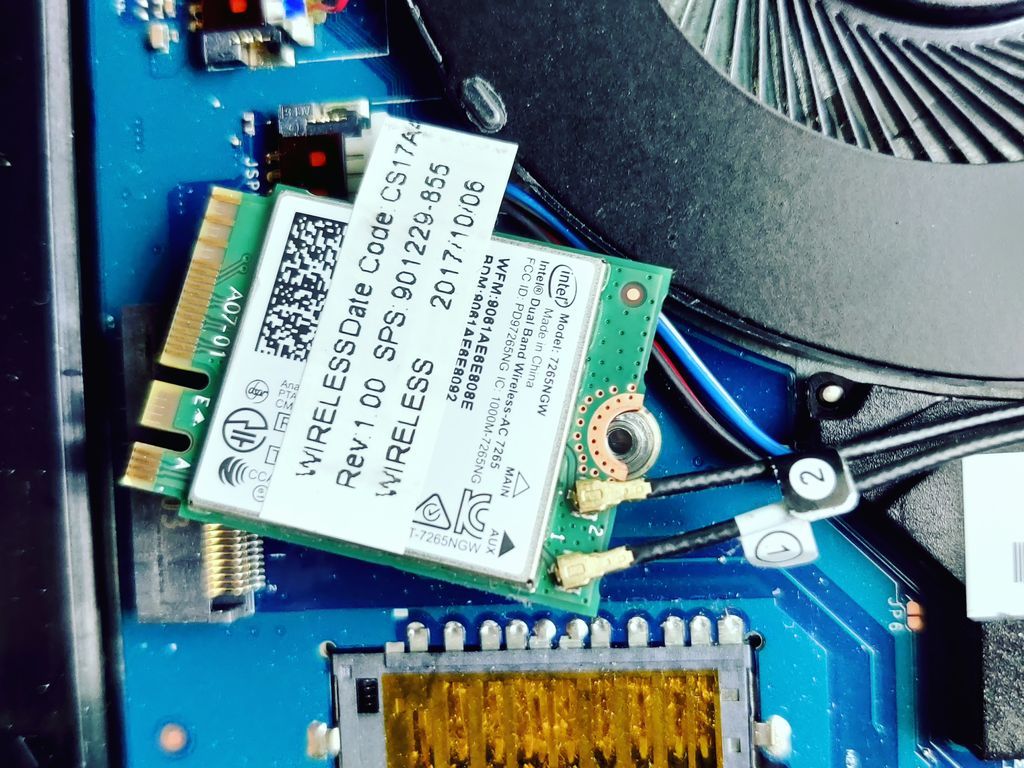
Above: The WiFi card can then be removed. Then detach the antenna cables. Do the reverse to insert a new one.
Second SSD/Disk
This was the hardest upgrade because it needs additional parts. The laptop does not come with the connector/cable (part number 930596-001) or brackets (934983-001 and 934984-001).
I wanted to put my unused 2.5" 250GB Samsung 850 Evo SSD (an upgrade from my previous laptop) in that space though, so I began buying different HP cables to try. I actually brought (and sold again) two cables that didn't work, or reach, however I had success with a cable named 'HDD Hard Drive SATA Cable for HP Pavilion 14-BA 14M-BA 14T-BA Series CD SZ'. The cable cost US$15.88, including shipping from China.
It doesn't lay perfectly inside the laptop, but it does work perfectly. I did not find the brackets, but since this was an SSD I decided to do without the brackets and used some folded card to apply a little pressure on the SSD outer case - enough so that it does not move freely inside the laptop. I did that in Jan 2019, and it's lasted nearly 2 years.
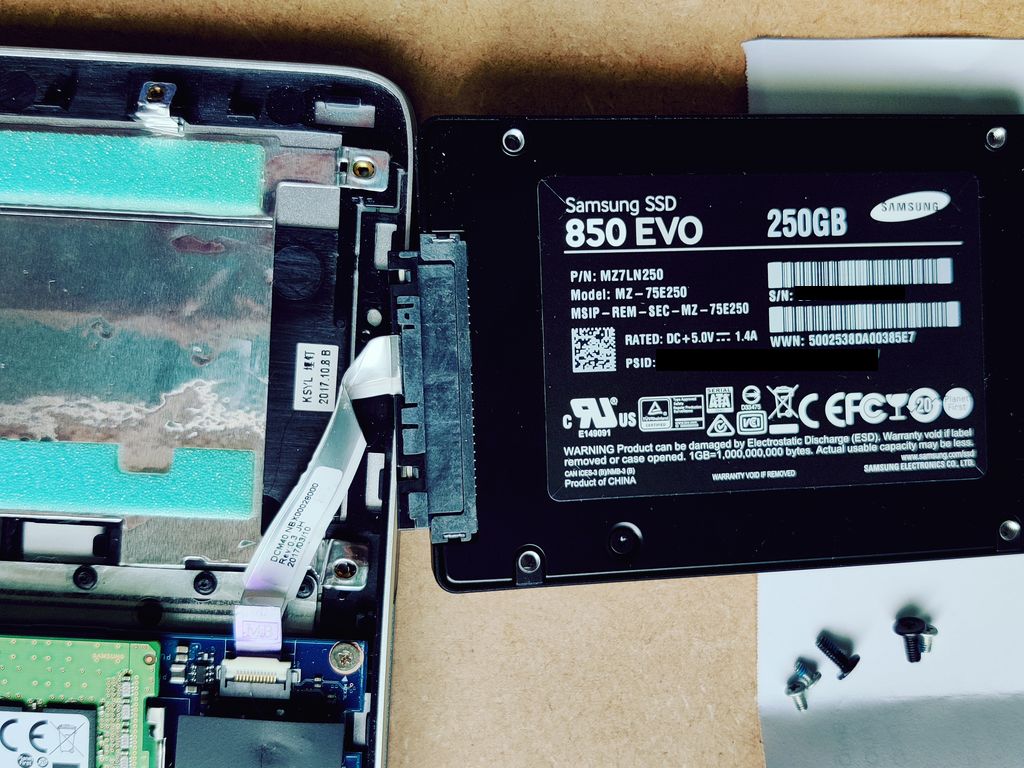
Above: With the correct cable, adding a second 2.5" SSD is easy.
Battery replacement
After some time, my battery did not seem to last more than 2 hours and started powering off sometimes after 20%. That's a shame, but batteries don't last forever and even if you use the laptop on the mains most of the time, they still perish.
A replacement battery order for £15 in January 2020 restored its runtime back to around four hours. There are a few screws to remove to replace the battery, but then it slides out easily enough and it's possible to complete the replacement in around 15 to 20 minutes.
The old battery was then taken to the recycling centre and dropped in the container where all other dead batteries go. Never put it in the standard landfill waste or recycling as it's a hazard and can cause fires for your local authority!
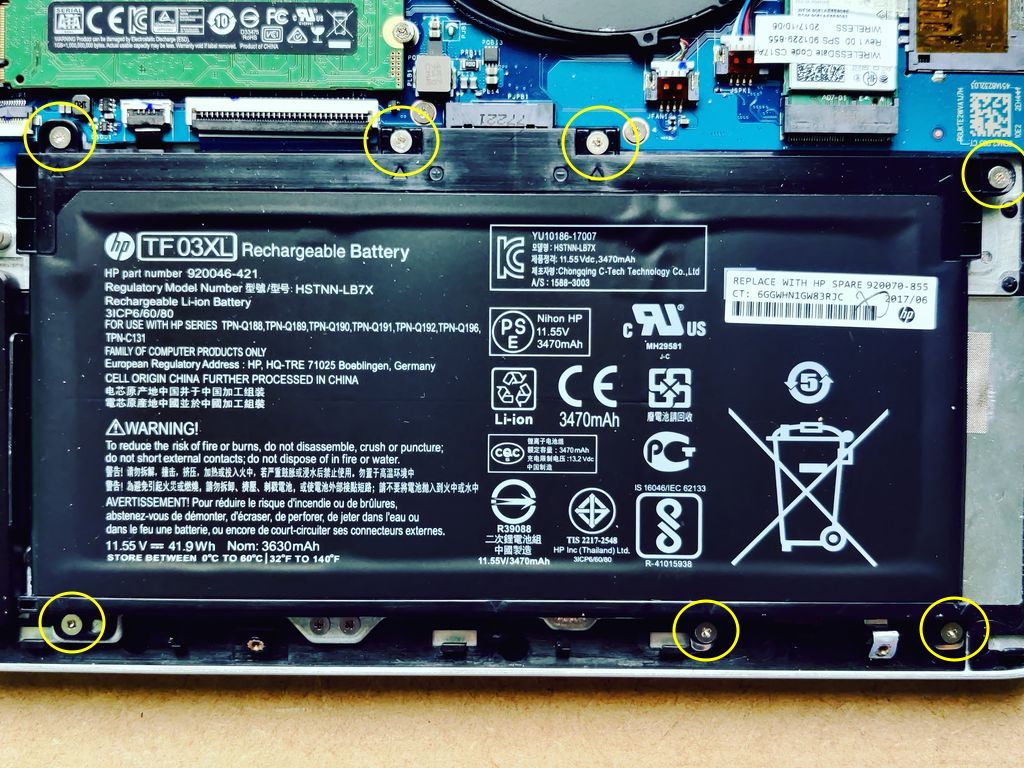
Above: Several screws need to be removed in order to replace the battery.
Hardware conclusion
The laptop was a Black Friday deal, costing £679, and I've upgraded the hardware for less than £240. That's only a little over £900 for hardware that would beat laptops costing more than £1000 at the time.
If you've got this laptop and not upgraded yet - these same kinds of improvements would now be only a little over £100 (excluding the second disk) and would give it a new lease of life.
It's great that laptops like these are still user upgradable as it prolongs the life of the hardware, saving you money, and being a little less e-waste. You cannot upgrade the CPU or Graphics chip though, and this is true for 99% of laptops nowadays, so when purchasing, spend your money on the best CPU and graphics you can afford (if you need graphics), and the rest you might be able to upgrade later.
Installing Linux
In 2020, after enjoying Linux on my desktop for some time, I decided it was time to install it on my HP Pavilion.
In past years, migrating to Linux was always a challenge because of the software and hardware support. In 2020 though, the Linux Distributions available and desktops are really excellent quality! I'm a fan of Linux Mint Cinnamon because it's not so different from Windows, but it looks pretty good and feels so much faster than Windows 10.
On the software side, most work you do these days is in a browser. I've been a fan of Firefox since it was called Firebird (long time ago!), but Google Chrome, and it's open source alternative Chromium is easy to install and works well on Linux too. If you like Microsoft Edge, even that is available for Linux now!
The typical challenge is Office software - LibreOffice / OpenOffice have plenty of features, but they feel so old when you consider Microsoft moved their suite to the ribbon in 2007. The compatibility with Microsoft documents is not the best too - almost always works, but alignment and some features do not work. Fortunately, we now have Office 365 in the Web, and Google Docs in the web too. These work really well for most tasks.
Should I need the full Microsoft Office products, I've got a Windows 10 VM available to start on my server within seconds, and remote desktop to that for my work.
Games was the other challenge too - but Steam have done plenty of work with both native Linux games, and emulation for lots of Windows games via proton.
Lots of other Windows software will be runnable in wine / playonlinux too, but often there's great native Linux alternatives anyway.
So how does Linux Mint 20 behave on my HP Pavilion 14-bf101na? Really well actually! It never crashes, and it boots quickly and feels snappy in use.
There were some adjustments I needed to do though.
The first challenge is I wanted to keep Windows 10, on its BitLocker enabled drive. Ordinarily this would be a problem as you cannot dual boot with BitLocker TPM enabled hardware encryption on the same disk. Because I've installed two SSDs in my laptop though, I've put Linux on the second 250GB Samsung 850 Evo. I can choose what OS to boot by using the F9 key when the laptop is powered on.
The only downside is the Linux encryption is the standard LUKS based encryption, rather than making use of the self-encrypting SSD drive. There are ways (sedutil), but it looks risky, and unlikely to work alongside Windows 10. Maybe one day I'll attempt it on my main SSD and purge Windows off completely (to run in a VM), but that will be a time consuming task.
Battery Life
After using Linux a few times on the battery, I did notice that it lasted nowhere near as long as Windows. This HP Pavilion under light use should last around four hours, but it was empty after around two hours only. On battery and mains, I did notice the laptop felt a little hotter to touch then under Windows too, but the CPU fan was not running fast.
The problem is the standard Linux parameters typically do not automatically select power saving. That's because these settings can cause problems with some hardware.
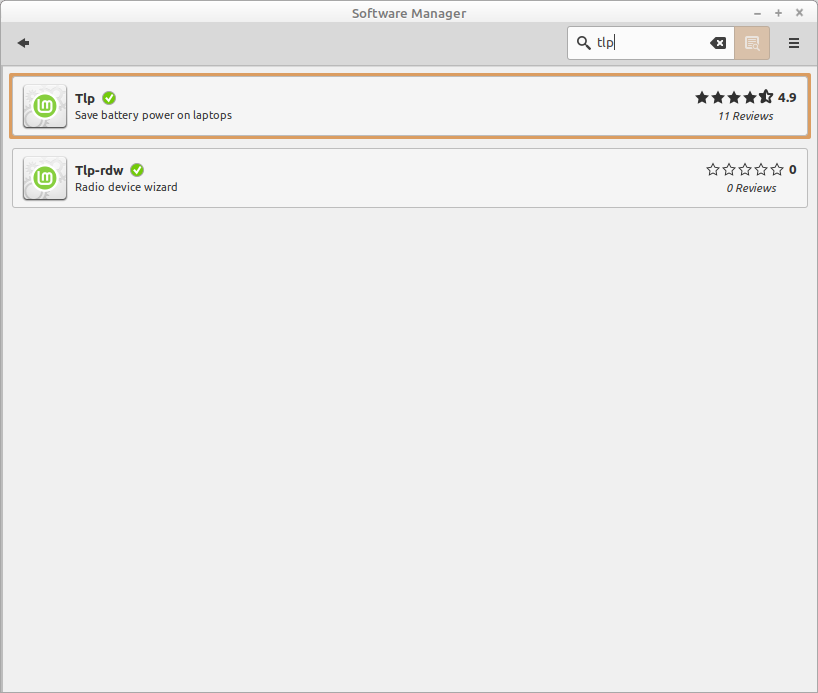
Installing powertop and enabling all tunnables solved the battery issue, but to make this permanent, I installed TLP:
sudo update
sudo apt install tlp tlp-rdw
sudo tlp-stat -s
Alternatively you can install tlp from the software centre.
There's nothing more to do, as TLP will install itself as a service and the defaults seem perfectly fine on the HP Pavilion 14-bf101na. Battery life is now around four hours with light use.
NVIDIA graphics
This option only applies to models of the HP Pavilion 14 that has an NVIDIA discrete graphics processor. Mine as a GeForce 940MX.
Linux does work fine with the NVIDIA GPU, as well as the built in Intel UHD 620 graphics. NVIDIA do build drivers for Linux, but they are not open source.
For Linux Mint and Ubuntu (maybe others), you are asked during install whether you want to allow third party software, and if you choose yes then the NVIDIA drivers should be installed automatically.
The 'Driver Manager' available should list the available proprietary drivers. Pick the latest nvidia-driver version. Note that 'xserver-xorg-video-nouveau' drivers are also available as an open source alternative, but the performance is not good and will likely cost you framerate and/or compatibility with games.
The other challenge with these drivers is secure boot. I installed and configured Linux Mint with secure boot enabled so I could keep my Windows BitLocker installation available.
One option is to disable secure boot. That will run fine but will upset your Windows install especially if you have BitLocker which will request you to enter the recovery key. If you're running Linux only though or installing Windows after and you've no desire to use BitLocker (it needs Professional edition anyway), disabling secure boot is an option.
If you install the NVIDIA driver via the Driver Manager though (available in Ubuntu, Linux Mint and the like), it should detect secure boot is present and ask to enrol the driver.
On my laptop's original BIOS/UEFI (F32), this enrolment did not work. However, it appears fine after updating to BIOS F.46 (maybe earlier ones are also fine).
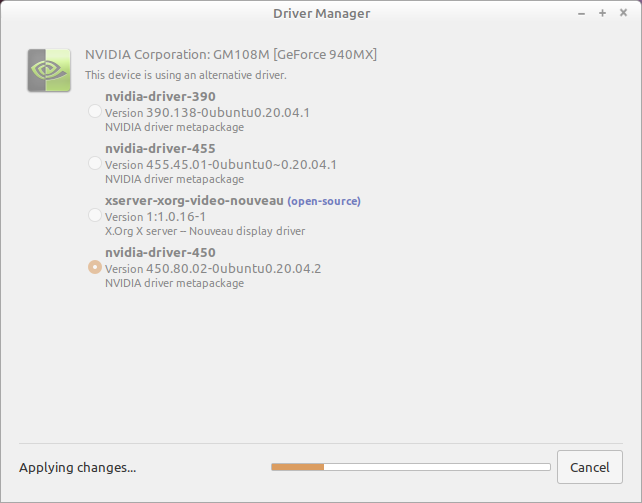
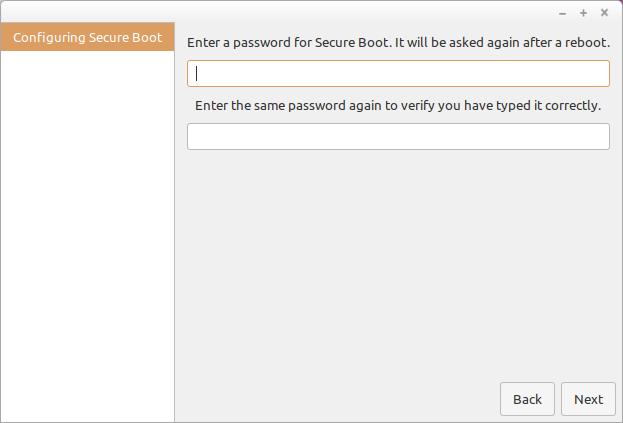
The driver manager should pop up a window to configure Secure Boot. Enter a temporary password here.
Then it will ask to restart

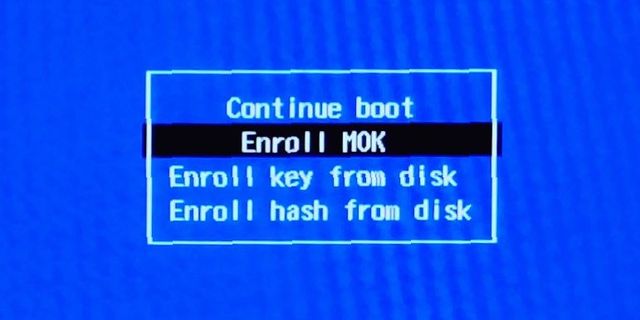
After restart, the HP laptop should enter the 'Perform MOK management' screen. It's at this point I took out my smartphone to capture the process for you...
The default option is 'Continue Boot' - DON'T pick this. Pick the next option which is 'Enroll MOK'.
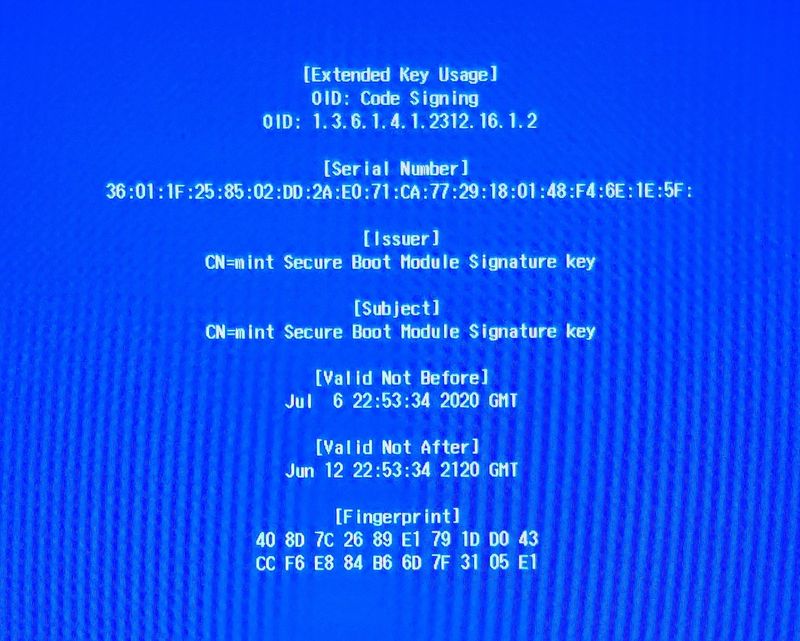
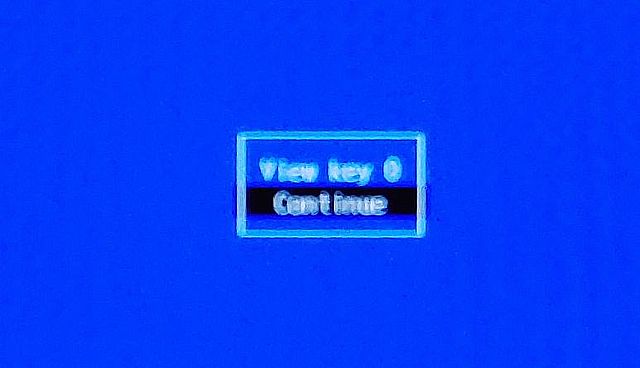
You can verify the key is the right one by going to 'View key 0'. The next page should provide a clue like subject CN=mint Secure Boot Module Signature Key
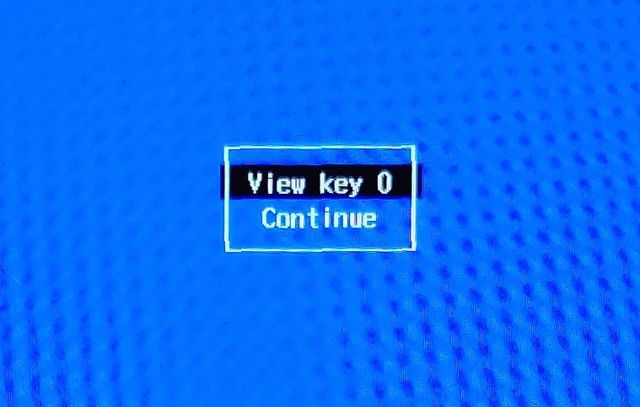
Now press 'Continue' (at this point I didn't notice my phone took a randomly blurry photo).
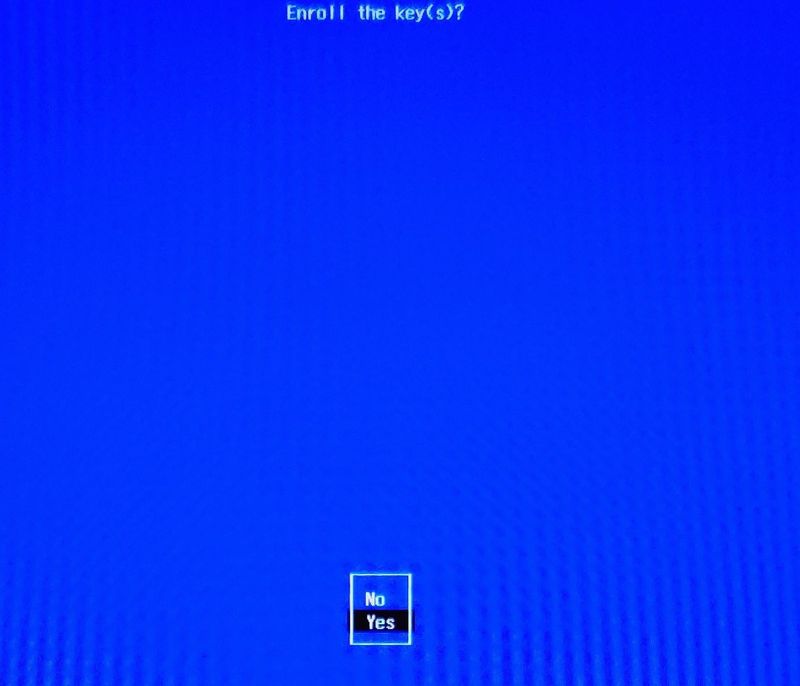
Next choose 'Yes'. The question is 'Enroll the key(s)?' at the top of the screen...
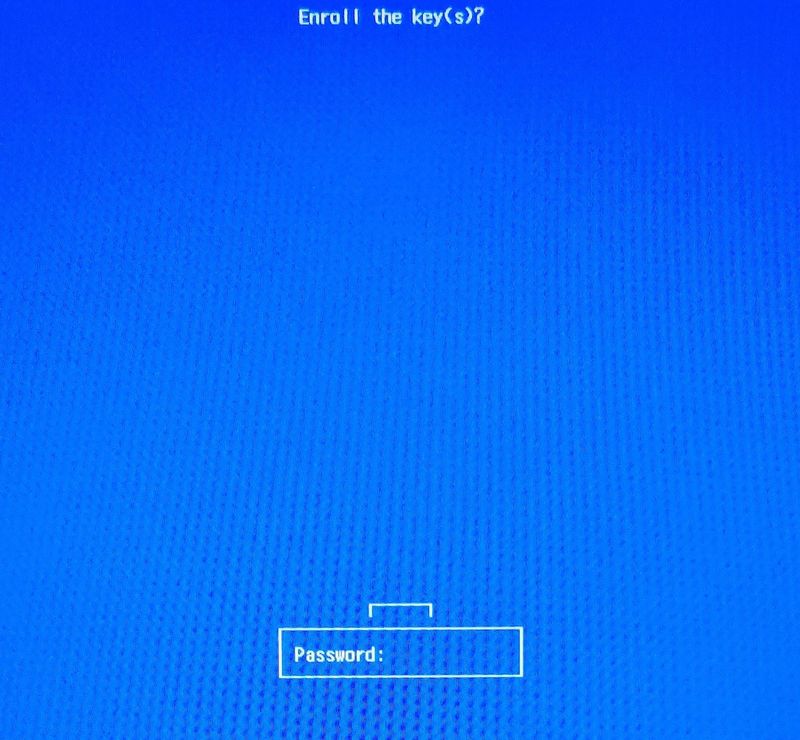
Here the password box appears. This should be the exact same password you entered when prompted by the driver manager.
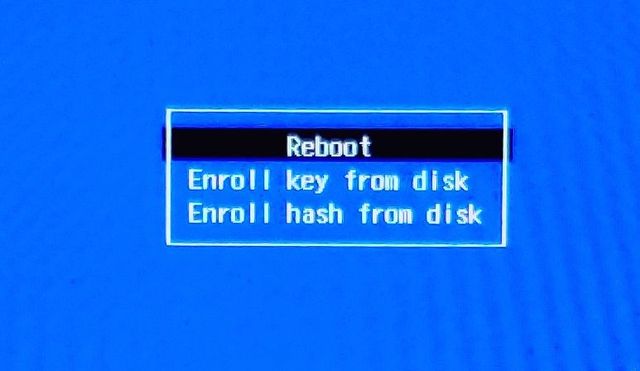
There's no confirmation, it takes you to a page like the first one, but with a 'Reboot' option. Select that.
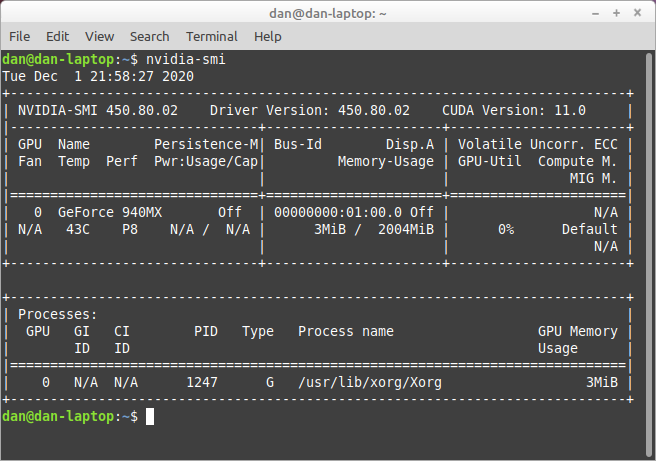
Ensure you boot into Linux on the next boot. With some luck, you'll now have a working NVIDIA driver. Run nvidia-smi to verify. If this says 'couldn't communicate with the nvidia driver', you still have a problem.
Great! Now you can install Steam, or playonlinux and try and get your games working, or maybe be able to do professional work.
Sound issues
Whilst listening to sound via the headphones, I heard a cracking and popping sound from left headphone. It sounded fine under Windows, so I gathered this was a Linux specific problem.
I searched and found the solution here.
I did the same and created a small script from the highest rated solution:
sudo update
sudo apt install alsa-tools
sudo nano /usr/local/bin/soundfix.sh
Paste the contents in the empty file:
#!/bin/bash
hda-verb /dev/snd/hwC0D0 0x20 SET_COEF_INDEX 0x67
hda-verb /dev/snd/hwC0D0 0x20 SET_PROC_COEF 0x3000
Press Ctrl+O to Save (Write), followed by Ctrl+X to exit.
Now make that script executable (chmod) and test it by running it.
sudo chmod +x /usr/local/bin/soundfix.sh
sudo /usr/local/bin/soundfix.sh
If it works, we can make it apply on every reboot by putting it in a cron job:
sudo crontab -e
Add this line:
@reboot /usr/local/bin/soundfix.sh
Alternatively, if you prefer you can put the script in the list of startup applications via the GUI.
BIOS/UEFI updates
HP only provides a Windows exe to apply BIOS updates. It gives three options - 1. Apply the update via Windows (which will temporarily disable, bitlocker and reboot to BIOS update screen), 2. Create a recovery USB, 3. Save the BIOS image.
I'm dual booting so I have my Windows install handy to apply BIOS updates via option 1 and I don't yet have a working solution to apply the BIOS update via Linux. The exe does have two .bin files in it which you can get to by opening the exe in the standard Linux archive manager, but those bin files are larger than the .bin file created by the Windows exe when choosing option 3. Option 3 also produces a .s12 file which isn't directly in the exe archive.
I've not tried option 2 yet but will update this if I do. All three options will require Windows somewhere though!
This method described on github seems to work.
Conclusion
Both the laptop hardware and running Linux wasn't perfect out of the box. But with upgrades and tweaks to both, it is pretty much perfect now and I expect it'll last years.
Being able to adjust some hardware makes you feel more like you own your laptop and installing and adjusting Linux makes you feel even more in control of the software side. I hope either side of this guide might come in use for those with similar models!