
My Home-made PC Router and NAS Server
I suggest reading about the rebuild first. Information below is for reference purposes and no longer recommended.
The build - Host Services / NAS, power saving and conclusion
The second objective of the build is a host for my files. As mentioned, this is not an enterprise grade NAS, but it has some useful features and is good for the home user.
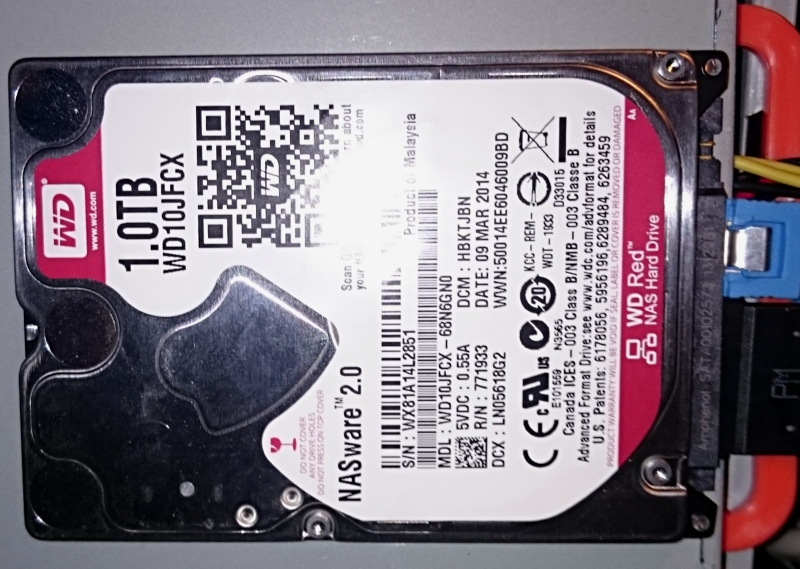
My setup uses two hard drives (both Western Digital Red 1TB disks, in 2.5 inch size).
My intention is to use 1TB only for storage of important files, and the other 1TB is used for backup and restore purposes.
My intention is to recover files in two potential events:
- If one of these hard drives fails, I can get everything from the other
- If I do something silly like overwrite or delete files, to be able to restore them from the previous day (or snapshot)
When I initially did this setup, I did just create one XFS partition on each drive and used regular RSYNC commands to copy the changes over to the backup drive. This is ideal and simple.
But nowadays BTRFS and ZFS file systems work well and stable on Linux. Both of these are advanced and support snapshots. ZFS is more enterprise grade (having come from Sun, now Oracle), but BTRFS seems to have more community information and having never tried it, I decided to have a go. Here is my guide:
Before we start - check your disks and partitions. Ubuntu may have auto-mounted them if they already had file systems. I'm starting like this with my two prior XFS partitions and now want to erase and repartition one drive with a BTRFS partition and copy files over.
The utility fdisk will list your drives:
sudo fdisk -l
My disk drives I'll be creating a NAS with are /dev/sdc and /dev/sdd
We'll ignore /dev/sda - this is the SSD the root file system is put on. The /dev/sdb is a 300GB hard drive which is for 'perishable' files (such as downloads of software I can usually get again).
Firstly - to recover my precious stuff in case of a disk failures, I will use what's called RAID 1 in my setup. RAID 1 can be done in hardware (but not on my hardware), but BTRFS supports it without anything propriety needed.
But to get there, I don't want to buy and install a temporary disk (which would be connected via USB 2.0 so would take a very long time). I want to instead destroy just one of my XFS partitions and create only one BTRFS volume and copy the remaining XFS one to the new BTRFS one.
Creating the first partition
My first BTRFS storage will be created on /dev/sdd and I'll copy files from the existing /dev/sdc XFS partition to this.
I already had a partition setup, using all of the disk, so I did not need to delete and recreate the partition, just overwrite the existing file system. If you need to create a partition, use fdisk, or gparted as a nice GUI alternative to doing this. Again, I'm only doing one disk for now so that I can copy files from the other - the disk I am creating the new BTRFS on is sdd, partition sdd1:
mkfs.btrfs -f -L MAIN /dev/sdd1
Using -f forces it to overwrite the existing XFS partition.
And it's done - disk wiped. Let's mount it. I'll mount it in new folder /mnt/main but you can adjust as you need:
sudo mkdir /mnt/main
sudo mount -t btrfs /dev/sdd1 /mnt/main
A quick command "df -h" and we can see /dev/sdd1 is mounted in /mnt/main. 17M is already used of a total size of 932G.
I the sub volumes HOME I created to store all my files:
sudo btrfs subvolume create /mnt/main/home
sudo btrfs subvolume list -p /mnt/main
Now let's mount this home subvolume. After reading, I decided to use LZO compression to make some space gains on uncompressed files. It's not too CPU intensive, so should give me some performance boost.
sudo mount -o compress=lzo,subvol=home /dev/sdd1 /mnt/main/home
And it's ready. Now to copy all my files.
First, I mounted the remaining XFS partition I had:
sudo mkdir /mnt/prior
sudo mount /dev/sdc1 /mnt/prior
Finally, permissions. I want my user to own the directory:
sudo chown -R dan /mnt/main
Then this is the copy command:
cp -ax /mnt/prior /mnt/main/home
Run that and it will take a while to copy almost a terabyte. Run this command on the system itself, not via SSH in case it times out. Then, continue tomorrow!
Once complete, check space usage old vs new (there may be some change expected due to the different file systems, or compression being adding)
Then do some spot checks just to make sure.
df -h
The copy would have taken the whole prior directory (mount point), including the directory name. To move things inside that directory a level above, I did this:
cd /mnt/main/home/prior
mv * ..
cd ..
ls     <- should list all the folders, including prior
rm -r prior     <- prior is now empty, so we can remove it
Creating the RAID volume
Now that all files have copied over (do a check first!), we can use the second disk to create a software RAID1 setup.
This will replicate the first disk on to the second.
Before starting, un-mount the existing mount that you copied from earlier.
sudo umount /mnt/prior
The btrfs device add command will create the new file system over the existing if you have already partitioned. Like before though, I'm overwriting the existing XFS one on my /dev/sdc disk, /dev/sdc1 partition.
btrfs device add -f /dev/sdc1 /mnt/main
The balance command will then spread data and metadata to the second disk.
The options dconvert and mconvert state that we are going to use data and metadata in RAID1.
btrfs balance start -dconvert=raid1 -mconvert=raid1 /mnt/main
After a long while (due to the amount of data like before), this will replicate all the data onto the second disk. Again, run this command on the system itself, not via SSH in case it times out. Come back hours later or another day!
Once complete, we now have a working file system, with all files copied over and it is resilient to a single disk failure.
The last thing we need to do is make the mount permanent so that the BTRFS raid setup is available in /mnt/main/home
Use these commands to check the UUID of the disks (changing sdd1/sdc1 as appropriate to your setup):
blkid /dev/sdd1
blkid /dev/sdc1
This should list volumes with the same LABEL, UUID but different UUID_SUB. It is UUID that we actually want to use.
Now edit /etc/fstab
sudo nano /etc/fstab
Here is my example, yours will vary. The lines at the bottom are the added ones
# /etc/fstab: static file system information.
#
# Use 'blkid' to print the universally unique identifier for a
# device; this may be used with UUID= as a more robust way to name devices
# that works even if disks are added and removed. See fstab(5).
#
# <file system> <mount point>   <type>  <options>       <dump>  <pass>
# / was on /dev/sda3 during installation
UUID=f85f4578-b33c-4555-8416-6bc5a885d9dc /               btrfs   defaults,discard,noatime,subvol=@          0     1
# /boot was on /dev/sda2 during installation
UUID=4ecb0fa7-d2c8-4503-8648-5cff69c0b864 /boot           ext2    defaults,discard,noatime                   0     2
# /home was on /dev/sda3 during installation
UUID=f85f4578-b33c-4555-8416-6bc5a885d9dc /home           btrfs   defaults,discard,noatime,subvol=@home      0     2
# /mnt/ssd was on /dev/sda4 during installation
UUID=eab32fea-40c8-4a36-ace6-a554fdb45ec1 /mnt/ssd        xfs     defaults,discard,noatime,nodiratime        0     0
# swap was on /dev/sda1 during installation
UUID=ff88b2fe-b7df-45be-a73e-dde199f61d07 none            swap    sw                                         0     0

# Main hard disks:
UUID=735d629a-58d6-417a-bbd5-28d198c71898 /mnt/main/home  btrfs   defaults,noatime,compress=lzo,subvol=home  0     0

# Software hard disk:
UUID=54ccc069-252e-4b9f-8343-ab91c3bc224c /mnt/software   btrfs   defaults,noatime,compress=lzo              0     0
Reboot the system and see if it works:
df -h
Filesystem      Size  Used Avail Use% Mounted on
udev            3.9G     0  3.9G   0% /dev
tmpfs           791M   30M  762M   4% /run
/dev/sda3        20G  5.6G   14G  30% /
tmpfs           3.9G  232K  3.9G   1% /dev/shm
tmpfs           5.0M     0  5.0M   0% /run/lock
tmpfs           3.9G     0  3.9G   0% /sys/fs/cgroup
/dev/sda3        20G  5.6G   14G  30% /home
/dev/sda2       277M  154M  110M  59% /boot
/dev/sdb1       299G  116G  181G  40% /mnt/software
/dev/sda4        67G   14G   54G  21% /mnt/ssd
/dev/sdd1       932G  802G  130G  87% /mnt/main/home
tmpfs           791M   80K  791M   1% /run/user/1000
Network Disk Share
Samba is what is used to make the hard drive appear on the network. It's basically compatible with Windows file shares without requiring extra software.
To install it:
sudo apt-get -install samba nfs-kernel-server
sudo nano /etc/samba/smb.conf
Change some things from the default. Firstly, add some settings below [global]
security = user
name resolve order = hosts wins bcast
wins support = yes
force user = dan
One thing we'll also want to do is make sure samba only listens on the LAN network:
interfaces = 10.0.1.2/24 enp4s0

bind interfaces only = yes
Add the shares that you need:
[share]
comment = This share requires a password
path = /mnt/main/home
browsable = yes
guest ok = no
writeable = yes
read only = no
create mask = 0755
user = dan

[daniel]
comment = This share requires a password
path = /main/daniel
browsable = yes
guest ok = no
writeable = yes
read only = no
create mask = 0755
user = daniel
Finally, run:
sudo smbpasswd -a dan
Enter the password the same as the Linux O/S one. Without doing this, I got access denied errors when trying to connect.
I've given two examples - my own user can access everything, but a separate user (named daniel) on is for my work PC to access only the folder I've created for work documents.
To add the missing user, do:
sudo useradd daniel

sudo passwd daniel

sudo smbpasswd -a daniel
Once done, run:
sudo service smbd restart
Now you should be able to go to a Windows PC and browse to the IP address of your server we configured earlier, e.g.
\\10.0.1.2
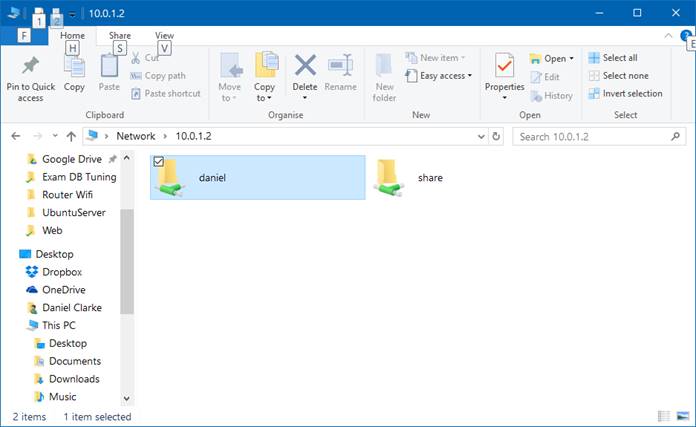
Once you go into a share, you should be prompted for a username and password. You could, if you wish, create a linux user with the same login name and password as your Windows one and it should automatically pass through.
Performance:
Samba performance is not that great. NFS may be a better way to go, but for home users this is more complex to setup, however adding the following to /etc/samba/smb.conf helped performance a little:
# Performance options:
server signing = disabled
read size = 65536
read prediction = true
#socket options = TCP_NODELAY SO_RCVBUF=8192 SO_SNDBUF=8192
write raw = yes
read raw = no
Security:
For extra security, we want to ensure that samba never listens on the hosts WAN interface, and only listens on the static LAN IP that we've defined.
You can also block access from certain computers accessing samba. Preventing access to the gateway router give a bit more security to keep your files away if the gateway is compromised.
Adding these lines to /etc/samba/smb.conf is an example of how to secure it further. Here samba will only listen on 10.0.1.2 and it will only accept clients locally, and from the range 10.0.1.1 to 10.0.1.255, except 10.0.1.1 is explicitly blocked.
# Security by IP
interfaces = 10.0.1.2/24
bind interfaces only = yes
hosts allow = 127.0.0.1 10.0.1.0/24
hosts deny = 0.0.0.0/0 10.0.1.1
After applying, restart using:
sudo service smbd restart
Backups / Snapshots
RAID 1 protects us from disk failure, but it does not protect us from mistakes!
If I do something like accidently delete or overwrite files, RAID 1 automatically replicates that mistake to the second disk, and the original file is gone forever.
BTRFS support snapshots however. It uses a technology called Copy-On-Write.
This means that Snapshots are not the size of the entire disk each time. The first snapshot will actually be nothing in size, but as I delete and overwrite files, these old ones will be linked to the snapshot.
I can then use that snapshot to recover the files.
Overtime, snapshots will grow of course, so manage them carefully. Snapshot changes will be by block size instead of file size.
To take a snapshot, use this command:
sudo btrfs subvolume snapshot -r /mnt/main/home/ /mnt/main/home/snap20170305
Snaphsots need to be in the same location, otherwise you might get an "Invalid cross-device link" error.
Once the snapshot has been taken, You can have a look at your snapshot to see the files.
ls /mnt/main/home/snap20170305
Let's make a change:
rm /mnt/main/home/snap20170305/dan/Downloads/install.exe
File is gone. To restore a previous version or deleted file, you could just copy it from your snapshot:
cp -a /mnt/main/home/snap20170305/dan/Downloads/install.exe /mnt/main/home/dan/Downloads
The file is back!
If you delete many files, and just want to restore the entire snapshot, you can run these commands instead:
rsync -avrW /mnt/main/home/snap20170305/* /mnt/main/home
You may want to then delete snapshots to save space
sudo btrfs subvolume delete /mnt/main/home/snap20170305
This is all good, but snapshots are not automatically taken - you need to take them first.
A crontab script can help with this.
Crontab is frequently used for scheduling tasks in Linux, so we can use it to execute a script that will take snapshots (and clean up old ones) at 2AM daily.
First, the custom script:
nano ~/snapshots.sh
#!/bin/bash

TIME=`date +%Y%m%d`
OLDTIME=`date +%Y%m%d  -d "7 days ago"`
HOMENAME=/mnt/main/home
SNAPSHOTNAME=/mnt/main/home/snap$TIME

# Take a new snapshot today
btrfs subvolume snapshot -r $HOMENAME $SNAPSHOTNAME

# Delete snapshots older than 7 days ago, matching the name of these snapshots
find /mnt/main/home/snap* -maxdepth 0 -print | awk -v b=$OLDTIME '{a=substr($0,length($0)-7,8); if (a < b) print a; }' | xargs btrfs subvolume delete
sudo chmod +x ~/snapshots.sh
Now add it to crontab.
sudo crontab -e
Add the following line as an example to call the script daily at 2AM:
0 2 * * * /home/dan/snapshots.sh
To explain the script above - we are assigning the date to a variable, and a date from 7 days ago to another variable. A snapshot is created for today's date - easy.
Deleting old snapshots (since you may not want them around forever - disk space will get lost) was trickier. You cannot reliably use the directory time stamps of the snapshots (they match the main filesystem), so we match the filename pattern instead.
The find command is used to match directories in /mnt/main/home starting with snap. Maxdepth prevents going into sub directories. Awk then extracts the last 12 characters of the file name and tests if it is less than or equal to the file name 7 days ago (prefixed with snap). If true, the full path is printed and put to btrfs subvolume delete with xargs.
Using this method, I've got backups for the last 7 days, but I can also take manual snapshots in the same directory still and they will not be deleted.