
Lenovo IdeaPad 120S SSD Upgrade
I brought a cheap laptop in 2018 for £149.99 mainly as a small and light 11" laptop to travel with so we could watch films or catch up TV (via a VPN) just before bed in whatever hotel or apartment we stayed in, usually via a HDMI cable. I also bring my homemade PAM8403 speakers with me for usually much better sound than any hotel TV does.
It was brought because it is light, but also cheap to the point of losing or damaging it would not be too much upset. These days I don't travel so much but as I recently sold my main HP laptop, I wanted to make this laptop a usable machine.
It came with Windows 10S, but I was never interested in that and instead installed Linux Mint on it (version 19 at the time), which made it a bit more usable.
For the price, it's a great laptop. 4GB RAM is just about enough, the passively cooled dual core Celeron N3350 definitely isn't fast, but it's efficient and will outperform older i3 processors. Keyboard, webcam, speakers, all ok for what it's worth. Because the CPU is passively cooled, there is no fan. This means there are no moving parts at all (except the hinge and keys of course), as it is also free from spinning rust (hard drives).
The model number of mine is Lenovo IdeaPad 120s-11IAP. A 14" screen model also exists - 120s-14IAP.
But to hit such a low price there are a couple of big compromises:
- The screen is only HD (1366x768) and it's not a good one - colour is poor, viewing angles are very poor.
- The disk drive is a 32GB eMMC, which is NOT an SSD (nor an HDD). This is essentially equivalent to soldered down SD card and the performance (particularly write performance) is really bad
The screen I can live with. I might replace it in future (it should take most common 11.3" eDP screens), but for now decreasing the font sizes gives enough UI space to work on and now that my eyes are showing signs of aging, I doubt I'll benefit from increased resolution in such a small diagonal size anyway.
The biggest challenge is that eMMC though. Under scenarios where there is disk writing (and browsing the internet using Firefox/Chrome will write data for caching), the OS essentially locks momentarily until the disk gets written too. You can tune kernel parameters to improve that, but it can still kick in and leave you frustrated - especially during updates, or when shutting down if you've made the disk cache really large.
I did some research to see if a real SSD could be fitted, which lead me to this thread at forums.lenovo.com.
Now more than five years old - I decided to attempt this as one of my first jobs with a hot air rework station I got last year but haven't used until now.
The advice works - essentially you need to install the M.2 connector and 4x 0402 sized 100nF capacitors. Then you should be able to use a SATA based M.2 SSD (not a NVMe one).
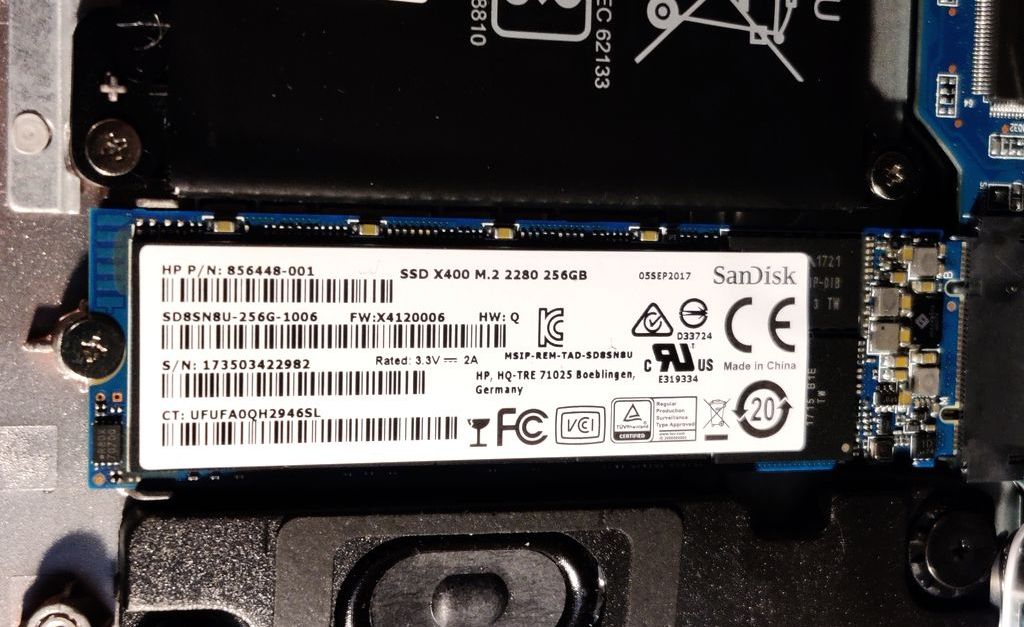
I had a Sandisk 256GB X400 SSD from my old HP laptop sitting unused, so I used that - but a quick check on eBay shows loads of used SATA 128GB SSDs available (inc. delivery) for around £6.99 - yes, even a 128GB one is plenty and a big upgrade over the 32GB eMMC.
With the AliExpress SATA connector and capacitors - the whole upgrade is going to be less than £20.
The complication of course is you need to solder it - and this means only us electronics amateurs (or professionals) are capable of this and as you will see from my pictures it was a challenge for me as one of the first jobs, I've done with the rework station and iron.
You'll also need a small torx screwdriver to remove the back cover screws (T4 or T5 worked for me).
Still, it's doable, and should you succeed, the performance difference compared to the standard setup is immense!
First, the connector. The one I got (AlixExpress) is actually M-keyed but will accept a B+M keyed SATA M.2 drive anyway. Some pins will need cutting though.
A closer match might be this one (AliExpress).
Whatever you order, I suggest getting 2 or more. I bridged solder on my first attempt and bent pins trying to fix it and have another I could swap in was easier.
Next, capacitors. You'll need 0402 100nF MLCC. Get whatever is cheapest for you, the voltage rating should be higher than 5V (most likely they will be rated for 50V anyway). I got 50x delivered from within the UK for £1.66. Plenty of spares. Get more than 4 anyway because if you drop them - you won't find them again (especially on carpet!).
In terms of tools - a rework station is ideal, and I used mine to heat the through hole pads (including the anchor pads each side) until the connector moved through. It did melt the plastic a bit though so better advice is to heat the board initially, then add the connector towards the end of the heating.
You also need good flux - this really helps the solder flow where it should. Thin solder, soldering iron tip and de-soldering braid (in case you put too much solder) all helps.
Here's some pictures of the teardown and result...
After lifting the cover:
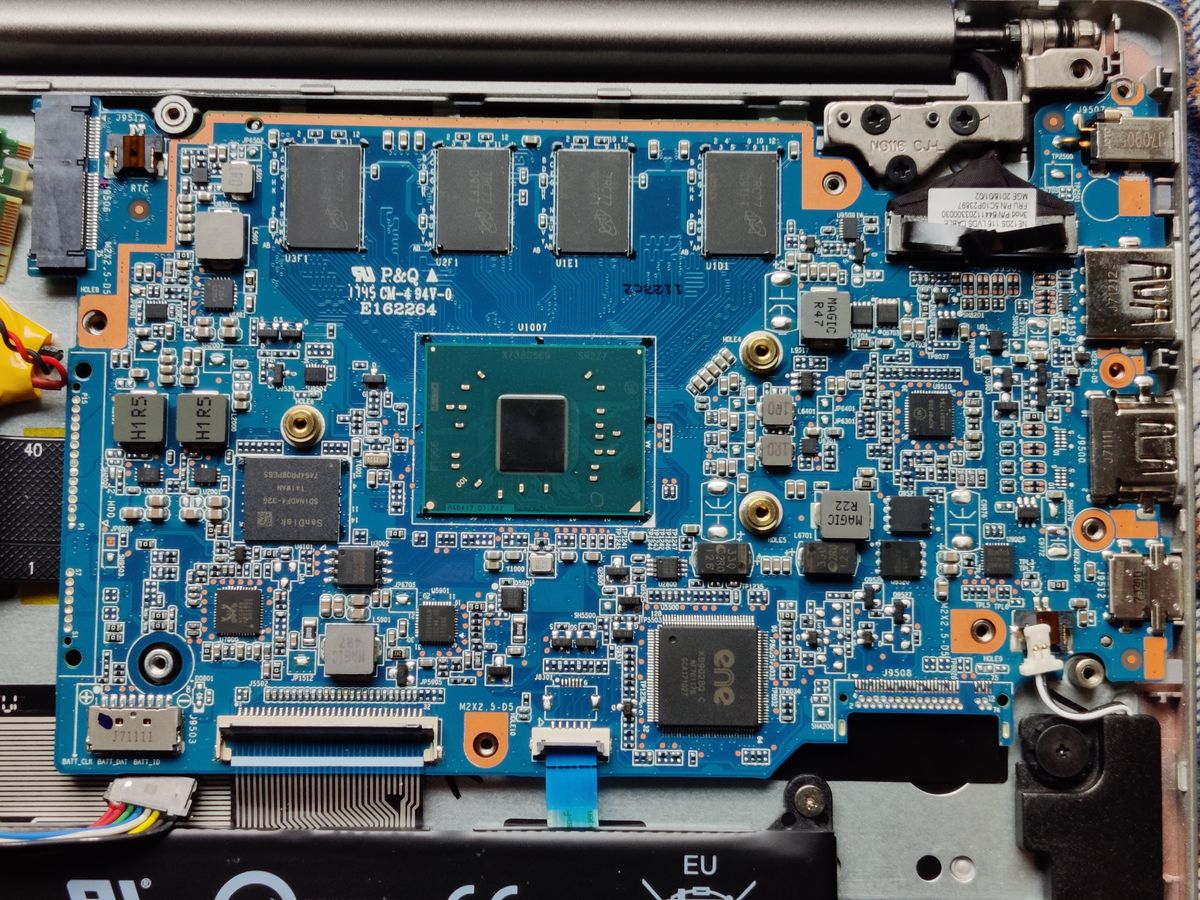
After removing the heatsink:
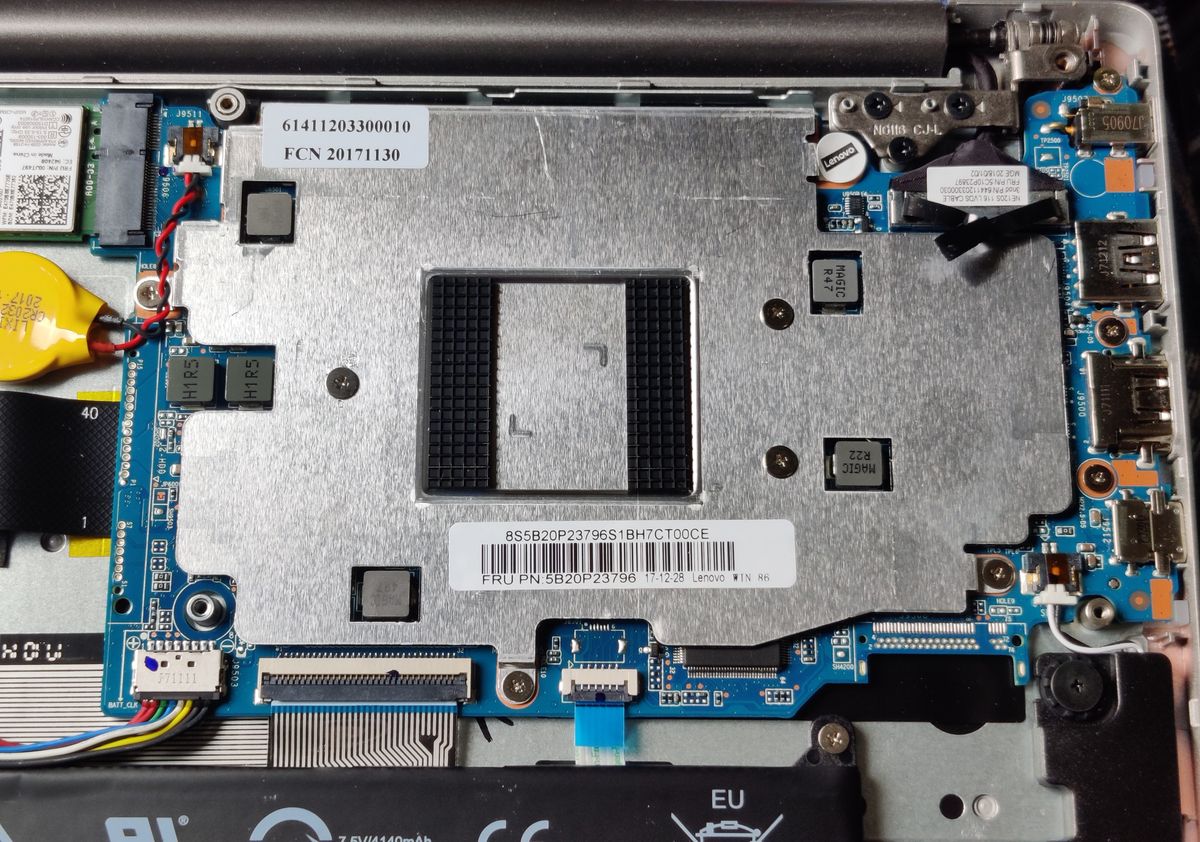
After removing the motherboard:
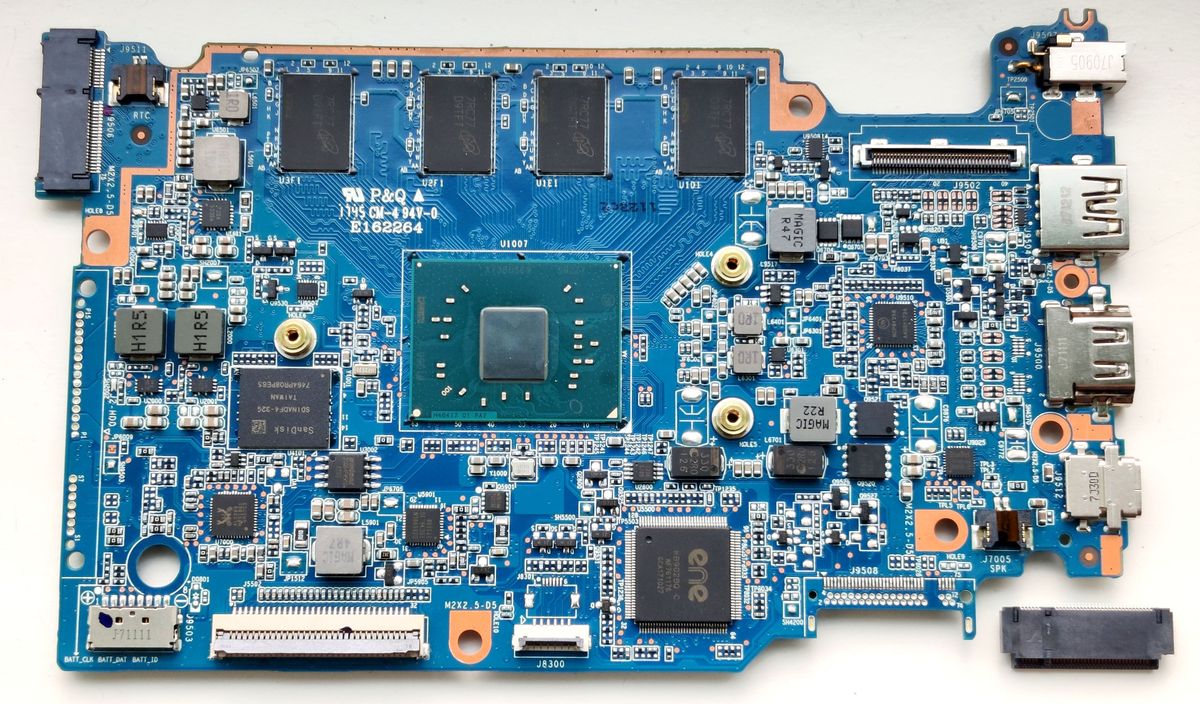
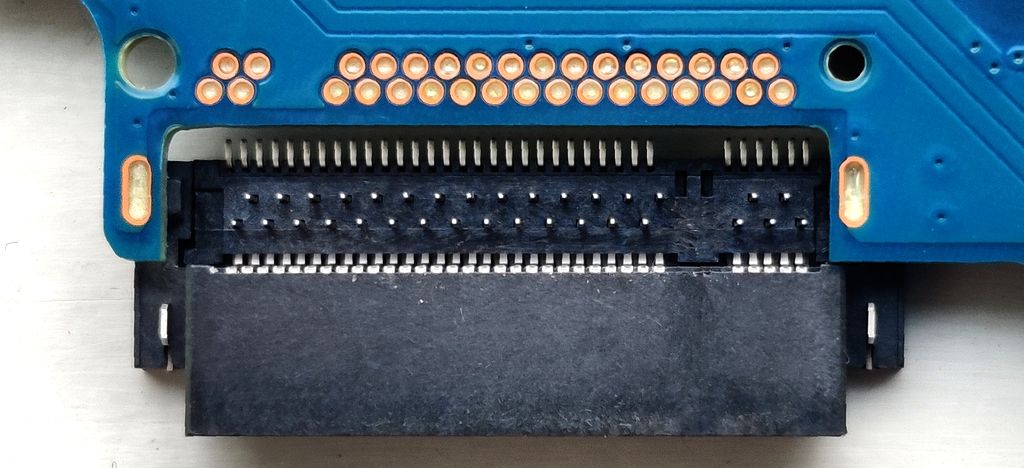
Back of the motherboard:
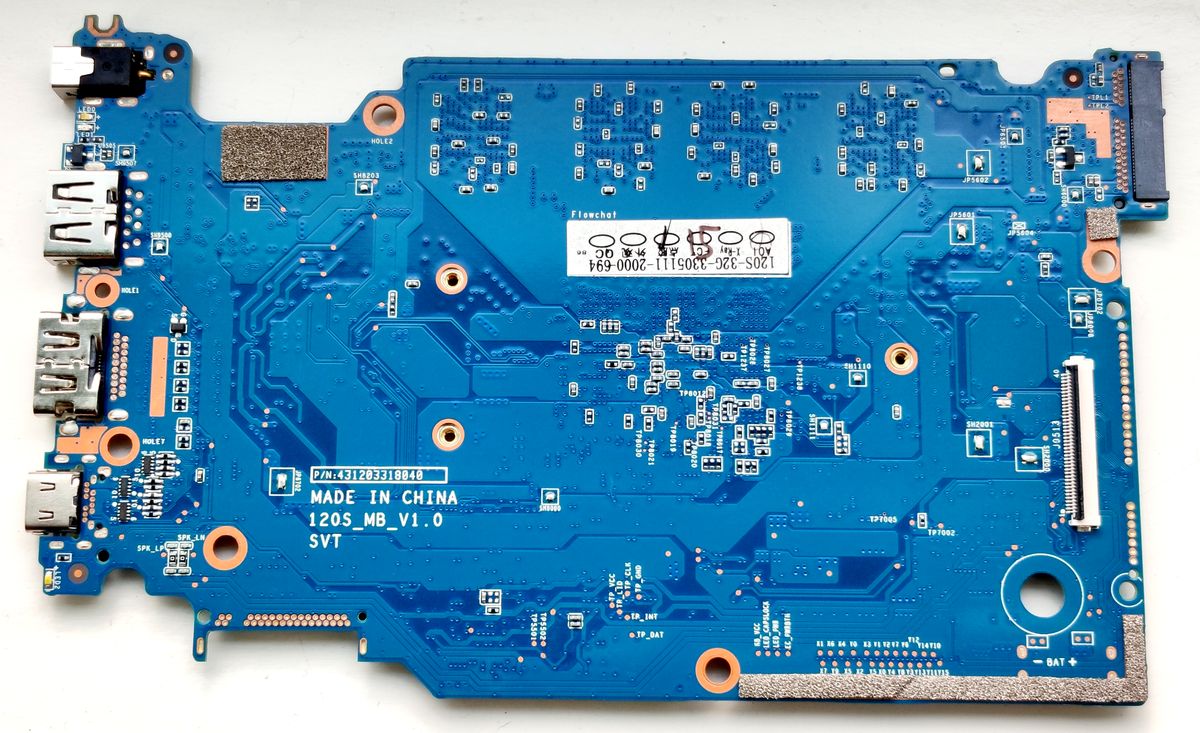
Connector soldered below:
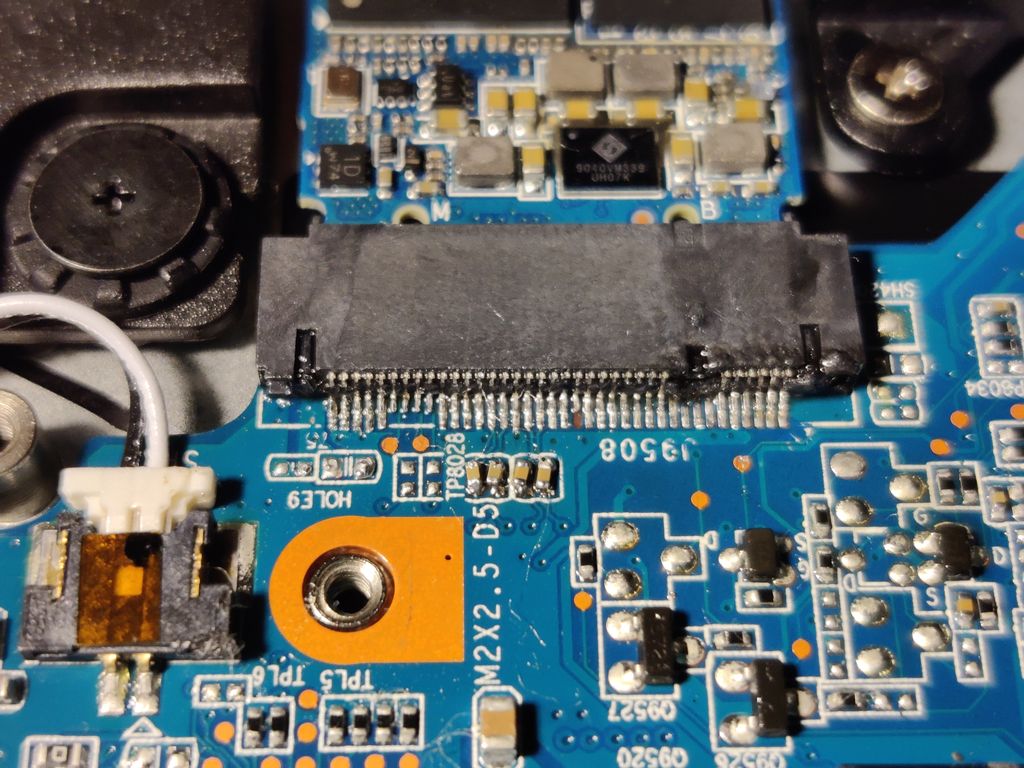
Yes, this looks messy, and I burned the plastic a bit when trying to use the rework station (hot air) on it. I also lifted one pad when lifting the original for a second attempt -fortunately it's not essential! There is a bit of cotton bud thread there as I like to use those to clean off the flux. Getting the really tiny capacitors straight was a challenge for me too!
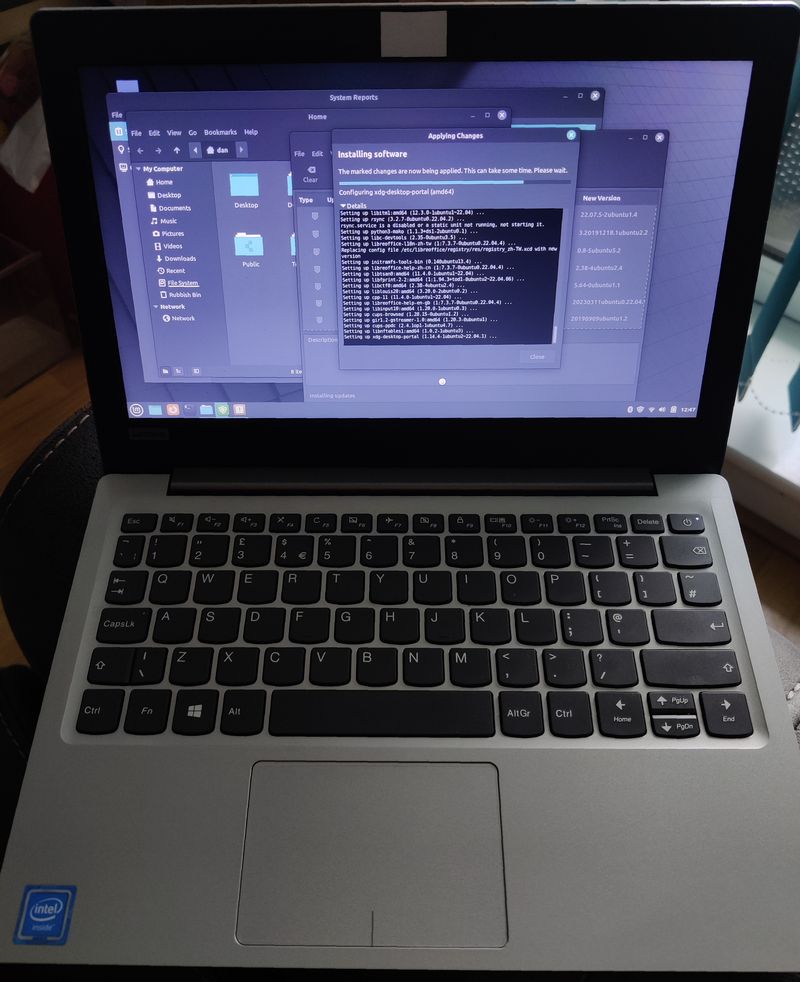
SSD installed:
I don't know how much I'll use this laptop, but I'm happy with the frankly huge performance gain it's received.
With Linux, and a tweak of installing zram-config to get more RAM space, it works pretty well.