
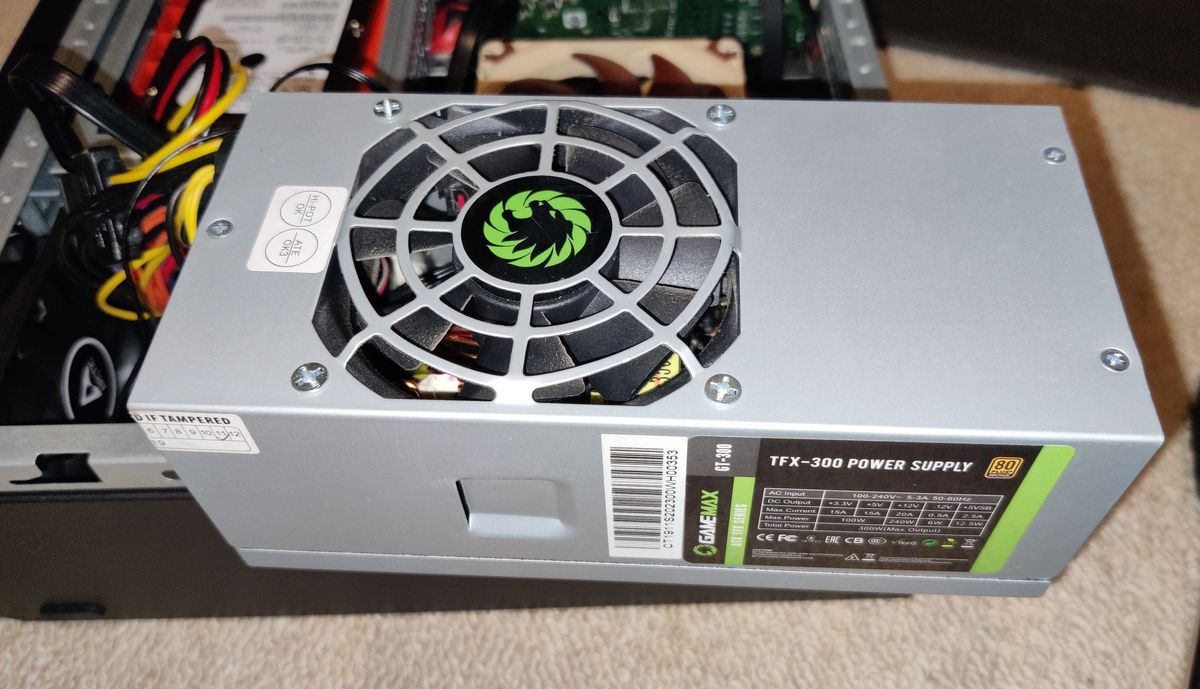
PC Gamemax GT-300 TFX (ATX) Power Supply Fan Replacement
I use a PC as my router, and so it doesn't take much space it is a Mini ITX system in a CiT MTX-008B case that came with a Gamemax GT-300.
It's not so old, but it is on 24/7 and in a storeroom near the front door, which is where the internet comes in, but this room also contains the hot water boiler.
As a result, the fan needs to work and after almost 3 years (so a bit under 26000 hours), the fan started making growling noises. That's well before the claimed 100,000 hours MTBF (11+ years).
At first I thought it was the case fan, so I replaced that anyway, but after no improvement in noise I realised it is the PSU fan (the CPU cooler fan is a Noctua fan, and those are fantastic, so I knew it wasn't that!).
Now, opening a PSU needs two warnings:
- The warranty is voided - so if you are still in manufacturer or vendor warranty then use this instead. It should be 2 years for this PSU.
- Once open, you are exposed to LETHAL VOLTAGES! I'm not kidding, you can be killed by residual high voltage electricity in the PSU even if powered off for some time.
It's not just the PCB and components that could kill you - even touching the internal heatsink can. So, I must stress, doing this repair is at your own risk and I've warned you and won't be held responsible. Please see the picture below.
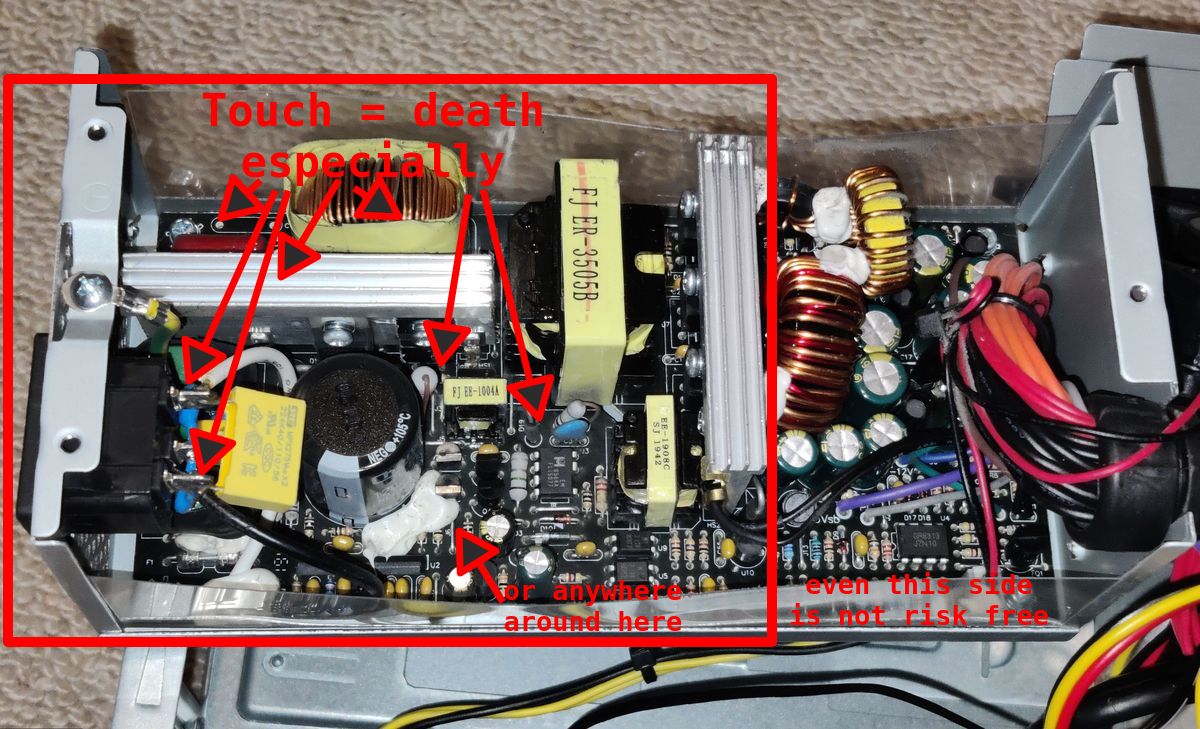
Whilst I do see what might be a bleed resistor that should hopefully discharge the high voltage probably after 20 minutes+ of being unplugged, I didn't fancy probing around to check so err on the side of extreme caution!
Of course, never open it whilst plugged into the mains! Make sure it's fully put together before testing again.
If you are careful though, own a soldering iron, solder, electrical tape or shrink wrap and wire-strippers, replacing the fan is quite easy.
You need an 80mm fan, but the standard 25mm depth does NOT fit. The manufacturer's fan is 20mm deep and these are obtainable. Since my system only has a 65W TDP CPU though I went with an existing 15mm fan I had for now. Do not buy a PWM fan as a replacement - their fan speed is more designed to be pulse width modulation controlled (rapid on/off cycles) instead of voltage controlled.
You'll need a combination of philips screwdrivers / bits. Remove the PSU from the case with the screws at the back. It then slides up towards the motherboard and can be lifted out.
Unscrew partially the four fan screws, just a quarter to half turn to loosen the somewhat tight screws whilst the cover is held in place.
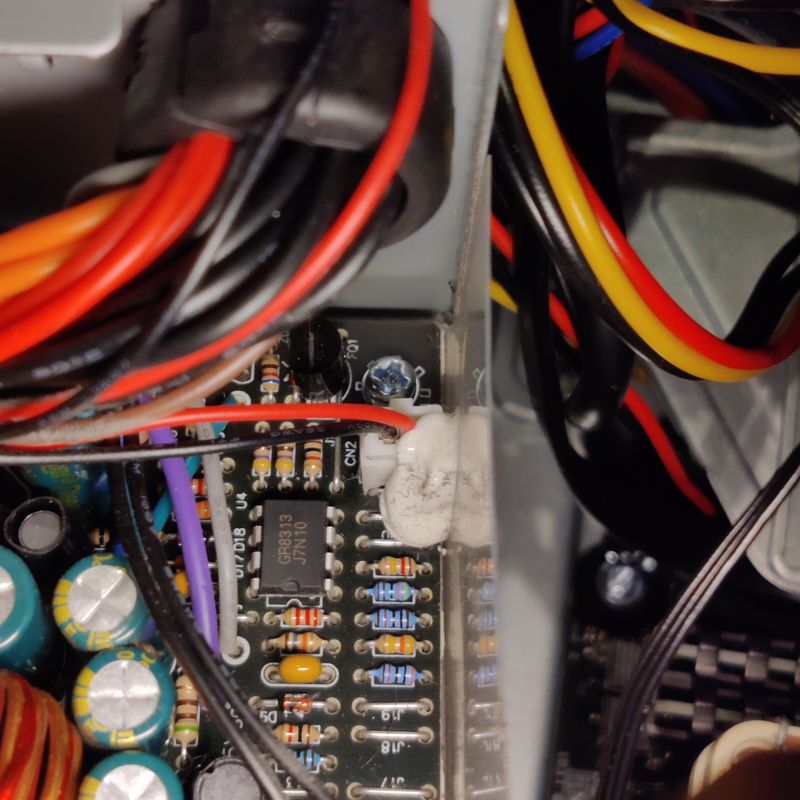
Then unscrew the three smaller screws fully and take them far away and put them somewhere safe (this is so they don't fall into the PSU). Break the warranty tamper seal (I managed with just running my fingernail along it) and CAREFULLY lift the cover off straight and only once fully off and away from the internal PCB and components, move it aside. The PSU PCB and components are revealed now, so stay away from them.
To avoid touching the PSU by accident, cover it with something insulated, especially the high voltage side - i.e. plastic, card.
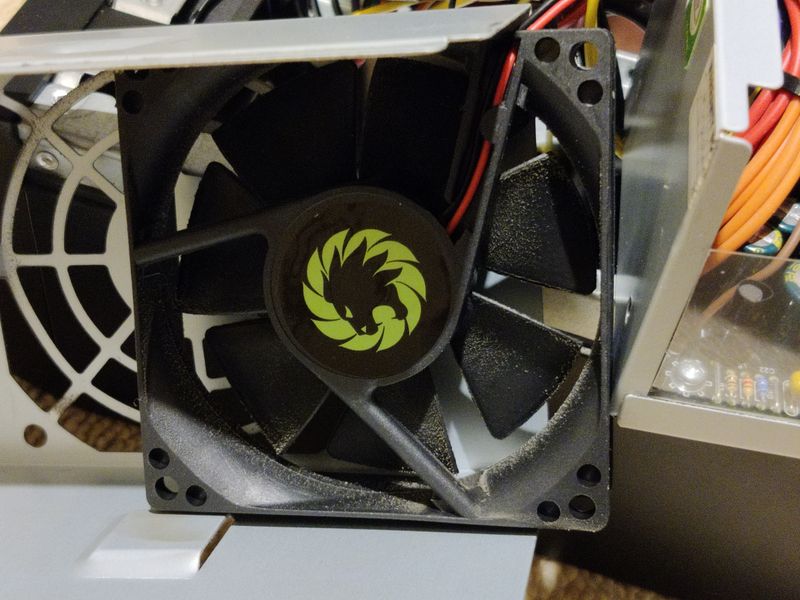
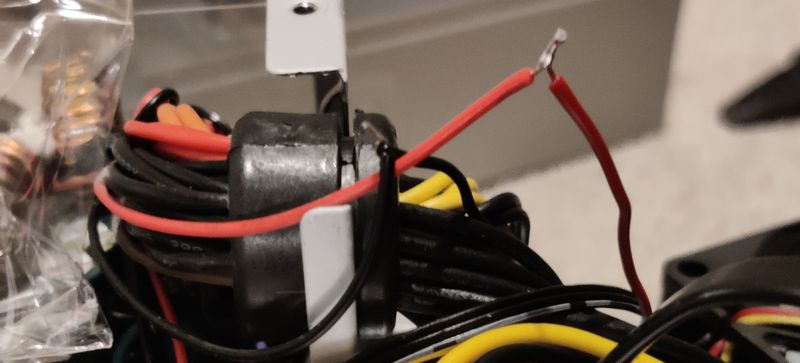
Check the fan - if it is like mine, it doesn't spin freely (almost seized), then cut the red/black wires close to the fan itself. Unscrew the fan fully, noting the direction it faces (it should be pushing air in).
The reason I suggest cutting the existing fan cable and attaching the new one to the existing cable is because the existing fan header is glued solid in place, and you should avoid going near the PCB anyway.
The new fan can then be screw in place. Check the replacement fan wire colours - typically they are red, black and yellow if the replacement has speed sense. If they are not the same colours or all black etc., then you'll need to reverse engineer the cables from the position they are on the header before you cut the header off.
Cut off the fan header from the new fan, and if there is a yellow wire. cut that close to the fan body because we won't need it. Strip about 5mm of insulation on the red and black wires from both the fan side and PSU side, then twist red to red, black to black. If you have shrink wrap, add that before twisting together. Then solder the two sets of twisted cable strands together. Make sure to heat well first and I recommend leaded solder for ease of use.
If you didn't use shrink wrap, wrapping with electrical tape is fine too. I suggest wrap each cable individually, then wrap both together.
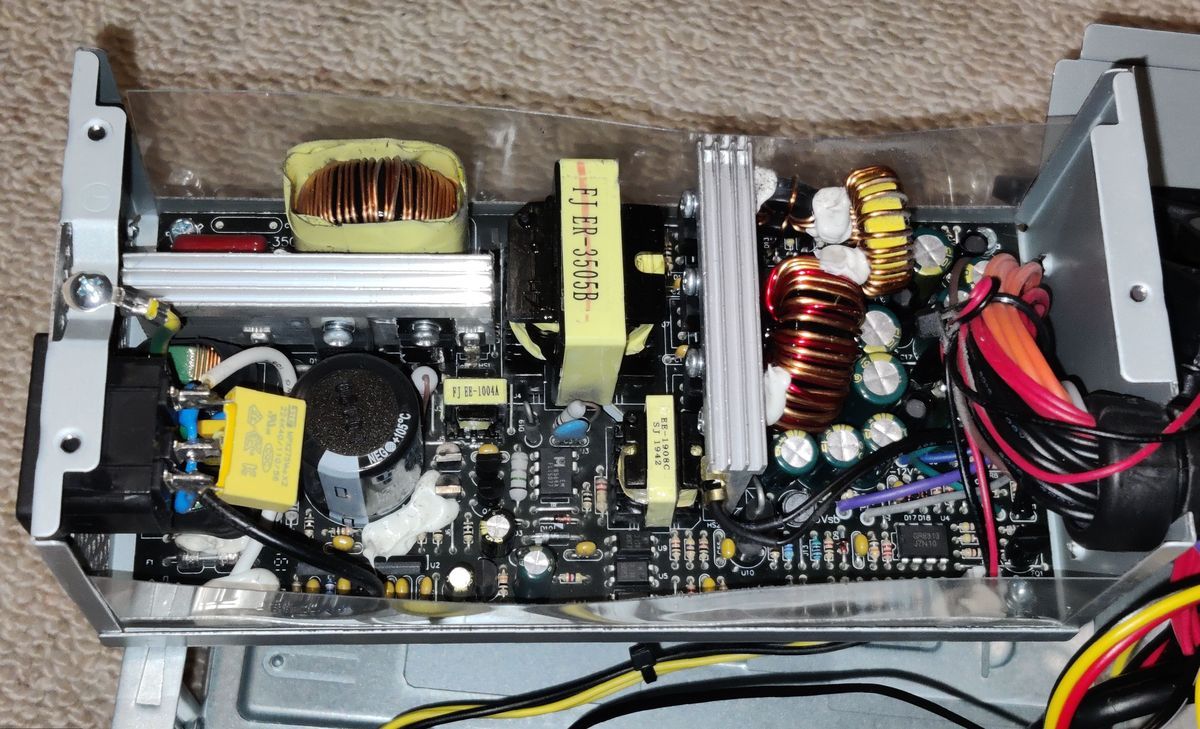
Carefully re-attach the cover. Before attaching, locate the fan cables towards the low voltage side of the PSU (left in the picture above).
As you re-locate the cover, your fingers must be on the cover itself and not overhang to avoid accidental contact with the PCB or components. The plastic insulation may get in the way so press that with the back of a plastic pen or similar to ensure the cover slides nicely over the plastic.
Once located nicely, use the three smaller screws to secure the cover. Tighten the fan screws too if required.
Using a pen or similar, try to poke it slightly through the fan grill enough to move the fan blades. This is just to check the fan can spin freely.
All good - the PSU can be put back in the case and the PC tested. To reduce risk to your PC, you can bridge pins 16 and 17 of the ATX connector to power it on - see image 5 in this silverstone pdf.
My repair is fine, and I did it because it cost nothing and keeps it from being e-waste for now. Apart from this fan replacement though - even with my knowledge I would never service anything else from a PSU and I'm only blogging this for those who do have knowledge, tools and know the risk.